Featured Post

Privacy Policy

I'm working on a new privacy policy for my followers, but for now you should know that if you comment on my site, my site collects your ...

Showing posts with label Birthday. Show all posts

Tuesday, January 11, 2022

A House-Mouse Birthday


Have you seen all of the House-Mouse Designs that Stampendous has in their new catalog?!  They are oh my gosh so cute!  I like them on my cards but not in my house hahahaha.

Here's how my card was made-

  1. I stamped the Birthday Cupcake on white card stock with Onyx Black VersaFine Ink and colored it with Prisma Colored Pencils.
  2. I used a brick stencil to add bricks in the background.  I didn't do any masking, I was just careful and it worked out!
  3. The panel was layered onto blue cardstock and mounted to a white panel measuring 
  4. 4" x 5 1/4".
  5. Place two of Extreme Double-Sided Tape above and below the image as shown. Remove the liner of the wider tape, sprinkle with embossing powder from the Mermaid Sea 5-Jar Embossing Powder Kit and emboss. Remove the liner of the thinner tape, sprinkle with another color from the Kit and emboss.
  6. Stamp sentiment on white cardstock that has been stenciled with bricks, with black ink.
  7. Use the oval die from the  POP Frame Die Set to die-cut the sentiment and layer it on green cardstock that was cut using a die from the same set.
  8. Pop the sentiment up on the card with foam squares.
Be sure to share your projects made with Stampendous products on the Stampendous! Fans Facebook page, we'd love to see what you're making!!

Let's connect!


Disclaimer- I get free goodies for blogging about craft products! Today I'm sharing a card made with products from Stampendous


Saturday, June 19, 2021

Sweet Wishes


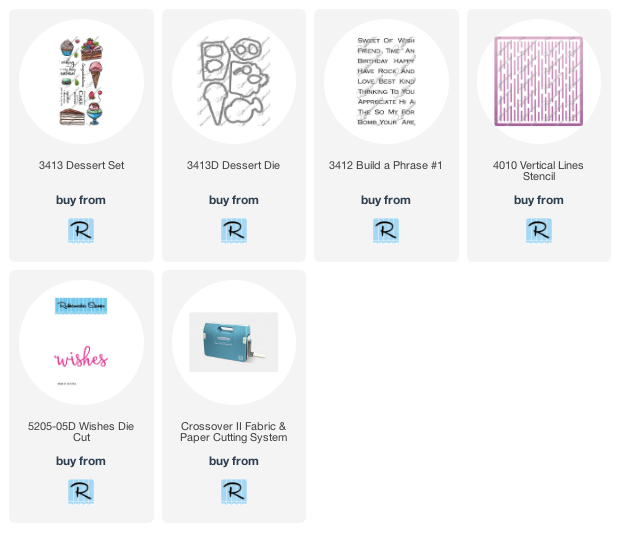
Hi my friends, I got some new watercolors that I've been playing with, the Mont Marte Watercolour Cake Set.  I'm really happy with the way my ice cream cones from the Dessert Set from Rubbernecker Stamps turned out! 

Here's how my card was made- 
  • The cones were stamped on watercolor paper with Onyx Black VersaFine Ink and embossed with Clear Embossing Powder.

  • The cones were popped up on a strip of decorative paper using 3D Foam Circles Mixed White.
  • This was then layered onto a white panel that was dry embossed using the Vertical Lines Stencil from Rubbernecker Stamps.  Then it was mounted to a green card using E-Z Runner Grand Refillable Dispenser.
  • Sweet from the Build a Phrase #1 Set was stamped on a strip of white cardstock and a piece of ribbon was stapled onto the left side and it was popped up on the card.
  • Wishes, was die-cut from black cardstock and adhered to the bottom of the card.


  • Mont Marte- Watercolour Cake Set
  • PaperWorks Cardstock- Floral  Cardstock Pack (Green), Americana Cardstock Pack (White), Halloween Cardstock Pack (Black)
  • Decorative Paper Momenta Cardstock
  • Scrapbook Adhesives by 3L- 3D Foam Circles, Dual Tip Glue Pen, E-Z Runner Grand            Refillable  Dispenser
  • Stampendous- Onyx Black VersaFine Ink, Clear Embossing Powder

Have a crafty day!

Let's Connect!

Affiliate and Product Disclosure
I am on various Design Teams and get free goodies for blogging about craft products but only because I love their products and genuinely use them. Ultimately my opinions are my own. A list of companies is in my sidebar.
Being part of various affiliate programs – when you click on an affiliate link and then go on to make a purchase, at no cost to you, I receive a small commission.  The affiliates I use include Rubbernecker Stamps.

Saturday, March 6, 2021

Cool Birthday


I'm whipping up a few birthday cards to have on hand, using the POP Ice Cream Perfectly Clear Set from Stampenoudous, doesn't the ice cream look yummy?!

Here's how my card was made-
  1. Stamp ice cream and cone on Mixed Media White Paper with black ink, color with pencils, and cut it out.
  2. Stamp the sentiment with black ink on a strip of white paper and layer it onto slightly larger decorative paper.
  3. Make a mini slimline card by cutting tan cardstock to 6" x 7", fold the 7" side in half so that the final card measures 6" x 3 1/2".
  4. Cut two pieces of different decorative paper to 5 3/4" x 3 1/4".
  5. Glue one piece of decorative paper to the top of the card.
  6. Cut the second piece diagonally and glue the bottom portion onto the bottom of the card.
  7. Pop up the ice cream and cone using foam squares.
  8. Glue the sentiment flat to the top of the card.
Supplies
Stampendous

Plus
Prisma Colored Pencils
Decorative Paper
Cardstock-Tan
3D Foams Squares, Scrapbook Adhesives by 3L
Zip Dry Glue, Beacon Adhesives
Paper Cutter


Have a creative day!

Let's connect!


Disclaimer- I get free goodies for blogging about craft products! Today I'm sharing a card made with products from Stampendous

Here are some places that you can find Stampendous Products-
First off check out your local Stamp Store, if they don't have it they can order it.
Online Stores


Friday, January 15, 2021

Birthday Calories Don't Count!


The beginning of the new year is always a good time to get a bunch of birthday cards made to have on hand for the year.  I used the new super cute POP Cupcake Perfectly Clear Stamp Set and the POP Shapes Die Set from Stampendous.  This one die set works with their new line of POP Stamps, it's so nice to not have to buy a die set for each of the stamp sets!
Here's how my card was made-
  1. Stamp the cupcake and candle from the POP Cupcake Perfectly Clear Set, with black ink and color with watercolor pencils.
  2. Die-cut the images using the POP Shapes Die Set and set them aside.
  3. Stamp the sentiment from the same set on lavender decorative paper with black ink and die-cut with a banner die.  Set aside.
  4. Layer a strip of green and white striped decorative paper onto slightly larger black and yellow cardstock then glue to a lavender card.
  5. Glue the bottom of the cupcake flat on the card and pop up the frosting and candle with foam squares.
  6. Glue the banner to the top left of the card.
  7. Randomly apply rhinestones to the frosting and a few to the card.

Supplies
Stampendous
SSC1381 POP Cupcake
DCP1021 POP Shapes Die Set
MPW811Mixed Media White Paper
STF082 VersaFine Ink- Onyx Black

Plus
Inktense Pencils
Watercolor Paper
Cardstock- Lavender, Black, Yellow
Decorative Paper- Green and White Striped, Lavender
3D Foam Squares- Scrapbook Adhesives by 3L
Zip Dry Glue, Beacon Adhesives
Banner Die
Scissors
White Gel Pen
Self Adhesive Clear Rhinestones
Have a creative day!

Let's connect!


Disclaimer- I get free goodies for blogging about craft products! Today I'm sharing a card made with products from Stampendous

Here are some places that you can find Stampendous Products-
First off check out your local Stamp Store, if they don't have it they can order it.
Online Stores

Thursday, January 7, 2021

Have a Ball


Have you seen the new release from Stampendous?  They have come out with a new POP Frame Die Set and a bunch of stamp sets that work with it, one is the Sports Frame Perfectly Clear Set that I used to make this Birthday shaker card.
Here's how my card was made;
  1. Stamp Sports Frame on watercolor paper with black ink and emboss with clear embossing powder and watercolor with Inktense Pencils.
  2. Die-cut the Sports Frame using the           Die Set.
  3. Die-cut white cardstock with the largest of the frames and trim the two edges with scissors.
  4. Lay the frame on top of the last die-cut piece and stamp the sentiment in the center of the frame so that it's stamped on the panel behind the frame.
  5. Glue the acetate to the back of the Sports Frame.
  6. Place foam tape around the backside of the frame being sure not to leave any gaps.
  7. Place a small amount of Glitter Glass on top of the sentiment and adhere the frame over it.
  8. Cut red and white striped decorative paper slightly smaller than a blue card and glue it on.
  9. Glue the frame diagonally to the card.
        

 Supplies
Stampendous
SSC1376 Sports Frame
MPW811Mixed Media White Paper
FRG01C Silver Crushed Glitter Glass
STF082 VersaFine Ink- Onyx Black
EP020  Clear Embossing Powder

Plus
Inktense Pencils
Decorative Paper
Cardstock- Blue
Acetate 
Foam Tape
Zip Dry Glue, Beacon Adhesives
Scissors
Paper Cutter
Heat Gun
Let's connect!


Disclaimer- I get free goodies for blogging about craft products! Today I'm sharing a card made with products from Stampendous

Here are some places that you can find Stampendous Products-
First off check out your local Stamp Store, if they don't have it they can order it.
Online Stores


Tuesday, October 27, 2020

Birthday Shaker


Hi there!  I have a real quick post today since we're in the middle of an ice storm here in Oklahoma, it's the perfect time to stay in my stamp room and create!  I'm getting a jump start on some birthday cards for next year.  Here's the first on made with the new Birthday Numbers Die Set from Stampendous, look at all that you get!!


Let's connect!

Disclaimer- I get free goodies for blogging about craft products! Today I'm sharing a card made with products from Stampendous

Here are some places that you can find Stampendous Products-
First off check out your local Stamp Store, if they don't have it they can order it.
Online Stores
Scrapbook.com


Friday, October 16, 2020

It's Time To Celebrate!!


It's time to celebrate!  I have a few birthdays coming up that I'll need cards for and wanted to use this great "Balloons and More" set from Stampendous.  The cupcake and candles are separate so you can use the one stamp with a bunch of candles or use the single candle to use just a few. 
Here you can see what all comes in the set, be sure to read the witty sentiments!
  • I stamped the cupcake and candles with Onyx Black VersaFine ink, colored it with Inktense Pencils, cut it out, and added glitter on the flames and on the icing.
  • I wanted to use a layout that was a little different so I placed a white cardstock panel diagonally on a 4" x  5 1/4" decorative panel and glued it down with Zip Dry  Glue.  Once it dried I turned the panel over and cut off the excess white cardstock.

  • Washi tape was added to the white cardstock and "It's time to Celebrate!!!" was stamped at the bottom with black ink.
  • Happy Birthday was stamped diagonally at the top left corner of the white cardstock with black ink and three pink self-adhesive pearls were placed below the sentiment.
  • The cupcake was popped up using 3D Foam Squares from Scrapbook Adhesive by 3L.
  • This was then glued to a pink card and two more self-adhesive pearls were added to the top left of the decorative paper panel.

If you want to see all of the shimmer and shine of this card, stop by my Stamp This Facebook page to see a quick video.

Let's connect!

Disclaimer- I get free goodies for blogging about craft products! Today I'm sharing a card made with products from Stampendous

Here are some places that you can find Stampendous Products-
First off check out your local Stamp Store, if they don't have it they can order it.
Online Stores


Wednesday, June 24, 2020

Boat Docking


Hi, my crafty friends today's card uses the beautiful scenic Boat Docking stamp from Stampendous, how I wish I could be on that dock enjoying the water!

Here's how my card was made-

  • Stamp Boat Docking on white cardstock with black ink and color with colored pencils.
  • Layer onto a larger black and red panels set aside.
  • Glue the decorative paper onto a larger white panel and tie white and brown twine around the bottom before gluing to a red card.
  • Mount Nautical Anchor on the card with foam squares.
  • Stamp sentiment from the Ocean Wisdom Perfectly Clear Set on white cardstock with black ink and cut out using the Fitted Frames A Die Cut Set.


Click on the product to go to the Stampendous site.


Stampendous
P351 Boat Docking
SSC1246 Ocean Wisdom Perfectly Clear Set
DCP1005 Fitted Frames A Die Cut Set
MPW811 Mixed Media White Paper
STF082 Onyx Black VersaFine Ink

Plus
3D Foam Squares- Scrapbook Adhesives by 3L
Zip Dry Glue- Beacon Adhesives
Prisma Color Pencils
Cardstock- Red, Black
Decorative Paper

Have a creative day and follow me on 

Disclaimer- I get free goodies for blogging about craft products! Today I'm sharing a card made with products from Stampendous

Tuesday, May 5, 2020

Birthday Butterflies


This week the Stampendous Design Team will be making cards using the Butterfly Frame Perfectly Clear Set.  The frame and all of the butterflies is just one stamp and you can pick your sentiment to fill the frame from the five choices.


To make my card I stamped it with Onyx Black VersaFine Ink and embossed it with Clear Embossing Powder.  I then color with Zig Clean Color Real Brush Pens and colored in the dots on the butterflies with a white gel pen. 


Have a creative day and follow me on 

Disclaimer- I get free goodies for blogging about craft products! Today I'm sharing a card made with products from Stampendous


Friday, February 28, 2020

It's Your Birthday


Today's card is a birthday card made with the cute Cupcake Sprinkles from Stampendous.
The image is colored with colored pencils and shadowed with decorative chalks.
The patterned frame was die-cut using the Fitted Frames B Die Set and popped up using 3D Foam Squares from Scrapbook Adhesives by 3L.


Glossy Accents was added to the jar to give it a shiny look the and the sentiment popped up.

Have a creative day and follow me on 

Disclaimer- I get free goodies for blogging about craft products! Today I'm sharing a card made with products from Stampendous


Friday, January 3, 2020

Watercolor Wish


Hi there!  Today I have my first post of 2020 for Stampendous, its a card using the cute new  House-Mouse Design Watercolor Wish stamp.  Now is a good time to build up your birthday card stash for the year!  Don't you think these would be cute in a bunch of different colors?


Here's how my card was made;
1.  Stamp Watercolor Wish with black ink and color with Prisma Colored Pencils.  Shadow around the top of the image with green chalk and the bottom with brown chalk using a flat brush.
2.  Cut out the image and black cardstock using Fitted Frames B Die-Cut Set.
3.  Glue decorative paper to a slightly larger white panel, wrap with ribbon and glute to a purple card.
4.  Adhere the framed image to the center of the card and glue a bow to the side of the image.

Supplies
Stampendous
Onyx Black VersaFine Ink

Plus
Adhesive- Scrapbook Adhesives by 3L
Prisma Colored Pencils
Decorative Paper- The Paper Studio
Decorative Chalk- Green and Brown


Have a creative day and follow me on 

Disclaimer- I get free goodies for blogging about craft products! Today I'm sharing a card made with products from Stampendous

Thursday, July 18, 2019

A Party Without Cake...


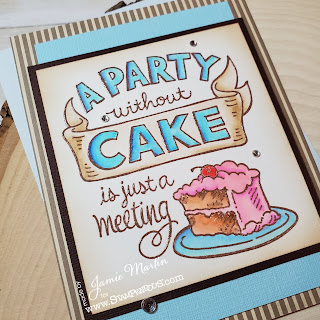
I love the saying on this stamp, don't you?  And another thing that I love is it's all one stamp so you stamp once and done, so easy!  After stamping Without Cake from Stampendous, on watercolor paper with brown ink it was embossed with clear embossing powder and colored with Zig Clean Color Real Brush Pens.  It was then layered onto a few papers and glued to a white card.


Disclaimer- I get free goodies for blogging about craft products! Today I'm sharing a card made with products from Stampendous.