Featured Post

Privacy Policy

I'm working on a new privacy policy for my followers, but for now you should know that if you comment on my site, my site collects your ...

Showing posts with label Anniversary. Show all posts

Sunday, May 15, 2022

Fun With Foil Slimline Card


Hi my crafty friends, I have this card up on the Scrapbook Adhesives by 3L Blog today with different ways you can use their Adhesive Sheets and Foil.  

  • Place a sheet of 4x6 in Adhesive Sheet on white cardstock, keep the top liner on, and die-cut with heart dies.
  • Cut foil a little larger than the heart that you are going to cover, then wad it up and roll it in your hands then open it, this is what you'll get.


  • Remove the liner from the heart and place the foil on top with the pretty side of the foil facing up.  
  • Remove the foil to reveal a marbled look which will be sticky so either a different color foil needs to be placed on it and rubbed to fill in the cracks or you can use glitter, fun flock or even embossing powder.
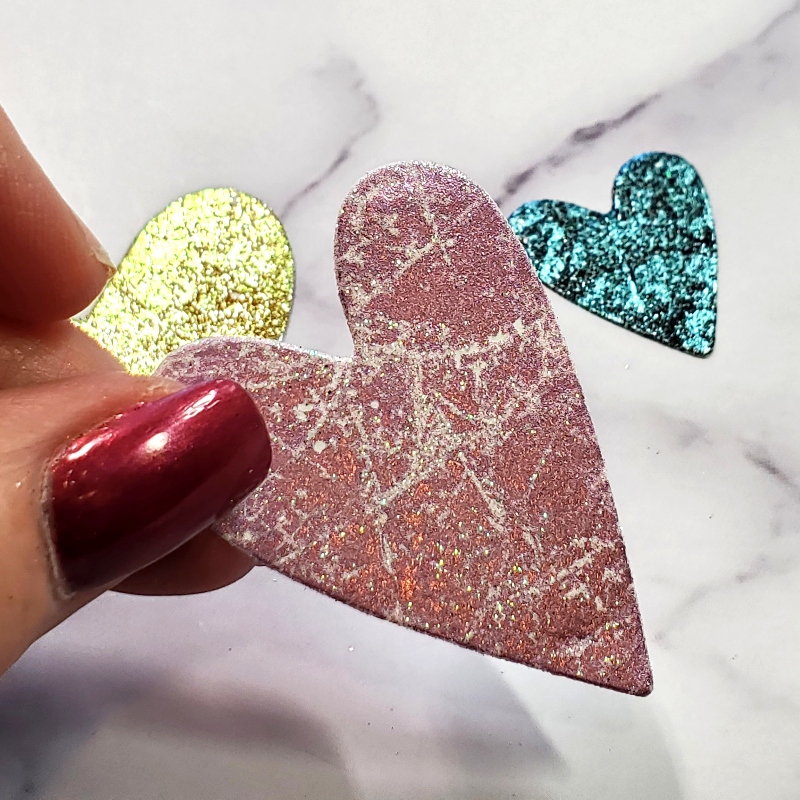

  • Here are three hearts that have just solid foil on top, they're beautiful!


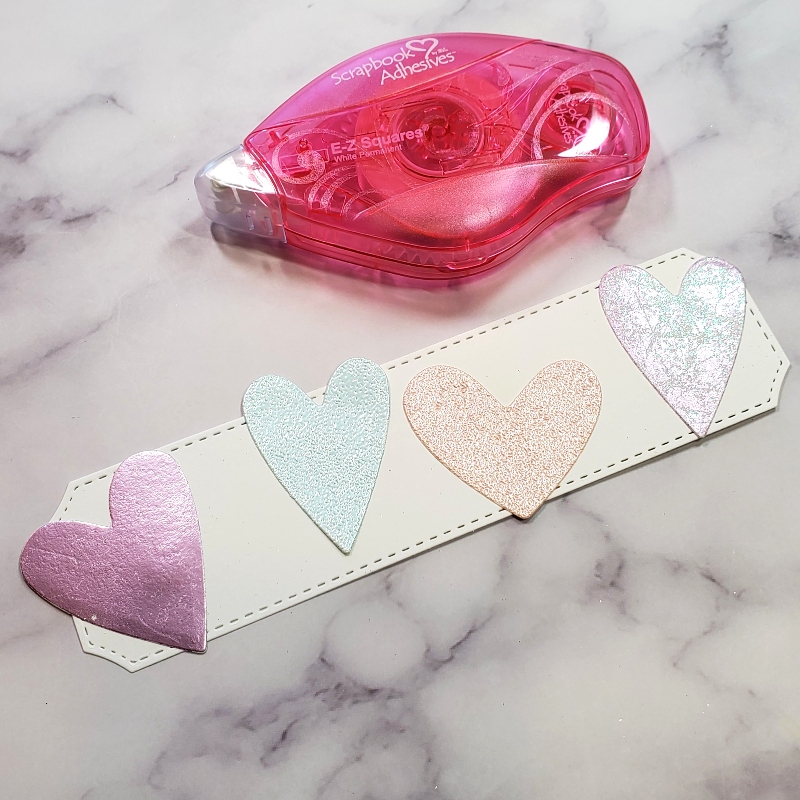
  • White cardstock was die-cut using a slimline die and four hearts were placed spaced apart using and glued flat using a E-Z Runner.  
  • The first heart uses solid pink foil, the blue and pink hearts are embossed with embossing powder and the last heart uses pink foil and the marbling technique.

  • Three hearts will be popped up using 3D Foam Circles and placed in between the hearts on the panel.


  • An additional blue heart was attached flat below the little green popped-up heart.
  • Die-cut a second larger panel from the same slimline die set and pop up the heart panel using 3D Foam Circles.
  • The words were stamped on white cardstock with black ink, cut them out and use the E-Z Runner to attach them flat to the bottom panel.
  • Pop up the panel to a slightly larger pink panel that has been stamped with splatter spots with pink ink.
  • Attach this to a white slimline card.
  • For the final touches, a few pink enamel dots were placed around the hearts and pink Enamel Accents were added to the larger white panel.


Materials used from Scrapbook Adhesives by 3L®

3D Foam Circles White Mix Adhesive Sheets 4x6" Metallic Transfer Foil Sheets Pastel Colors

Plus Stampendous- Word Stamps Whimsy Stamps- Slimline Dies Queen & Co- Enamel Dots


Wednesday, February 23, 2022

We're Purrfect


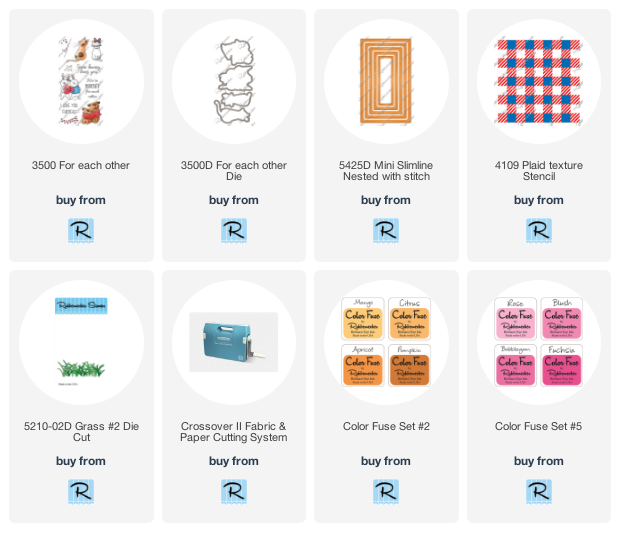
Die-cut white and pink cardstock with the Mini Slimline Nested with Stich Die.
Stencil the white die-cut panel with the Plaid Texture Stencil which is a two-part stencil with Blush from the Color Fuse Ink Set #5 and Citrus Color Fuse Ink Set #2.
Glue the stenciled panel onto a slightly larger white panel. Set aside.


Stamp cats from the new For Each Other Set, on watercolor paper with Onyx Black VersaFine Ink and emboss with clear embossing powder.
Watercolor the cats with Zig Clean Color Real Brush Pens and cut out.


Die-cut the grass using the Grass #2 Die Cut, from green cardstock and glue the pieces behind the cats, then pop them up on the sides of the card.
Stamp the sentiment on pink cardstock with VersaMark Ink and emboss with white embossing powder.  Layer this onto a slightly larger black cardstock panel, then glue between the cats.
Add clear self-adhesive rhinestones around the sentiment and pink hearts randomly on the card.


Add clear self-adhesive rhinestones around the sentiment and pink hearts randomly on the card.


Thursday, April 15, 2021

Happy Anniversary


Hi,  today I have an Anniversary card up on the Scrapbook Adhesives by 3L Blog, made using the pretty shimmery and sparkly Metallic Transfer Foil Sheets Holographic Colors, Adhesive Sheets 12" x 12", 3D Foam Butterflies, Adhesive Lines, 3D Foam Circles and the Dual Tip Glue Pen. Be sure to stop by their Blog for full directions and pictures on how to make this card, click HERE.


Have a creative day!

Let's connect!


Connect with Scrapbook Adhesives by 3L


Monday, September 7, 2020

Loving Hugs


Hi there, Jamie here with you today on this first Monday of September with a card that's good for any time of the year, because it's always a good time to send hugs!

Here's how my card was made-
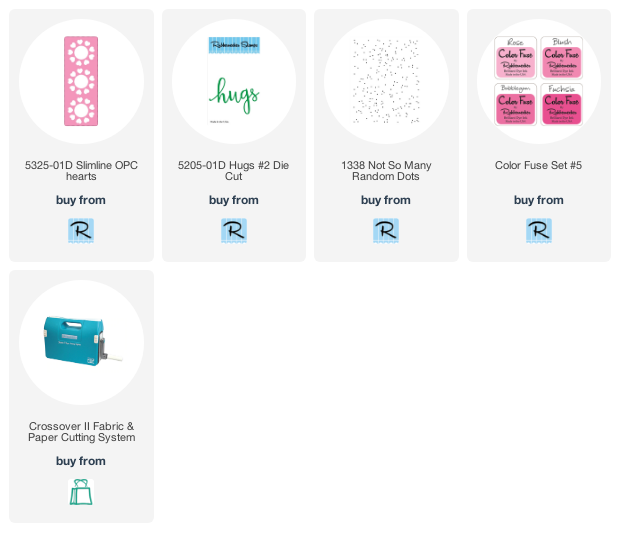
  • Stamp white cardstock from The Paper Company 3.25" x 8.25" with Not So Many Random Dots repeatedly using Blush Color Fuse Ink.  Set aside.

  • Die-cut three shades of pink cardstock using the Slimline OPC Hearts and save all of the circles and hearts.

  • Place one of the die-cut panels on the stamped cardstock and place a small dot of Nuvo Adhesive in the centers of the hearts on the stamped panel, then place the hearts inside of the negative space of the die-cut piece as seen below.
  • Once the hearts and circles have been glued, carefully remove the larger slimline piece to reveal the pattern. 

  • Layer this piece onto a slightly larger black panel and apply black and white check washi tape to the left side.
  • Pop this up on a pink slimline card.


Follow Me- Stamp This, on-
Twitter

Affiliate and Product Disclosure
I am on various Design Teams and get free goodies for blogging about craft products but only because I love their products and genuinely use them. Ultimately my opinions are my own. A list of companies is in my sidebar.
Being part of various affiliate programs – when you click on an affiliate link and then go on to make a purchase, at no cost to you, I receive a small commission.  The affiliates I use include Rubbernecker Stamps.

Tuesday, December 31, 2019

You Everytime


Hi my friends, Happy New Year's Eve and  I hope you all are having a nice holiday season!! I thought I would take a quick break from all of the holiday cards and share a card that's for the special someone in your life.  
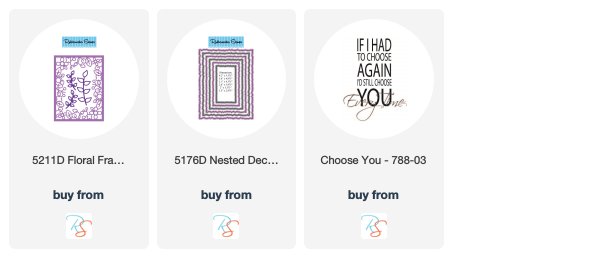
I used the Floral Frame Die Cut and the Nested Deckle Rectangle Die from Rubbernecker Stamps to make the frame for the "Choose You" sentiment also from Rubbernecker Stamps.  


1.  I die cut the pieces from white cardstock, patted them with my VersaMark Inkpad, sprinkled it with Vintage Lilac Embossing Powder and heated it with a heat gun.  And wow does this sparkle!! 
2.  The piece from the Floral Frame Die Cut was glued to a white panel and then to a purple card.  
3.  The sentiment was stamped with black ink and embossed with clear embossing powder.  4.  The frame was made using the Nested Deckle Rectangle Die was popped up using 3D Foam Squares from Scrapbook Adhesives by 3L.  
5.  Then a couple of sequins were glued around the sentiment.

Thank you to all of my crafty friends for your support and kind comments, they all mean so much to me!  I'll be back with you in the New Year with more creative ideas for you, have a safe and happy New Year's Eve!

Here are the RubberNecker products I used to make my card

Follow Me- Stamp This, on-
Twitter

Affiliate and Product Disclosure
I am on various Design Teams and get free goodies for blogging about craft products but only because I love their products and genuinely use them. Ultimately my opinions are my own. A list of companies is in my sidebar.
Being part of various affiliate programs – when you click on an affiliate link and then go on to make a purchase, at no cost to you, I receive a small commission.  The affiliates I use include Rubbernecker Stamps and Whimsy Stamps.

Thursday, August 22, 2019

All You Need


Hi there!  Today I'm up on the Rubbernecker Stamps Blog with these cards that use the same stamps, same color stamped background but two different looks. 


This first look has a more elegant, soft and pretty feel that the camera doesn't quite pick up fully. I used one stamp and one stamp set on both, the stamp is All You Need and the set is Watercolor Background Set.  The sentiment was embossed with gold powder and then the stamped panel was layered onto gold paper before being popped up on a pink rectangle that was die-cut using the Nested Rectangle Stitch Die.


Then I tried stamping the sentiment in black, adding a black layer and mounting to a black card.

I think the black gives it more of a masculine look.

Here are pictures with links of the Rubbernecker products I used.


***Check out this Crossover II Fabric & Paper die-cutting machine, you can cut with thin dies, thick dies, use embossing folders and dry emboss all with one machine and no changing plates, because it has a roller adjustment so you can adjust to tighten or to loosen the tension.   Another thing I really love about the Cross Over II is that so far, my plates haven't warped!! That's a huge plus for me.

  Follow Me- Stamp This, on-
Twitter

Affiliate and Product Disclosure
I am on various Design Teams and get free goodies for blogging about craft products but only because I love their products and genuinely use them. Ultimately my opinions are my own. A list of companies is in my sidebar.
Being part of various affiliate programs – when you click on an affiliate link and then go on to make a purchase, at no cost to you, I receive a small commission.  The affiliates I use include Rubbernecker Stamps and Whimsy Stamps.


Wednesday, January 2, 2019

Windowrama Card


I'm so excited to share the new Windowrama Die Set from Stampendous! It's an easy way to make a 3D card and it folds flat to fit into a standard size envelope.  If you're like me, this is a great way to use up some of the decorative paper you've been hoarding haha.

Here's how my card was made;

1.  Stamp Small Hellebore on watercolor paper with black ink and emboss with Clear Embossing powder.  Color with Zig Markers and cut out.
2.  Die cut the Windorama from decorative paper, stamp the sentiment from the Script Sayings Perfectly Clear Set as shown with black ink and emboss with Clear Embossing Powder.
3.  Stamp the hearts from the same set onto pink paper with VersaMark Ink, emboss with White Embossing Powder and cut out.
4.  Glue flowers, hearts, and sequins as shown.


Supplies
Stampendous
CRQ241 Small Hellebore
SSC1308 Script Saying
DCP1012 WindowRama Die Set
EP100 White Embossing Powder
EP020 Clear Embossing Powder
STF082 Onyx Black VersFine Ink
VM001 VersaMark Watermark Ink

Plus
My Colors Cardstock- My Minds Eye
Watercolor Paper- Strathmore
Decorative Paper- The Paper Studio
Zip Dry Glue- Beacon Adhesives
3D Foam Squares- Scrapbook Adhesives
Zig Clean Color Real Brush Pens


Disclaimer- I get free goodies for blogging about craft products! Today I'm sharing a card made with products from Stampendous.

Monday, May 7, 2018

From The Heart


Wedding and anniversary season is just around the corner.  My anniversary is next month and oh my gosh I can't believe it will be 31 Years, I don't even feel 31!! Stampendous has a new Big Words Happy Perfectly Clear Set that will take care of all your wedding and anniversary needs. Oh and don't you just love that Champagne Embossing Powder?  It's my favorite!!

Here is how my card was made;
1.  Place the Large Flourish Metal Stencil on a panel of Bo Bunny decorative paper and stipple with Faded Jeans ink.
2.  Stamp Love from the Big Words Happy Perfectly Clear Set over the stenciled area with Golden Glitz ink and emboss with PEARLustre Champagne 3.  Embossing Powder.
4.  Stamp sentiment from the same set on a strip of dark blue paper with Golden Glitz ink, emboss with PEARLustre Embossing Powder and glue onto the panel. 
5.  Layer panel to a larger gold panel and glue to a dark blue card.

Stampendous

Plus
Bo Bunny Decorative Paper
My Colors Cardstock
Zip Dry Glue-Beacon Adhesives
Golden Glitz Delicata Ink
Faded Jeans Distress Ink

Be sure to stop by the Stampendous Blog to see what the other Design Team Members have shared this week!


Disclaimer- I get free goodies for blogging about craft products! Today I'm sharing a card made with products from Stampendous.


Monday, June 26, 2017

Wedding & Anniversary Gift Caddy


Now's the season for weddings and anniversaries, this little caddy would be perfect for a sweet surprise to give to that special someone.  I found the easy to follow directions on how to make the box on the Fancy Pants Designs blog.  I have also made these caddies for Christmas, Easter and Birthdays, the possibilities are endless!

Here is how the caddy was made using stamps and embossing powders from Stampendous.  The larger hearts were diecut with Spellbinders dies from kraft colored corrugated paper. The hearts were rubbed with VersaMark ink and embossed with Shabby Pink Embossing Enamel.  The tag was stamped with the Eiffel Tower Perfectly Clear Set with Tea Dye Distress ink and the key was stenciled over this with pink ink. The sentiment from Love Always Perfectly Clear Set was stamped with Onyx Black VersaFine Ink and embossed with clear. Everything was glued together with 3 in 1 Glue from Beacon Adhesives.  

Disclaimer- I get free goodies for blogging about craft products! 

Stampendous Supplies
Eiffel Tower Perfectly Clear Set
Love Always Perfectly Clear Set
Heart Lock Stencil-Dreamweaver Stencil
Shabby Pink Embossing Enamel

Stay connected and don't miss a thing!

 Follow Stamp This 
(I follow crafty people back!)


https://blogger.googleusercontent.com/img/b/R29vZ2xl/AVvXsEiBIB7cl3FWcUqRpVNE2xf0uD7bSSaDv8EJChhD3TSJRrDTTqubuFddCha_Vsye2BIOBKX1yGUjGJyPJvjizD-izRFYxEG1Q0kTmLKEiANGSeoreVxGdz2kjJCF6lGrlm9fopxLmRzM6V04/s1600/Stampendous+logo.jpg


Friday, March 3, 2017

Stencil Love


This week has sure been fun sharing cards made with metal stencils from Stampendous and different techniques, but this is my last stencil post of the week.  This card used the double glitter technique for the heart and dry embossing for the background.  Here is how my card was made.

1.  Cut a piece of Double Sided Mounting Paper (it's sticky on both sides) the size of the Ornate Heart Metal Stencil.  Remove the backing from one side and stick to a piece of white cardstock.
2.  Rub Ornate Heart Metal Stencil with Coconut Soap and place soap side down on Double Sided Mounting Paper after removing the backing.  This step is a must!! It allows the stencil to be removed from the Mounting paper without ripping it.  Here is a link to the Stampendous INSTRUCTIONS on this technique and it says to use VersaMark as a release.  I'm sure this works great but I haven't tried it. There is also a link to a video on this page.
3.  Sprinkle the stencil with Crystal Micro Glitter and rub with finger.  Shake off excess glitter and return to the jar.
4.  Hold stencil, stencil side down over a trashcan and pull Mounting Paper off of stencil.
5.  Now sprinkle Mounting Paper with Black Micro Glitter, rub with finger and throw out excess glitter (it might be mixed with some of the Crystal Glitter).
6.  Cut heart out and set aside.
7.  Dry emboss Antique Keys on rose paper and sponge with pearlized metallic acrylic paint before removing stencil. Place the stencil in warm soapy water and clean.
8.  Layer onto black paper and glue to a rose colored card.
9.  Glue heart to the card diagonally, glue rose colored ribbon to the center and glue a key charm below the bow.
10.  Stamp sentiment on white paper with black ink, layer onto black paper and pop up on card.

Supplies
Stampendous
FMS4060 Ornate Heart Metal Stencil
FMS4053 Antique Keys Metal Stencil
SSCM5002 Painted Wishes
MG01 Crystal Micro Glitter
MG18 Black Micro Glitter

Plus
May Arts Ribbon
Paper- rose, black, white
Pearlized Metallic acrylic paint
key charm
Double Sided Mounting Paper/Sticker Paper
Coconut Soap

I hope I have inspired you to try some of the techniques with stencils that I've shared this week, I know you will love the results!


Stay connected and don't miss a thing!

 Follow Stamp This 
(I follow crafty people back!)


https://blogger.googleusercontent.com/img/b/R29vZ2xl/AVvXsEiBIB7cl3FWcUqRpVNE2xf0uD7bSSaDv8EJChhD3TSJRrDTTqubuFddCha_Vsye2BIOBKX1yGUjGJyPJvjizD-izRFYxEG1Q0kTmLKEiANGSeoreVxGdz2kjJCF6lGrlm9fopxLmRzM6V04/s1600/Stampendous+logo.jpg

Thursday, May 19, 2016

Anniversary Wish


This week the Stampendous Design Team is sharing the new all-in-one stamps from Stampendous.  There are many ways to use them, if you're in a hurry stamp it on a watercolored panel, have a little more time color in the images.  If you have time to be creative and have fun, color the images, pop them up, color the background, frame the sentiment...let your imagination run wild!
Here is how I made my, oh so easy anniversary card;

1.  Stamp Anniversary Wish on white paper with black ink and color with pencils.
2.  Die cut using a Fitted Frame.  Layer onto Grasshopper paper and glue to a Lilac Mist card.

Supplies
Stampendous
R260 Anniversay Wish
MPW811 Mixed Media White Paper
MEM01 Memento Tuxedo Black Ink Tsukineko

Plus
My Colors paper- Grasshopper, Lilac Mist
Zip Dry Glue Beacon Adhesives
Prisma Colored Pencils

Take a look and see what the other Designers have created for you today.
Stay connected and don't miss a thing!

Monday, January 26, 2015

Anniversary Roses


Here at Stampendous, we stopping to smell the roses this week in anticipation of spring and we’d love for you to join us. Visit the Stampendous blog each day for a look at just a few images from the October Catalog.  Links to the other Designers are listed below.
Be sure to stop by tomorrow for Tips and Tricks Tuesday!!
1.  Stamp Timeless Rose on white paper with Tuxedo Black Memento ink, color with Prisma pencils and cut out.
2.  Stamp Vintage Letter and sponge with Wild Honey and Worn Lipstick Distress Inks.
3.  Distress edges and apply a dragonfly brad.
4.  Stamp sentiment from SSC1214 Happy Greetings, stamping Happy with Versamark and embossing with Aged Green Embossing Enamel and Anniversary with Tuxedo Black.
5.  Cut into tag shape, sponge edges with Worn Lipstick. Spray tag with 1 part Deco Art Metallic Lustre in Gold Rush and 2 parts water in a 2 oz Spray Splatter Applicator from Stampendous.
6.  Wrap May Arts cord around Vintage Letter panel and tie tag on. Pop up with 3D Foam Squares from Scrap Book Adhesives by 3L
7.  Layer onto Authentique 6x6 Bundle Classic: Pretty, distress edges and mount to a goldenrod card that has been sponged with Tea Dye Ink.

Supplies
Stamps- Timeless Rose R218,  Vintage Letter R221, SSC1214
Plus-Aged Green Embossing Enamel FREG043, 2 oz Spray Splatter Applicator GS5402
Ink-VersMark, Tuxedo Black Memento, Distress ink in Wild Honey, Worn Lipstick, Tea Dye
Paper-Authentique 6x6 Bundle Classic: Pretty
Other Things- May Arts Cord, dragonfly brad, acrylic blocks, Deco Art Metallic Lustre in Gold Rush, Prisma colored pencils, Imagine Crafts Ink Blushers, small and micro hole punch.

I'm entering this is the Crazy for Challenges C4C207 challenge, hop over and take a look  http://crazy4challenges.blogspot.com/

Giveaway Wednesday
You still have time to enter!!!!! Take a look at my Giveaway Wednesday post Here and comment for your chance to win, winner will be announced Wednesday, January 28th!! 

Stampendous Blog

Kristine Reynolds

Jennifer Dove

Asia King

Rhea Weigand

Jamie Martin


Stay connected and don't miss a thing!
Follow my blog (in the right column)


https://blogger.googleusercontent.com/img/b/R29vZ2xl/AVvXsEiBIB7cl3FWcUqRpVNE2xf0uD7bSSaDv8EJChhD3TSJRrDTTqubuFddCha_Vsye2BIOBKX1yGUjGJyPJvjizD-izRFYxEG1Q0kTmLKEiANGSeoreVxGdz2kjJCF6lGrlm9fopxLmRzM6V04/s1600/Stampendous+logo.jpg