Featured Post

Privacy Policy

I'm working on a new privacy policy for my followers, but for now you should know that if you comment on my site, my site collects your ...

Tuesday, December 31, 2019

You Everytime


Hi my friends, Happy New Year's Eve and  I hope you all are having a nice holiday season!! I thought I would take a quick break from all of the holiday cards and share a card that's for the special someone in your life.  
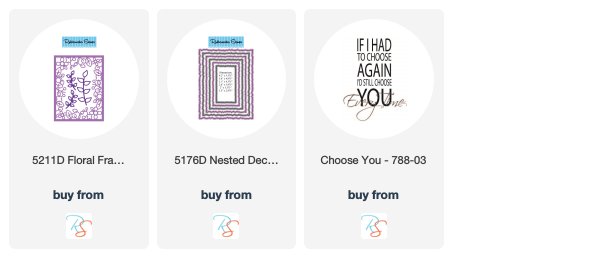
I used the Floral Frame Die Cut and the Nested Deckle Rectangle Die from Rubbernecker Stamps to make the frame for the "Choose You" sentiment also from Rubbernecker Stamps.  


1.  I die cut the pieces from white cardstock, patted them with my VersaMark Inkpad, sprinkled it with Vintage Lilac Embossing Powder and heated it with a heat gun.  And wow does this sparkle!! 
2.  The piece from the Floral Frame Die Cut was glued to a white panel and then to a purple card.  
3.  The sentiment was stamped with black ink and embossed with clear embossing powder.  4.  The frame was made using the Nested Deckle Rectangle Die was popped up using 3D Foam Squares from Scrapbook Adhesives by 3L.  
5.  Then a couple of sequins were glued around the sentiment.

Thank you to all of my crafty friends for your support and kind comments, they all mean so much to me!  I'll be back with you in the New Year with more creative ideas for you, have a safe and happy New Year's Eve!

Here are the RubberNecker products I used to make my card

Follow Me- Stamp This, on-
Twitter

Affiliate and Product Disclosure
I am on various Design Teams and get free goodies for blogging about craft products but only because I love their products and genuinely use them. Ultimately my opinions are my own. A list of companies is in my sidebar.
Being part of various affiliate programs – when you click on an affiliate link and then go on to make a purchase, at no cost to you, I receive a small commission.  The affiliates I use include Rubbernecker Stamps and Whimsy Stamps.

Friday, December 13, 2019

Sharing a Sip


Warm Winter Wishes, this is a card that can be used as a Christmas card or a card just to say hi during the winter months.  These little mice are fun to color, this image was colored with Prisma Colored Pencils.  Stampendous has a large line of House-Mouse Design stamps, be sure to check them out!!

Here's how my card was made;
1.  Stamp Sharing a Sip with black ink on Mixed Media White Cardstock and color with colored pencils.
2.  Layer onto a larger green panel and pop up on a green card that has a panel of decorative paper on the front.
3.  Stamp the sentiment from the Winter Chickadee set with black ink, layer onto a larger red panel and pop up on the card.
4.  Randomly add rhinestones to the seam of the hot chocolate.


Supplies
Stampendous
HMCR131 Sharing a Sip
QS5044 Winter Chickadee
MPW811 Mixed Media White Paper
STF082 VersaFine Onyx Black Ink

Plus 
3D Foam Square from Scrapbook Adhesives by 3L
Zip Dry Glue
Prisma Colored Pencils
Paper- Red Cardstock, Green Cardstock, Decorative Paper
Crystal Rhinestones

Disclaimer- I get free goodies for blogging about craft products! Today I'm sharing a card made with products from Stampendous.


Tuesday, December 3, 2019

Gnome for the Holidays


Hi there, today's card uses the Holiday Gnomes Perfectly Clear Set from Stampendous, there are so many cute little gnomes to choose from!  I decided to go with a green and blue color scheme and some pretty glitter paper to add a touch of sparkle.

The gnome is colored with Prisma Colored Pencils, cut out and layered against decorative papers and glitter paper. 
Holiday Gnomes

Have a creative day and follow me on 

Disclaimer- I get free goodies for blogging about craft products! Today I'm sharing a card made with products from Stampendous


Saturday, November 30, 2019

Friends at Christmas


Hi, I hope you all are having a crafty week!  I have a clean and simple card today made with a large sentiment stamp from Stampendous, this stamp makes it really easy to make a bunch of Christmas cards when you're short on time.
I stamped the Always Friends sentiment on white, colored it with Prisma colored pencils and die cut it with the Fitted Frames B Set (links below).  It's then layered onto decorative paper, a green card using a tape runner from Scrapbook Adhesives by 3L.

I also thought it would be cute to use the sentiment on a gift bag and attach it with a clothespin.

Always Friends
Fitted Frames B Set  

Have a creative day and follow me on 

Disclaimer- I get free goodies for blogging about craft products! Today I'm sharing a card made with products from Stampendous


Friday, November 15, 2019

Stampendous and Doodles Paper Playground Hop


Hi and welcome to the Stampendous and Doodles Paper Playground Blog Hop! You'll want to check out all that the Design Team has for you HERE and be sure to comment on the post for your chance to win some prizes.

During the Hop, Doodles Paper Playground is offering a 30% discount promo Off Sparkle Blends Friday-Sunday plus a free gift with every order, just use the Code: SPLURGE30.

Now on to my card, I made a shaker card using the  Intricate Snowflakes Rubber Stamp Set from Stampendous and started off by adding purple and blue inks to a white panel.  I then heat set or let dry, rub the panel with and embossing buddy and randomly stamp the two smaller snowflakes with VersaMark ink and emboss with Sparkle Puff Embossing Powder from Stampendous.  The Sparkle Puff Embossing Powder is really pretty in person, it's dimensional and sparkly, the camera just doesn't pick it up.


To make the shaker frame I used rectangle dies to create the frame and glued an acetate sheet to the back of it, then applied strips of foam tape under the frame.  The stamped panel was glued to a white card then Sparkle Blends: Birthstone Collection October: Opal pieces from Doodle Paper Playground, were spread around in the center of the panel then the frame is placed on top.


Lastly, the sentiment from the set was stamped on blue paper with VersaMark Ink, embossed with White Embossing Powder from Stampendous and popped up with 3D Foam Squares from Scrapbook Adhesives from 3L.  A sequin from the Sparkle Blends Set was glued to the sentiment. 


Have a creative day and follow me on 

Disclaimer- I get free goodies for blogging about craft products! Today I'm sharing a card made with products from Stampendous


Wednesday, November 13, 2019

Winter Hugs


Today I have a card made with the cute new Winter Bear in Tree stamp from Rubbernecker Stamps.  It's colored with Prisma Colored Pencils and to add a bit of shading around the image,  used blue decorative chalk and applied it with a flat edged brush.


After coloring the image it was die cut using the Nested Rectangle Stitch Die Cut Set and add the "snow" using Shabby White Embossing Enamel.  Layer this onto a kraft colored panel, then onto a striped decorative paper panel.  Glue this to a kraft colored card and pop up a white frame that was cut using the same die set using 3D Foam Squares from Scrapbook Adhesives by 3L.


Hugs was die cut using Hugs #2 Die Cut, cut from pink and kraft colored cardstocks and glued together slightly offset.   

Have a creative day and click below to follow me on-
Twitter

Affiliate and Product Disclosure
I am on various Design Teams and get free goodies for blogging about craft products but only because I love their products and genuinely use them. Ultimately my opinions are my own. A list of companies is in my sidebar.
Being part of various affiliate programs – when you click on an affiliate link and then go on to make a purchase, at no cost to you, I receive a small commission.  The affiliates I use include Rubbernecker Stamps and Whimsy Stamps.


Tuesday, November 5, 2019

Believe in the Magic of the Season


Hey my crafty friends, have you started on your Christmas cards yet?  If not tic toc... now is the time, and if you're short on time here's a quick and easy festive card that you can whip out in no time.  The new William Winter Gnome from Rubbernecker Stamps is colored with Prisma Colored Pencils  and glitter was applied to the trim of the hat.

He was cut out and popped up on a white panel.  The plaid paper edge was die cut using the Borders #2 die set, isn't that cute!!  Once the papers were glued to a red top folding card, the sentiment Magic of the Season was stamped in black and a twine bow was tied on the top.

Have a creative day!

Follow Me- Stamp This, on-
Twitter

Affiliate and Product Disclosure
I am on various Design Teams and get free goodies for blogging about craft products but only because I love their products and genuinely use them. Ultimately my opinions are my own. A list of companies is in my sidebar.
Being part of various affiliate programs – when you click on an affiliate link and then go on to make a purchase, at no cost to you, I receive a small commission.  The affiliates I use include Rubbernecker Stamps and Whimsy Stamps.


Saturday, November 2, 2019

For My Coffee Lover Friends!

Okay, my coffee-loving friends, get ready for coffee card overload!  To celebrate the Coffee Lover's Blog Hop, I have a few coffee cards I've made all in one post.

The first is a card made with stamps and dies from Rubbernecker Stamps, isn't that owl adorable!!

Here's a quick and easy card using stamps from I Brake For Stamps...no coloring or cutting required!

These cute little coffee cups are from a clear set from Rubbernecker Stamps, they were colored with Zig Clean Color Real Brush Pens.

And here is that cute owl from Rubbernecker Stamps again, I just can't get enough of him!

Who doesn't love House-Mouse?  Stamps are from Stampendous and the mirror image was made using the Mirror Stamping Plate from Stampendous.

And finally, a Fall coffee card made using stamps and dies from Stampendous.

Friday, November 1, 2019

Coffee Loving Cardmakers Blog Hop


Hi and welcome to the Coffee Loving Cardmakers Blog Hop!  You'll want to join in and comment on the Blogs for your chance to win prizes!


For my card, I used the Warm Cup stamp from Stampendous and colored it with Prisma Colored Pencils.  It's layered on a circle that has clouds stenciled on it using the Picasso Tool using Tea Dye Ink.  The sentiment is from the Big Words Thanks Perfectly Clear Set, "Friend" was stamped on the cup in Sepia VersaFine Ink and embossed with Clear Embossing Powder.  The longer sentiment was stamped with VersaMark Ink and embossed with White Embossing Powder.  Everything was stuck down and popped up with adhesive and foam squares from Scrapbook Adhesives by 3L.

Be sure to comment on this post and to stop by the Stampendous Blog and the Coffee Loving Cardmakers Blog for your chance to win some fun prizes!

    
Have a creative day!


Disclaimer- I get free goodies for blogging about craft products! Today I'm sharing a card made with products from Stampendous


Here are some links to other coffee cards I've previously made!

Cocoa Hot Tub (close to coffee)


Tuesday, October 29, 2019

Altered Box For Fall


Today I have something a little different, it's an altered hearing aid box.  In my Bunco group, one of the ladies works for a doctor and they get an excess of hearing aid boxes, so rather than throw them away, she gave each of us one to decorate of course!!  Here is what I came up with, a Fall Wreath.


I wrapped the box with decorative paper, die-cut the circle out of burlap using the Circle Stitch OPC Die and die-cut the leaves using the Fall Leaf Die Set from colored cardstock and sponged them with the same colors of inks.  Smile was also die-cut, this was super quick and easy.  To make the drawer easy to open I added a ribbon pull attached with a decorative brad.


Follow Me- Stamp This, on-
Twitter

Affiliate and Product Disclosure
I am on various Design Teams and get free goodies for blogging about craft products but only because I love their products and genuinely use them. Ultimately my opinions are my own. A list of companies is in my sidebar.
Being part of various affiliate programs – when you click on an affiliate link and then go on to make a purchase, at no cost to you, I receive a small commission.  The affiliates I use include Rubbernecker Stamps and Whimsy Stamps.

Friday, October 25, 2019

Winter Wonderland


Hi there, today I have a snowman card made with the new Snowman with Lantern stamp from Rubbernecker Stamps.  I colored him with Prisma Colored Pencils and added Crystal Stickles to the trim of the hat and to the ball, then on the scarf Silver Stickles was added.  
To make the glitter background, I used the Mixed Squares Stencil and applied BoBunny Silver Glitter Paste to a light blue cardstock panel and wow in person it's so sparkly!! Once it was dry I die cut a circle using The Nested Circle Stitch Die Set and layered it onto a gray circle scallop cut with the Nested Cir Scallop w/ Holes Die.


The circles were popped up on a strip of the paste embossed piece and it's all layered on a panel of  Kaisercraft Let It Snow decorative paper.
The sentiment is Magic of the Season and it was embossed with white embossing powder.


I hope you have a creative day!

Follow Me- Stamp This, on-
Twitter

Affiliate and Product Disclosure
I am on various Design Teams and get free goodies for blogging about craft products but only because I love their products and genuinely use them. Ultimately my opinions are my own. A list of companies is in my sidebar.
Being part of various affiliate programs – when you click on an affiliate link and then go on to make a purchase, at no cost to you, I receive a small commission.  The affiliates I use include Rubbernecker Stamps and Whimsy Stamps.