Featured Post

Privacy Policy

I'm working on a new privacy policy for my followers, but for now you should know that if you comment on my site, my site collects your ...

Sunday, February 27, 2022

Friends Brighten Your Day


 I just love this big Pink Magnolia stamp from Stampendous, it's fun to color and I have so many plans for it too, I might even try pink! 

The image is colored with Prisma Colored Pencils and layered onto patterned paper.
The sentiment is from the True Friends Perfectly Clear Set also from Stampendous, it was stamped with black ink and the word "brighten" was outlined with an orange pencil.
To finish it off sequins were randomly added to the card.  
Adhesives from Scrapbook Adhesives by 3L were used to pop up and stick down the images and sequins.

Let's connect!

Disclaimer- I get free goodies for blogging about craft products! Today I'm sharing a card made with products from Stampendous

Thursday, February 24, 2022

Sunshine and Shade


Today my card is filled with mousey cuteness.  This Rainy Play House-Mouse Designs Stamp is from Stampendous and they have a LARGE variety of House-Mouse stamps.

Rainy Play was stamped on Mixed Media White Cardstock with Onyx Black VersaFine Ink.  The image was then colored with Prisma Colored Pencils.  Everything was stuck down and popped up using adhesives from Scrapbook Adhesives by 3L.This is an easy card, it just takes a bit of coloring.  

Did you know that you can share the projects you make with Stampendous products on their Stampendous Fan Facebook Page?  We'd love to see what you're making, you can add it here STAMPENDOUS FANS.

I hope you all have a creative day!

Let's connect!

Disclaimer- I get free goodies for blogging about craft products! Today I'm sharing a card made with products from Stampendous


Wednesday, February 23, 2022

We're Purrfect


Die-cut white and pink cardstock with the Mini Slimline Nested with Stich Die.
Stencil the white die-cut panel with the Plaid Texture Stencil which is a two-part stencil with Blush from the Color Fuse Ink Set #5 and Citrus Color Fuse Ink Set #2.
Glue the stenciled panel onto a slightly larger white panel. Set aside.


Stamp cats from the new For Each Other Set, on watercolor paper with Onyx Black VersaFine Ink and emboss with clear embossing powder.
Watercolor the cats with Zig Clean Color Real Brush Pens and cut out.


Die-cut the grass using the Grass #2 Die Cut, from green cardstock and glue the pieces behind the cats, then pop them up on the sides of the card.
Stamp the sentiment on pink cardstock with VersaMark Ink and emboss with white embossing powder.  Layer this onto a slightly larger black cardstock panel, then glue between the cats.
Add clear self-adhesive rhinestones around the sentiment and pink hearts randomly on the card.


Add clear self-adhesive rhinestones around the sentiment and pink hearts randomly on the card.


Thursday, February 17, 2022

Bloom With Grace


Hi my crafty friends, today I have a clean and simple card using the new, cute Lily of the Valley House-Mouse Designs stamp from Stampendous

To make my card, I stamped Mixed Media White Paper with Onyx Black VersaFine Ink and colored with Prisma Colored Pencils.  It was then layer onto a slightly larger blue panel. The sweet sentiment is from the new True Friends Perfectly Clear Set which was also stamped in black and the word "Bloom" was outlined with the same colored pencil as the flowers, it was then popped up on The white textured paper from a 12" x 12" paper pad and gives a touch of texture to the card. This was then glued to a blue card.

Did you know that you can share the projects you make with Stampendous stamps on their Stampendous Fan Facebook Page?  We'd love to see what you're making, you can add it here STAMPENDOUS FANS.

Have a creative day!!
Let's connect!


Disclaimer- I get free goodies for blogging about craft products! Today I'm sharing a card made with products from Stampendous


Tuesday, February 15, 2022

Will Work For Stamps!


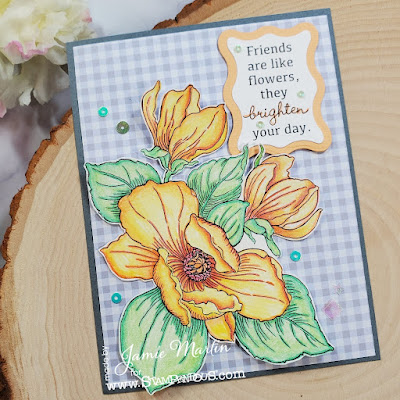
Today I have this bright, cheery and fun card up on the Scrapbook Adhesives by 3L Blog.  I love their adhesives especially when I have a lot of elements stuck down and popped up, with their adhesives I know nothing will fall off!

Here's how I made my card, first I stamped the images on watercolor paper with Onyx Black VersaFine Ink and watercolored them using Inktense Pencils.
Once the shirt is dry, it was stamped with the sentiment using Onyx Black VersaFine Ink.
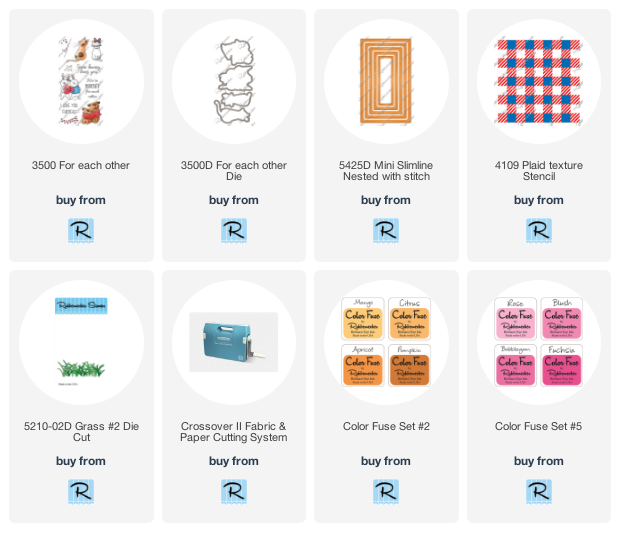
To cut them out, the matching dies were used.


Die-cut white cardstock using a slimline die and use the E-Z Dots Permanent Runner to attach the flowers and leaves except for the daisies, as shown.


The smaller 3D Foam Circles were used from the Permanent White Mix to pop up the shirt in the center of the card and also pop up the daisies, one on each side of the shirt. You always want to use enough of the 3D Foam Circles so the edges of your images don't droop, that's why I don't just use one in the center of the flower.


Attach the decorated panel to a black and white buffalo plaid card using the E-Z Dots Permanent Runner.
Apply Sunflower Liquid Pearls to the center of the daisies.
Randomly add a few black and white epoxy dots to the card.


Apply Sunflower Liquid Pearls to the center of the daisies and randomly add a few black and white epoxy dots to the card.


Materials Needed Scrapbook Adhesives by 3L® 3D Foam Circles Whtie Mix

E-Z Dots Permanent Runner


Plus
Whimsy Stamps- Stamps
Queen & Company- Epoxy Dots
PrintWorks- White Cardstock

Have a crafty day 💜

Let's Connect!

Affiliate and Product Disclosure
I am on various Design Teams and get free goodies for blogging about craft products but only because I love their products and genuinely use them. Ultimately my opinions are my own. A list of companies is in my sidebar.


Friday, February 11, 2022

Joy Clair Designs Blog Hop


Welcome to the Joy Clair New Release Blog Hop!  Wonderful new sets are available that you will love, be sure to stop by the Designers Blogs for tons of inspiration and for a chance to win an awesome prize. 

I used the digital set You Are Loved to make a square card.  The set was printed out on white cardstock from PrintWorks Specialty Paper and the flower was colored with Prisma Colored Pencils. Now go get hopping!


BLOG HOP DETAILS

All you have to do is hop along to each stop & leave a comment along the way to be entered to win! Winners will be posted on the Joy Clair Designs Blog by business end on February 22. You must check this blog & claim your prize within one week.


PRIZES:

Grand Prizes: One comment from the Joy Clair Blog will win the "Springish Fiesta Bundle 2022" with entire release. Three comments from all designer's blog hop post will win two digital stamp sets each one from our New Release "Springish Fiesta 2022".

 
Your next stop is 
Hannelie Berter – https://desertdiva-hannelie.blogspot.com/2022/02/joy-clair-designs-new-release-blog-hop.html


List of Designers

Joy Clair Designs - https://joyclairdesigns.com/?p=7666

Colleen Balija - https://irishrosecreations.blog/?p=5458

Crystal Komara - https://www.crystalkomara.com/blog/springish-fiesta-blog-hop

Nonni Niskanen – https://nonnishandmadecards.blogspot.com/2022/02/new-release-and-blog-hop-at-joy-clair.html

Joy Wilson – https://joywilsonink.com/?p=4604

Rebecca Rapanaro – https://www.wizardessofcards.com/?p=4579

Martha Lucia Gomez – https://stampartpapel.com/?p=32611

Esther Asbury – https://www.shoregirlscreations.com/2022/02/joy-clair-blog-hop.html

Anila Dikay – https://novelideas-gifts.blogspot.com/2022/02/joy-clair-february-release-blog-hop.html

Priscilla Joseph – http://nubblelightdesigns.com/?p=5724

Jyoti Adhikari – https://www.cardsncraftsnyc.com/springish-fiesta-joy-clair-designs-release/

Betsy Birge – https://caringheartcards.blogspot.com/2022/02/springlish-fiesta-release-with-joy.html

Maureen & Michele – https://kreativekinship.com/2022/02/joy-clair-inspirational-floral/

Marj Banzales – https://marjbanzalesdesigns.wixsite.com/marj/post/you-are-an-inspiration-joy-clair-designs-february-2022-new-release

Bonnie Crane – https://www.bonniecarollee.com/post/a-springish-fiesta-blog-hop-featuring-joy-clair-design-s-you-are-loved

Jamie Martin (you are here) – https://stampthis.blogspot.com/2022/02/joy-clair-designs-blog-hop.html

Hannelie Berter – https://desertdiva-hannelie.blogspot.com/2022/02/joy-clair-designs-new-release-blog-hop.html

Susan Powell – https://creatingwithsusan.blogspot.com/2022/02/joy-clair-designs-new-release-blog-hop.html

Sandhya Lyer - https://sanjuscreations.com/foiled-floral-card-joy-clair-designs/

Have a crafty day!

Let's Connect!

Affiliate and Product Disclosure
I am on various Design Teams and get free goodies for blogging about craft products but only because I love their products and genuinely use them. Ultimately my opinions are my own. A list of companies is in my sidebar.

Wednesday, February 9, 2022

Happy Birthday to You!


Do you need to replenish your birthday card supply?  If so, you're in luck because Rubbernecker Stamps is sharing birthday cards all month long!

To make my card, I used their new release Gift Set #4 which comes with this pretty vase of flowers and four sentiments in different fonts.

Here's how my card was made-
  • Stamp the vase of flowers on watercolor paper with Onyx Black VersaFine Ink and emboss it with clear embossing powder.
  • Color the image with Clean Color Real Brush Pens, cut it out and set it aside.

  • Use a blender brush to add Rose Color Fuse ink to the center-right of a white cardstock panel and over stamp this with any sentiment using the same ink.
  • Stamp ink splatters from the Watercolor Splatter Set using Silver Color Fuse Ink.
  • Apply a strip of black and white washi tape to the left side of the card and set a side.

  • Stamp a pink card with the Graduated Horizontal Stripe Background Stamp using VersaMark Ink and emboss with Vintage Pink Embossing Powder.

  • Stamp the sentiment from the same set on pink cardstock with Onyx Black VersaFine ink and emboss with clear embossing powder.
  • Glue the white panel to the pink card and pop up the sentiment and the flowers on the card as shown.
  • Randomly glue iridescent sequins to the card.
  • For the final touch, glue a pink twine bow to the flower vase.


Have a crafty day!

Let's Connect!

Affiliate and Product Disclosure
I am on various Design Teams and get free goodies for blogging about craft products but only because I love their products and genuinely use them. Ultimately my opinions are my own. A list of companies is in my sidebar.
Being part of various affiliate programs – when you click on an affiliate link and then go on to make a purchase, at no cost to you, I receive a small commission.  The affiliates I use include Rubbernecker Stamps.

Tuesday, February 1, 2022

Love Makes The World Go Round


Today I'm up on the Scrapbook Adhesives by 3L Blog with this Valentine's Day card with heart accents.

For Valentines Day I give out more cards than just to my husband, I also give one to my mom and kids.  I want everyone to know that I love them even though I tell them every time I talk to them.

To make my card, I used the Speckled Heart Stencil and Carnation Red Make Art Ink to add a heart to the center of a white cardstock panel.


I then stamped the sentiment on a strip of red cardstock with VersaMark ink and embossed it with clear embossing powder.  This was then layered onto a strip of black cardstock with Double-Sided Tape Runner Strips Permanent 150ft and a 3D Foam Strips was placed on the back.


The sentiment was then placed on the bottom of the panel and a heart from the 

E-Z Runner® Hearts Refillable Dispenser was placed on the right end of the sentiment strip.  Crystal Micro Glitter was then sprinkled on top and the excess was shaken off.  "Love" from the Big Words Happy Set by Stampendous, was then stamped over the stenciled heart with black ink and embossed with clear embossing powder.


Three more hearts from the E-Z Runner® Hearts Refillable Dispenser were placed on the card by using an exact knife to remove the hearts from the dispenser and placed on the panel.  Black glitter was then sprinkled on top of them.


Attach the panel to a red top folding card using the Double-Sided Tape Runner Strips Permanent 150ft.


Skill Level: Beginner

Creative Time: 35 minutes


Materials Needed:

Scrapbook Adhesives by 3L®
3D Foam Strips
E-Z Runner® Hearts Refillable Dispenser


Home Hobby by 3L® Double-Sided Tape Runner Strips Permanent 150ft


Rubbernecker Birthday Celebration Blog Hop


Welcome to the Rubbernecker Birthday Celebration Blog Hop where we have a lot of inspiration for you with new stamps and dies! For my card I used the new Birthday Celebration #1 and the new Mini Slimline Nested with Stitch Die Set.


You'll want to be sure to play along by visiting the blogs of each Design Team member and leave a comment, for your chance to win some really great prizes. One lucky winner will be picked on February 6th and here's what you could win.


Take a look at the new release and all of the wonderful stamp sets, you can shop the new release HERE.


Now head on over to the other Blogs and leave a comment.


Have a crafty day!

Let's Connect!

Affiliate and Product Disclosure
I am on various Design Teams and get free goodies for blogging about craft products but only because I love their products and genuinely use them. Ultimately my opinions are my own. A list of companies is in my sidebar.
Being part of various affiliate programs – when you click on an affiliate link and then go on to make a purchase, at no cost to you, I receive a small commission.  The affiliates I use include Rubbernecker Stamps.