Featured Post

Privacy Policy

I'm working on a new privacy policy for my followers, but for now you should know that if you comment on my site, my site collects your ...

Showing posts with label Upcycling. Show all posts

Wednesday, December 15, 2021

Upcycled Christmas Tag Holder


Hi there, Jamie here with you today with a question, were you one of the toilet paper hoarders at the beginning of the pandemic?  Well if you were, keep those empty toilet paper rolls and craft with them!!  I made them into tag holders for Christmas tags, read on to find out how easy it is to make.


To start recycling the roll, wrap it with Extreme Double-Sided Tape 1/4".  I wrapped two rows at the top and bottom and one in the center to make sure that the paper isn't loose once the roll is flattened.


Next I cut a piece of decorative paper a little longer than the roll so that it could be tucked inside.  I wrapped the roll and cut the paper so that it would slightly overlap.  I don't have measurements just in case the rolls are different sizes.
Extreme Double-Sided Tape was placed along all four edges, the roll was placed at on edge and rolled to the other edge.


To tuck the paper in, the paper overhang was cut approximately every 1/4" and folded down.  Since there's already tape at the edge just give it a little rub so that it will adhere.


Next the roll was flattened with the seam of the paper in the back.  Half of a circle die was placed inside of the roll with the cutting blade facing up.  It was then run through my CrossOverll Diecutting Machine to cut out half a circle.
The same circle die plus one that's one size larger was used to cut out the purple cardstock and it was glued the roll cut out using the Dual Tip Glue Pen.  You can see in the picture below, the cut marks of the paper. If this bothers you, you can cut a piece of the same decorative paper and glue a piece inside. But for me, I'm not that picky.


Now it's time to use the 3D Foam Holiday Embellishment Kit!  One of the taller trees from the tree foam sheet was placed on the right side of the roll and then it was rubbed with pink mica powder.  Then white Enamel Accents were placed on the tree, once this dried the star from the kit was placed at the top of the tree and silver foil from the kit was placed on the star.  When you use the foil, make sure the pretty side is facing you and the "ugly" side is down.


Next up is the sentiment, it was stamped on white cardstock with black ink and the edges were sponged with Cactus Flower Ink.  
The sentiment was then layered on slightly larger silver glitter paper using a strip of Extreme Double-Sided Tape.  
To attach this to the roll, turn it over and place a small amount of the Dual Tip Glue Pen on the right and two 3D Foam Circles on the left side.  This needs to be done since the roll is still a bit curved even though it has been flattened.
A strip of Extreme Double-Sided Tape was placed at the bottom of the role and rubbed with pink mica powder.


A tag was made by cutting a piece of white cardstock to fit inside the roll.  It was then rubbed with blue, lavender and silver Brilliance Inks for the background.  Holly Leaves were placed on the tag and rubbed with green mica powder and the dots were rubbed with the same mica powder as above.
The sentiment was then stamped with black ink and ribbon was added to the top.


Skill Level: Intermediate

Creative Time: 35 minutes

Materials Needed:

Scrapbook Adhesives by 3L®

3D Foam Squares White Mix

3D Foam Holiday Embellishment Kit


Home Hobby by 3L®

Extreme Double-Sided Tape 1/4″

Dual Tip Glue Pen


Wednesday, August 26, 2020

Pretty Packages For Christmas


Hi there!  Have you started making things for Christmas yet?  Well, there are more things to make than just Christmas cards, tags, gift bags, and gift containers.  Today I'm sharing a gift bag and gift container that both have tags using the same dies and stamps but with different looks.

Here's what was done for the bag-
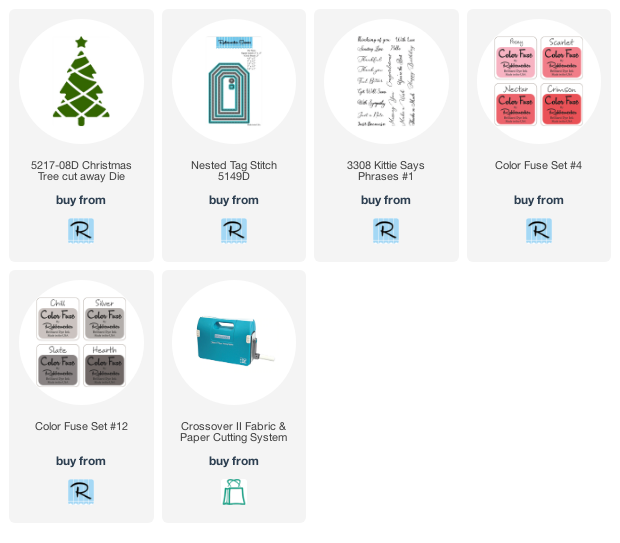
  • To make the tag I used the Nested Tagged Stitch Die and used the largest die to cut red decorative paper. The second to the largest die was used to cut white cardstock and green glitter paper.
  • Die-cut the white tag with the Christmas Tree cutaway Die.
  • Stamp "with love"  with Crimson Color Fuse Ink as shown.
  • Glue the white tag over the green glitter tag then onto the larger red decorative paper tag.
  • Use a decorative close pin to clip the tag onto the bag.

For this gift container I did a little upcycling, being a crafter it's always hard to throw things away that might be useful in some way.  This clear container is a side salad container from Chick-fil-A, when I saw it I just knew it had to be good for something even though it has a clear logo on the top of the lid.


  • This tag was made the same way as above except the words were stamped with Hearth Color Fuse Ink and popped up on the tag with foam squares.  
  • The red ribbon on the top of the tag was stapled on.  
  • Red shred was put inside of the container with the gift nestled in the shred.  
  • The container was then wrapped with red ribbon and the gift tag was popped up on the container with a foam square.


Follow Me- Stamp This, on-
Twitter

Affiliate and Product Disclosure
I am on various Design Teams and get free goodies for blogging about craft products but only because I love their products and genuinely use them. Ultimately my opinions are my own. A list of companies is in my sidebar.
Being part of various affiliate programs – when you click on an affiliate link and then go on to make a purchase, at no cost to you, I receive a small commission.  The affiliates I use include Rubbernecker Stamps.


Thursday, May 17, 2018

Pretty Upcycled Paper Bag Card


Hi, today I'm up on the Rubbernecker Stamps Blog with this card made using a brown grocery bag.  To make it I cut a piece of the bag, crumpled it up and stamped on it using the Leaves Set with VersaMark Ink and embossed with white.  It's layered on a white card stamped with Splatter Stains Set in Antique Linnen.  For a pop of color purple ribbon is tied around the card and the Idiots Happen sentiment is stamped on purple paper and white embossed.  

Follow Stamp This

Instagram


Disclaimer- I get free goodies for blogging about craft products! Today I'm sharing a card made with products from Rubbernecker Stamps.

Monday, July 27, 2015

Stencil This!


This week the Stampendous Design Team is "playing with paste."  There are so many ways to use it and today I'm showing 3 techniques. Be sure to stop by the Stampendous Blog (link at the bottom) each day for the links to the designers of the day and see their beautiful projects.

Today I am sharing a new project, the thank you card and a previously posted project, the tag and tag holder just in case you missed it because it is a fun and different way to use embossing paste. The first card uses Metallic Gold paste in the traditional style and look at how crisp and clean the sentiment is!  Here is how it was made.

1.  Place Feather Stencil DWLG760 on a black panel and sponge with VersaMark ink.  Remove stencil and dry paint the leaf with green and purple Polished Pigments (these are vibrant mica powder, they are similar to Pearl Ex).  When done wipe panel with a micro fiber cloth to remove excess powder.
2.  Place stencil back over leaf and tape down using removable tape to prevent the stencil from moving.  Trace the feather using a glitter Gelly Roll pen from Sakura and remove stencil.
3.  Place Thank Yous stencil DWLG691 on the right side and paste emboss with Dreamweaver Stencils Metallic Gold Embossing Paste using the Dreamweaver Palette Knife to spread it.  Remove stencil and let dry.
4.  Tie black panel with gold cord and glue to a gold card.

Now for the tag and tag holder.


Don't you love using recycled objects in your projects?! Not only are you saving the planet but also saving money.  The tag holder is made from a toilet paper roll that was flattened.  I saw the idea to use a toilet paper roll for a tag holder somewhere on pinterest but I don't remember where.  Here is how my project was made.

1.  After flattening the toilet paper roll, use a circle die to cut the top portion of the roll.  Sponge all edges with Vintage Photo ink and staple the bottom of the roll.
2.  Apply Dreamweaver Stencils Crackle Embossing Paste to the center of the holder using a palette knife and let dry.  It will start to crack as it dries.
3.  Once dry, mix Dreamweaver Stencils Embossing Paste with Ranger Leaf Green Archival ink re-inker.  I just put a dab of the paste on my craft mat and squeezed 1-2 drops of re-inker onto it and mixed with my palette knife.

4.  Place Tall Wheat LL3008 stencil over the crackle and hold in place with removable tape and apply the embossing paste with the palette knife. Let Dry.
5.  Glue ribbon to the bottom of the holder with 3 in 1 glue from Beacon Adhesives.
6.  Stamp flowers (I got them from the wedding isle at Michael's and I have enough for a life time!) with Dream Text stamp from Stampendous with Timber Brown Stazon, let dry, glue to holder and add pearls to the centers. You are done with the holder.
7.  To make the tag, cut light kraft paper to 4 1/4" x 2 1/4" and cut the upper corners on the diagonal.
8.  Place stencil diagonally on tag and sponge with gesso, let dry and clean stencil.  
9.  Place stencil on tag and sponge with Peeled Paint ink.  
10.  Stamp Moment Memory by Stampendous, on tag with Tuxedo Black Memento ink.
11.  Add flower and May Arts ribbon, you're done!

Stay connected and don't miss a thing!

Tuesday, February 18, 2014

Upcycling At It's Finest

 
 This week Stampendous and May Arts are partnering up to bring you creative goodness and of course, in this hop there will be Prizes!! We’ll be offering three prize packages of a brand new, Jumbo Cling Stampendous Flower Stamp Set, A Jumbo Perfectly Clear Handle, AND YOUR CHOICE of one spool of any May Arts Ribbon!! Wow!
How to win…  Comment on the Stampendous Blog, the May Arts Blog, and the blogs of each designer playing each day. Every comment is a chance to win! Be sure that you’re also a fan of the Stampendous Facebook page and the May Arts Facebook Page as well!

I was stumped coming up with a title for this post so I asked my husband for help which I may never do again!  His suggestion was "Poop Treat" and it just got worse from there.  The reason for his suggestion is that this cute treat container is made from a toilet paper roll.

This is super easy to make
1.  Wrap a toilet paper roll with decorative paper 4 3/4" x 6" using Beacon 3 in 1 glue.
2.  Pinch the bottom of the roll and staple it shut.

3.  Cut a doily in half, stipple with brown ink, fan fold and glue to roll.
4.  Stamp Always Young on cream paper with Sepia Versafine ink, heat set, color with pencils, cut out and glue over doily fan.
5.  Use a micro punch to punch holes on the sides and add 20 gauge wire.

6.  Glue brown  and pink May Arts ribbon to the bottom and tie green and pink ribbons to the wire.