Featured Post

Privacy Policy

I'm working on a new privacy policy for my followers, but for now you should know that if you comment on my site, my site collects your ...

Tuesday, January 28, 2020

Hello Sunshine


Hello Sunshine, sunshine is something we're not having here in Oklahoma today.  It's gloomy and has been raining all day, a perfect day to stay in and craft!  Today's card is one I made for the Stampendous January 2020 catalog, it uses the Sunflower Hello Cling Stamp Set and several die-cut sets.

Here's how my card was made;

  • The sunflower was colored with Prisma Colored Pencils and cut out.  
  • The background was sponged with yellow and orange Distress Inks then layered onto a kraft colored panel before being mounted to a green card.  
  • The sentiment was stamped with Onyx Black VersaFine Ink and embossed with clear embossing powder.  
  • This was then cut out using the Fitted Frames B Die-Cut Set, the sentiment fits perfectly inside the frame.  This was layered onto a larger green frame.
  • The circle was die-cut using the Build A Wreath Die Set and kraft colored paper.
  • All pieces were glued down as shown and some Pumpkin Spice Sparkle Blends for a touch of bling.


Have a creative day and follow me on 

Disclaimer- I get free goodies for blogging about craft products! Today I'm sharing a card made with products from Stampendous

Monday, January 27, 2020

Let's Celebrate!


Hi my friends, I hope you all are having a good start to your week!  I'm starting my week of with this card using the Balloon Buddies House-Mouse Design stamp from Stampendous.  These big balloons are fun and easy to color with colored pencils, I think I'll make a few of these in different colors.
Did you know that you can share your projects made with Stampendous stamps on their Stampendous! Fans, Facebook page?  We'd LOVE to see them!!

Here's how my card was made-

  • Stamp Balloon Buddies with black ink on a white cardstock panel and color with Prisma Colored Pencils.
  • Shade around the image with blue decorative chalk using a flat brush.
  • Sprinkle Shabby Blue Embossing Enamel on the bottom of the panel and heat emboss from underneath so the embossing enamel doesn't blow off.
  • Layer this onto a slightly larger black panel then glue to a pink decorative paper panel and mount to a white card.
  • Stamp sentiment onto black paper with VeraMark Ink, emboss with White Embossing Powder and cut out.
  • Glue the sentiment to the upper right portion of the card and add blue Enamel Dots as shown.


Have a creative day and follow me on 

Disclaimer- I get free goodies for blogging about craft products! Today I'm sharing a card made with products from Stampendous

Tuesday, January 21, 2020

Love is the Honey


Hi friends, today I have a friendship card made with the pretty new release Daisy Bee Cling Stamp Set from Stampendous.  The daisies and bee were stamped with black ink and colored with Prisma Colored Pencils.  The shading around the daisies was done with blue decorative chalk, it's a quick and easy way to add color.


The words were stamped with black ink on white cardstock and embossed with clear embossing powder.  The words were layered onto larger orange panels and the flowers were layered onto black cardstock  and tied with twine.  This was then layered onto decorative paper and glued to a tan card.  the words were popped up using 3D Foam Squares from Scrapbook Adhesives by 3L.

Click on the stamp set to go to the Stampendous website.

Have a creative day!


Disclaimer- I get free goodies for blogging about craft products! Today I'm sharing a card made with products from Stampendous

Monday, January 20, 2020

Coffee Shaker Card


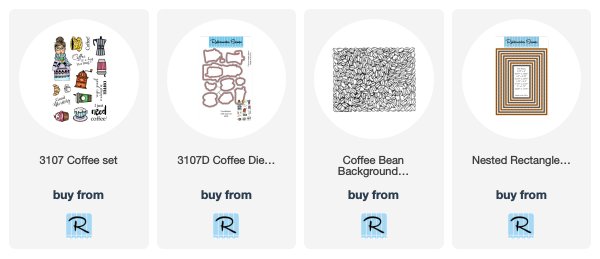
Hi there, I hope you all are having a good start to your Monday and to help wake you up and stay warm, I have a coffee shaker card for you using the Coffee Set,  Coffee Die Cut Set and the Coffee Bean Background Set.

Here's how my card was made-
  • Stamp the lady holding coffee from the Coffee clear set in black ink, color with Prisma pencils and die cut using the coordinating dies.
  • Stamp Coffee Bean Background on a tan panel with VersaMark Ink and emboss with White Embossing Powder.
  • Use the Nested Rectangle Small Stitch Die Set to cut a window in the panel and then cut a larger frame out of blue decorative paper to glue around the opening.
  • Glue a light blue decorative paper panel to a tan card, lay the Coffee Bean panel centered on top of this and stamp Can't Buy Happiness with Sepia VersaFine Ink and emboss with Clear Embossing Powder.

  • Glue an acetate panel on the backside of the window that was cut in the Coffee Bean Background panel then line with foam tape. 
  • Wrap the bottom of the panel with purple and white twine and pop up lady holding coffee with foam squares.
  • Place sequins over the sentiment and mount the panel, centered over this.
  • Randomly glue sequins to the front of the card.


Follow Me- Stamp This, on-
Twitter

Affiliate and Product Disclosure
I am on various Design Teams and get free goodies for blogging about craft products but only because I love their products and genuinely use them. Ultimately my opinions are my own. A list of companies is in my sidebar.
Being part of various affiliate programs – when you click on an affiliate link and then go on to make a purchase, at no cost to you, I receive a small commission.  The affiliates I use include Rubbernecker Stamps and Whimsy Stamps.

Tuesday, January 14, 2020

Butterfly Flowers


It's never too early to start making cards for Spring.   For today's card I used the Cling Spring Garden stamp from Stampendous.  The background and butterfly is one large stamp and the butterfly stamp separates out of the background stamp for extra versatility.  This 6" x 6" cling rubber stamp is a whole collage piece on its own.  Use a small portion of it for the background on cards, like I did here or use the whole thing for home decor projects and scrapbook pages.
  • To make my card I stamped the background image (without the butterfly) on a watercolor panel using VersaMark Ink and embossed with White Embossing Powder.  Distress ink in Spun Sugar, Picked Raspberry and Wilted Violet were sponged across the panel.
  • The butterfly was stamped on watercolor paper with Onyx Black VersaFine Ink, embossed with Clear Embossing Powder and colored with Zig Clean Color Real Brush Pens.  The body was glued to the background panel and the wings were curved to stay up.


  • The sentiment was stamped on black cardstock with VersaMark Ink, embossed with White Embossing Powder and glued to the background panel.
  • This was then glued to a larger black panel then glued to a purple card.
  • Sequins were randomly glued to the background.


Have a creative day and follow me on 

Disclaimer- I get free goodies for blogging about craft products! Today I'm sharing a card made with products from Stampendous

Monday, January 13, 2020

Sweet as Sugar- Whimsy Stamps Paper Door


Hi my friends, are you all ready to get your week started?  Today I have a shaker card made with the Whimsy Stamps Paper Door- January 2020 Sugar Rush card kit, it really ia amazing how many different looks you can get from one kit!  You can see my other card HERE.

This super sweet card kit will be available until January 25th or until they're sold out, be sure to order yours before they're gone!

Click on image to go to the Whimsy Stamps website

**PAPER DOOR - January 2020 Sugar Rush

Here's how my card was made-
1.  Stamp Sugar Rush image on white cardstock with black ink and color with colored pencils.
2.  Cut out the frame using the Shaker Maker Rectangle Die Set and paper from the Whimsy Stamps Designer Paper Pack.
3.  Cut a piece of acetate slightly smaller than the frame.

                                            
4.  Glue the acetate to the back of the frame and apply Shaker Maker Foam Tape around the back of the frame.
5.  Place shaker bits on the center of the stamped image, remove the tape liner and adhere the frame onto the stamped image.
6.  Glue this to a  5 1/2" x 4 1/4"  pink and white striped decorative paper panel and glue to a white card.
7.  Die-cut sweet from white, black and pink papers, glue to the top corner of the card.
8.  Stamp "as sugar" on pink paper with black ink and glue to the bottom corner of the card.

Paper Door Supplies: Sugar Rush stamp set, Sweet Word and Shadow Die, 6x6 Whimsy Stamps Designer Paper Pack 


Other: White Cardstock, acetate, Prisma Colored Pencils, Shaker Bits

Paper Door kits

Whimsy Stamps is excited to share our PAPER DOOR kits for 2020! Now your monthly crafty goodness delivered right to your front door is even more affordable, and includes even more exclusive Whimsy Stamps products!
BRAND NEW kit debuting on the 10th of each month
Each kit is a $50+ retail value for only $29.95 plus shipping
EXCLUSIVE 6x6 Whimsy Stamps designer paper pack collections, fun and creative designs on heavyweight paper with a beautiful sheen - 24 double-sided sheets
SPECIAL EDITION 4x6 clear stamp set "Sweet as Sugar" created exclusively for PAPER DOOR
COMPLEMENTING "Sugar Rush" 4x3 stamp set and large rubber background stamp "Sweets", designed exclusively for PAPER DOOR
SPECIAL EDITION "Sweet Word and Shadow Die" introduced especially for PAPER DOOR
PRIVATE access to PDF files with step-by-step instructions for at least 4 different projects
We’ve made PAPER DOOR an easy and affordable way for you to enjoy a monthly card making kit:
NO minimums
NO subscriptions to commit to
NO wait lists to sweat out
NO multi-tier pricing
Each kit is a LIMITED EDITION and individual items may or may not be released at a later date. Supplies are limited so order yours today, and unlock your creativity with Whimsy Stamps PAPER DOOR kits!


Have a creative day and follow me on 
Instagram

Affiliate and Product Disclosure
I am on various Design Teams and get free goodies for blogging about craft products but only because I love their products and genuinely use them. Ultimately my opinions are my own. A list of companies is in my sidebar.
Being part of various affiliate programs – when you click on an affiliate link and then go on to make a purchase, at no cost to you, I receive a small commission.  The affiliates I use include Whimsy Stamps.


Friday, January 10, 2020

Sweet!- Whimsy Stamps- Paper Door


Hi my friends, I'm super excited to announce that I'm on the Whimsy Stamps Paper Door Design Team!! My first card is using the Paper Door- January 2020 Sugar Rush kit. 

**PAPER DOOR - January 2020 Sugar Rush

These monthly kits are great, everything works together so there's no guessing if the size of the stamps will work together and each kit comes with a paper pack, everything is coordinated, I LOVE it!!  Here is all of the info on how the kits work-

Whimsy Stamps is excited to share our PAPER DOOR kits for 2020! Now your monthly crafty goodness delivered right to your front door is even more affordable, and includes even more exclusive Whimsy Stamps products!
BRAND NEW kit debuting on the 10th of each month
Each kit is a $50+ retail value for only $29.95 plus shipping
EXCLUSIVE 6x6 Whimsy Stamps designer paper pack collections, fun and creative designs on heavyweight paper with a beautiful sheen - 24 double-sided sheets
SPECIAL EDITION 4x6 clear stamp set "Sweet as Sugar" created exclusively for PAPER DOOR
COMPLEMENTING "Sugar Rush" 4x3 stamp set and large rubber background stamp "Sweets", designed exclusively for PAPER DOOR
SPECIAL EDITION "Sweet Word and Shadow Die" introduced especially for PAPER DOOR
PRIVATE access to PDF files with step-by-step instructions for at least 4 different projects
We’ve made PAPER DOOR an easy and affordable way for you to enjoy a monthly card making kit:
NO minimums
NO subscriptions to commit to
NO wait lists to sweat out
NO multi-tier pricing
Each kit is a LIMITED EDITION and individual items may or may not be released at a later date. Supplies are limited so order yours today, and unlock your creativity with Whimsy Stamps PAPER DOOR kits!

Step by Step Instructions:
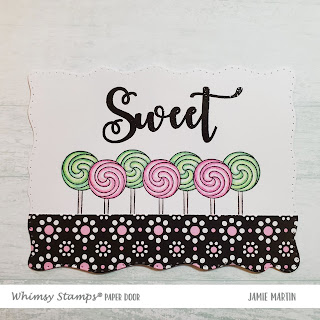
  1.  Stamp lollipops on white cardstock with black ink.
  2. Stamp the word Sweet above the lollipops, sprinkle with clear embossing powder and heat taking care not to get any embossing powder on the lollipops.
  3. Color lollipops with colored pencils and glue a strip of decorative paper across the lollipop sticks and once dry, die-cut using the largest Wavy Pierced Rectangles Die Set.
  4. Glue this to a pink panel from the Whimsy Stamps Designer Paper Pack then onto a larger dark decorative paper panel from the same pack.
  5. This will then be glued to a white card.
  6. Stamp words from the Sweet as Sugar Stamp Set on pink decorative paper with black ink, cut out and pop up on the card using 3D Foam Squares.
  7. Glue three sequins on the card using Nuvo- Deluxe Glue.

Paper Door Supplies: Sweet as Sugar, Whimsy Stamps Designer Paper Pack

Whimsy Stamps Supplies: Wavy Pierced Rectangles Die Set, 3D Foam Squares, Nuvo- Deluxe Adhesive, Onyx Black VersaMark Ink, WOW! Embossing Powder- Clear Gloss

Other: Prisma Colored Pencils, White Cardstock, Sequins, Heat Gun

Cardstock Measurements: Card base 5 ¾” x 4 ½”, Pink Panel 5 ½” x 4 ¼”, Wavy White Panel 5 ¼” x 4”, Decorative Paper Strip 5 ⅛” x 1 ⅛” (these are final dimensions, you will want slightly larger pieces that need to be die-cut).


Have a creative day and follow me on 
Instagram

Affiliate and Product Disclosure
I am on various Design Teams and get free goodies for blogging about craft products but only because I love their products and genuinely use them. Ultimately my opinions are my own. A list of companies is in my sidebar.
Being part of various affiliate programs – when you click on an affiliate link and then go on to make a purchase, at no cost to you, I receive a small commission.  The affiliates I use include Whimsy Stamps.


Monday, January 6, 2020

Daisy Bouquet- Rubbernecker Stamps


Hi there and welcome back, I hope you're ready to get this week started! To help you get your crafty mojo going, I have a bright and cheery card made with Rubbernecker Stamps to help brighten your day.

Here's how my card was made-
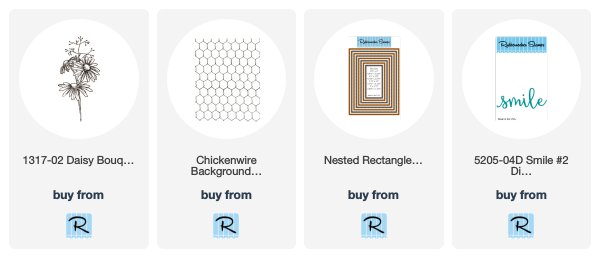
1.  Stamp Chickenwire on white cardstock with Smokey Gray VersaFine Ink and emboss with clear embossing powder.
2.  Blend Distress inks starting at the bottom with Squeezed Lemonade, Scattered Straw, Carved Pumpkin and Candied Apple using either brushes or sponges.
3.  Use the Nested Rectangle Small Stitch Die Set to cut it out, layer onto black cardstock and glue to a white card.  Set aside.
4.  Stamp Daisy Bouquet #1 on white cardstock with Onyx Black VersaFine Ink on Bristol Smooth Paper and emboss with Clear Embossing Powder.
5.  Cut out the image and black cardstock with the Nested Rectangle Small Stitch Die Set, layer the pieces then color the image with Zig Clean Color Real Brush Pens.

6.  Pop up on the Chickenwire background with 3D Foam Squares from Scrapbook Adhesives by 3L.
7.  Glue a strip of decorative paper to the bottom of the flowers and adhere Smile that was die-cut from the Smile #2 Die Cut.
8.  Randomly add sequins around the flowers using Nuvo Deluxe Adhesive.

These are the Rubbernecker products used to make my card, click on them to go the Rubbernecker Stamps website.


Follow Me- Stamp This, on-
Twitter

Affiliate and Product Disclosure
I am on various Design Teams and get free goodies for blogging about craft products but only because I love their products and genuinely use them. Ultimately my opinions are my own. A list of companies is in my sidebar.
Being part of various affiliate programs – when you click on an affiliate link and then go on to make a purchase, at no cost to you, I receive a small commission.  The affiliates I use include Rubbernecker Stamps and Whimsy Stamps.


Friday, January 3, 2020

Watercolor Wish


Hi there!  Today I have my first post of 2020 for Stampendous, its a card using the cute new  House-Mouse Design Watercolor Wish stamp.  Now is a good time to build up your birthday card stash for the year!  Don't you think these would be cute in a bunch of different colors?


Here's how my card was made;
1.  Stamp Watercolor Wish with black ink and color with Prisma Colored Pencils.  Shadow around the top of the image with green chalk and the bottom with brown chalk using a flat brush.
2.  Cut out the image and black cardstock using Fitted Frames B Die-Cut Set.
3.  Glue decorative paper to a slightly larger white panel, wrap with ribbon and glute to a purple card.
4.  Adhere the framed image to the center of the card and glue a bow to the side of the image.

Supplies
Stampendous
Onyx Black VersaFine Ink

Plus
Adhesive- Scrapbook Adhesives by 3L
Prisma Colored Pencils
Decorative Paper- The Paper Studio
Decorative Chalk- Green and Brown


Have a creative day and follow me on 

Disclaimer- I get free goodies for blogging about craft products! Today I'm sharing a card made with products from Stampendous