Featured Post

Privacy Policy

I'm working on a new privacy policy for my followers, but for now you should know that if you comment on my site, my site collects your ...

Thursday, June 26, 2014

Fun With Stampendous and Deco Art


Here is my card for today, the info on how I made it is below the Blog Hop information.


The excitement continues as conclude our grand tour of amazing artists playing with Stampendous, DecoArt, and Princeton Artist Brushes via inspired by Willow Wolfe products! The inspiration has been amazing, and today you'll be even more astonished! If you missed the beginning of our journey, be sure to go back and check it out! MONDAY - TUESDAY - WEDNESDAY - THURSDAY 
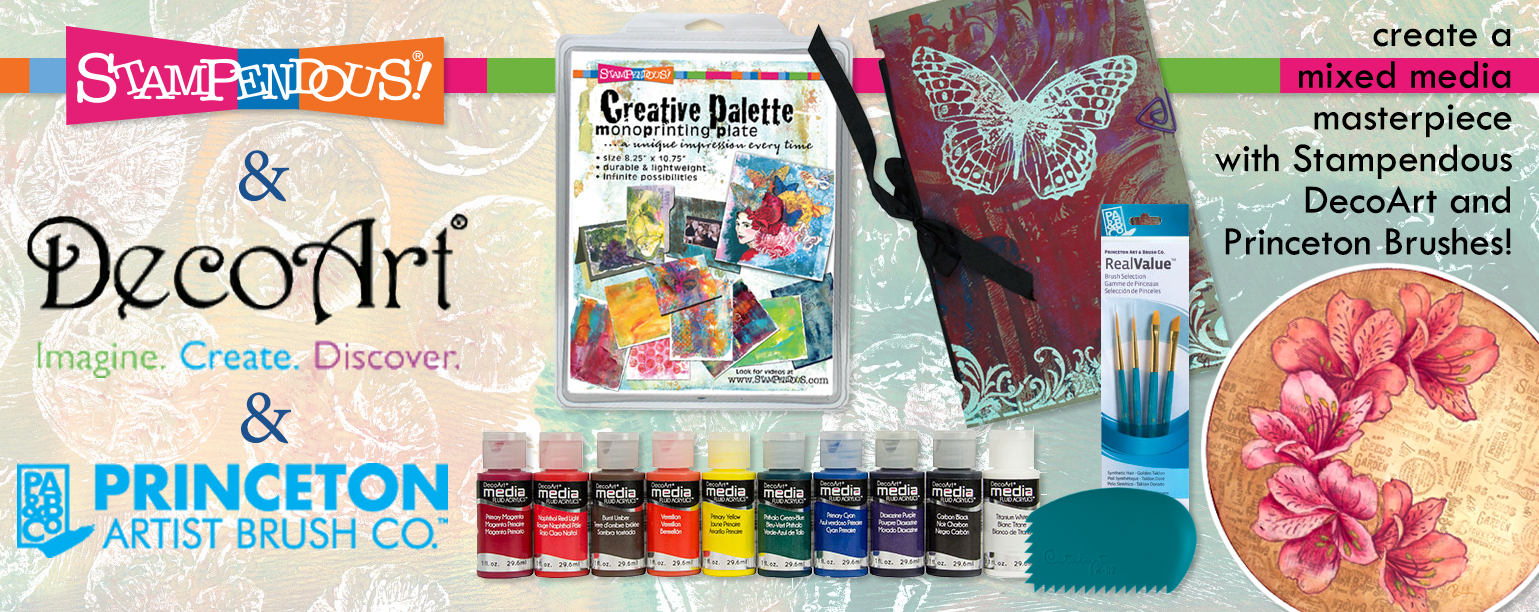
Of course, there are prizes! DecoArt is sending three sets of their  Media Fluid Acrylics, Princeton Artist Brushes via inspired by Willow Wolfe is donating Select 3750 Brushes and some Catalyst Wedges, and we'll be adding a Stampendous Creative Palette so you can practice all the techniques you'll see this week.  We'll be sending three prize packages to commenters with U.S. Mailing Addresses, and DecoArt will be sending three generous sample packages to international commenters, so all our friends can play. This week we've shown you how to use Stampendous Rubber Stamps to transfer a terrific pattern for painting. Did you know you can sell your projects made with our images? As long as you hand stamp each one, you can sell as many as you like of any kind of project anywhere you want.  You can find our detailed Angel Policy on our website. One of the terrific prizes is a Catalyst Wedge from Princeton Artist Brushes and inspired by Willow Wolfe. These wedges are terrific for using with our Creative Palette and DecoArt paints. In this video Stampendous owner Fran Seiford demonstrates how easy it is to make amazing backgrounds with these tools. [youtube https://www.youtube.com/watch?v=x7UqUFDrTXg&w=560&h=315] Wait until you see what our other artists have created!

Visit each blog, leave a comment!   Like

Stampendous, DecoArt, Princeton Artist Brushes, and inspired by Willow Wolfe on Facebook!  We've also got a Pinterest Board started!
Please repin our projects on to your boards and be sure to tag us when you do (#Stampendous, #DecoArt, #PrincetonArtistBrushes, #byWillowWolfe) - we'll be tracking. Your comments on the blogs are your entry into the drawing!  AND I have a few bonus goodies hanging around my office for some lucky people who SHARE our Facebook posts and Pinterest Pins! 
 
How my card was made
1.  Paint kraftboards from the Kraftboard Royal Heart Kit with Deco Art Acrylic Gesso and let dry, I helped it along with a heat gun. 
2.  Then paint the back board with Deco Art Traditions Red Violet, let dry then crumple up waxed paper, dip it into Traditions Raw Senna and pounce the paint on. 
3.  Paint the shield kraftboard with Traditions Raw Sienna paint, let dry and stamp with the script from Stamps Royal Heart Kit with Tuxedo Black Memento ink.
4.  Cut out the quote from the quote sheet and glue it underneath the shield then glue the shield to the bottom board. Add pink rhinestones.
5.  Place the die-cut double-sided Sticky Panels over the heart and crown, remove the carrier and sprinkle the heart with Shabby Pink Embossing Enamel, heat and add a pink rhinestone to the center.
 
6.  Remove the carrier from the crown, sprinkle with mica chips from the Silence Stack Art Elements Kit, rub off the excess then sprinkle with the pink glitter from the set to fill in any spaces the mica didn't cover.  Add brown and pink rhinestones and glue the crown and heart to the Stack Art piece.
 
 
7. Layer a tan panel onto a rust panel, tie with pink May Arts Ribbon and mount Stack Art piece to papers.
8.  Sprinkle Shabby Pink Embossing Enamel on a tan card and heat from underneath so the Embossing Enamel doesn't blow off.
9.  Mount work to the card.

Stay connected

Follow my blog (in the right column)
Follow me on Twitter
Follow me on Instagram- stampthis


https://blogger.googleusercontent.com/img/b/R29vZ2xl/AVvXsEiBIB7cl3FWcUqRpVNE2xf0uD7bSSaDv8EJChhD3TSJRrDTTqubuFddCha_Vsye2BIOBKX1yGUjGJyPJvjizD-izRFYxEG1Q0kTmLKEiANGSeoreVxGdz2kjJCF6lGrlm9fopxLmRzM6V04/s1600/Stampendous+logo.jpg
  
 
Ready for your trip around the world??? Pack your bags, get a cup of coffee and a kitten, and get comfy. You have until the end of Sunday, June 29 PDT to comment on all the blog posts.

Louise Crosbie (Scotland, UK)


Lea Kimmel (North Carolina, USA)


Claudia Neubacher (Vienna, Austria)


Asia King (Oxford, UK)


Iliane de Fockert (Elly) (Niedersachsen, Germany)


Suzanne Czosek (Illinois, USA)


Julia Stratford-Wright (near London, UK)


Kristine Reynolds (California, USA)


Angelica Stark (Sweden)


Mark Gould (West Sussex, UK)


Debbie Cole (California, USA)


Jamie Martin (Oklahoma, USA)


Tobi Crawford (BC, Canada)


Wendy Price (New Jersey, USA)


Jessa Plant (Arizona, USA)

A few of the bloggers this week are new to hopping, so if you have an issue with any of the links, here's a little tip! If you get a page that says "Sorry that Page is not here" or something similar, try clicking on the header of the blog, or look for something that says Home. The hop page should be near the top of the day's posts. We will fix broken links as the day goes on, as well, so check back here if you are really lost. The Official Rules.

Tuesday, June 24, 2014

Stampendous and Deco Art Week


This is my card for today, the info on how is was made is below the Blog Hop information.


We're using terrific products from our generous friends at DecoArt and Princeton Artist Brushes, via inspired by Willow Wolfe,  this week to show you that "if it will sit still long enough, you can paint it and stamp it!" If you're just joining us, don't miss the great inspiration from Monday's Post and Tuesday's Post. Artists from DecoArt's International Design Team are joining the Stampendous team to create some astonishing inspiration for you. Prepare to be amazed! Of course, there are PRIZES! DecoArt is sending sets of their  Media Fluid Acrylics, we'll be adding a Stampendous Creative Palette, and Decorative Painter Willow Wolfe has persuaded Princeton Artist Brushes to donate some Select 3750 Brushes and a Catalyst Wedge to each prize package. We'll mail three prize packages to commenters with U.S. Mailing Addresses, and Deco Art will mail three sample packages to international commenters so all of our friends can play! Here's a terrific project created by our Design Team Member Janelle Stollfus. She used "layers and layers" of paint on this plaque to get that incredibly deep background. She stamped the face on tissue and colored ahead of time to make application easy. The hair is ribbon and found items. LOVE IT!!  Blossom Beauty Plaque by Janelle Stollfus Wait until you see what our other artists have created! Visit each blog, leave a comment!  Like Stampendous, DecoArt, Princeton Artist Brushes and inspired by Willow Wolfe on Facebook!  We've also got a Pinterest Board started!Please repin our projects on to your boards and be sure to tag us when you do (#Stampendous, #DecoArt, #PrincetonArtistBrushes, #byWillowWolfe) - we'll be tracking. Your comments on the blogs are your entry into the drawing! We'll randomly choose three blog posts from all the designer posts this week and then choose one commenter from each with a U.S. Mailing Address to receive a prize package. THEN we'll choose three international commenters to receive a generous sample pack courtesy of DecoArt, so everybody can play this time!  AND I have a few bonus goodies hanging around my office for some lucky people who SHARE our Facebook posts and Pinterest Pins!  
 
Now here is how my project was made:
I used several colors of Deco Art Americana Multi Surface Satin Paints on the Stampendous Creative Palette Monoprinting Plate, used a brayer to spread the paint, layed my white cardstock on the Creative Palette, pulled it off and let it dry.  Then the stencil from the Wired Grillager set was used  and purple paint was sponged through it.  When dry stamp wire from the Wired Grillager set and the sayings from the Discover Today Perfectly Clear Set were stamped with Onyx Black VersaFine ink.


Stay connected
Follow my blog (in the right column)
Follow me on Twitter
Follow me on Instagram- stampthis


https://blogger.googleusercontent.com/img/b/R29vZ2xl/AVvXsEiBIB7cl3FWcUqRpVNE2xf0uD7bSSaDv8EJChhD3TSJRrDTTqubuFddCha_Vsye2BIOBKX1yGUjGJyPJvjizD-izRFYxEG1Q0kTmLKEiANGSeoreVxGdz2kjJCF6lGrlm9fopxLmRzM6V04/s1600/Stampendous+logo.jpg


 Ready for your trip around the world??? Let's get Hoppin!

DecoArt Blog


Stampendous Blog


Claudia Neubacher (Vienna, Austria)


Kristine Reynolds (California, USA)


Iliane de Fockert (Elly) (Niedersachsen, Germany)


Julia Stratford-Wright (near London, UK)


Julie Robertson (UK)


Jamie Martin (Oklahoma, USA)


Debbie Cole (California, USA)


Shannon Moyer-Szemenyei (Canada)


Tamiko McCurry (Illinois, USA)


A few of the bloggers this week are new to hopping, so if you have an issue with any of the links, here's a little tip! If you get a page that says "Sorry that Page is not here" or something similar, try clicking on the header picture at the top of the blog, or look for something that says Home. The hop page should be near the top of the day's posts. We will fix broken links as the day goes on, as well, so check back here if you are really lost. Official Rules are here.

Thursday, June 19, 2014

Summer Memories


At Dreamweaver Stencils, we love to make our monthly challenges something for everyone, and not so strict that no one wants to play along. This month our challenge is, "Old, New, Borrowed, Blue", with the obvious thought being a wedding theme...but not necessarily. Add an old embellishment or picture. Use a new stencil design or technique. Borrow, or CASE (copy and say everything) another designers project, and obviously, blue...is blue. Remember, linking your creations with the Inklinkz tool at the end of the team posts, provides you with the opportunity to win the stencil of your choice!

This week my project uses something old and blue.  The picture of my daughter is old, she is now 21...how time flies!  Blue paper, ink, brads and ribbon were also used.  Here is how my page was made.

1.  LL329 Beach Chair was stenciled using Radiant Neon Inks in Electric Pink and Green on the umbrella and VersaFine Vintage Sepia.
2.  The stencil was cleaned off and placed back over the image, then Dreamweaver Stencils Translucent Embossing Paste was spread over the stencil which was then removed.
3.  Pink Micro Glitter from Stampendous was spread over the umbrella only and the image was left to dry.
4.  Once dry place stencil over image, sponge the chair only with a glue that stays tacky when dry, I used Duo Glue from US ArtQuest.  Once dry (just a couple minuntes) Metallic FX powder was spread on using a brush.

5.  The LL332 Picasso was used to make the clouds with Radiant Neon Electric Blue ink.
6.  On the photo Electric Pink was stippled through LG698 Corner Flourishes then embossed with Shabby Pink Embossing Powder from Stampendous.  The stencil was then replaced and a bit of Electric Pink was stippled on top.

7.  To make the sign, LJ901 Mosaic Swirls was placed on blue paper and stippled with Electric Blue ink.  The LM294 Summer was placed over the stenciled piece and Translucent Embossing Paste was spread over the top, the stencil remove and Pink Micro Glitter was spread over the top of the paste.

8.  May Arts Ribbon was glued to the bottom of the page and used to hang the sign.

Here's what our "A" team has been working on this week:

Stay connected
Follow my blog (in the right column)
Follow me on Twitter
Follow me on Instagram- stampthis


https://blogger.googleusercontent.com/img/b/R29vZ2xl/AVvXsEh51wyTO6jT5VTdYnB6w_G_m5HpVcLHg74CtPgP_LxPEKzn_V-OoKqGG2xT1wqb9akJ4WnFtjyWN2v_w0oXJVDqSV3SyVI_lnvmji1y88Z-8_yaN4exn-xXopYtjiwAjsF2De1Y9Uh9R-yQ/s1600/Dreamweaver+logo.jpg

Link your monthly challenge project here.


Monday, June 16, 2014

Yee Haw!!


This week the Stampendous Design Team is sharing Cowgirl cards.
Rodeo Girl was stamped on a white panel with Onyx Black VersaFine ink, heat set, colored with pencils and sponged with blue ink.  Horseshoe ribbon was glued onto a strip of kraft paper as was Rodeo Girl and the purple panel.  Three holes were punched in the top right of the stamped image and tied with twine from May Arts Ribbon.

Friday, June 13, 2014

Hop With Dreamweaver Stencils and Imagine Crafts


IC_DW_Blog_Hop_Badge.jpg (688×212)
Welcome to Dreamweaver Stencils first ever collaboration week with Imagine Crafts/Tsukineko! Three prize packages are available, each containing one set of each of these inks and stencils/dies. Just leave comments on each post of each day this week (June 9th - June 13th) for a chance to win! Winners will be announced on Tuesday, June 17th!


I LOVE clean and simple cards, they look so crisp, so that is what I set out to do when I made these cards. Here is how my card was made.

1.  Die Cut DG743 Stylized Dahlia on a white panel.
2.  Place removable tape around the edges of a white card and sponge with Radiant Neon inks in Electric Pink, Electric Purple, Electric Green and Electric Yellow.  Remove tape.

3.  Glue die cut piece onto the sponged card and glue with Beacon Adhesives 3 in 1 glue.
4.  Sponge a small tag with Electric Purple, Green and Pink. Stamp sentiment from Regal Bird Quotes by Stampendous on the tag with Onyx Black VersaFine.   Glue to the stem and place a green rhinestone in the hole.
5.  Glue a purple bow made from May Arts Ribbon and glue with 3 in 1 glue.

Now here is the card I originally made but a couple of days ago the Amazing Pam Hornschu made a card with this stencil and it was so similar to mine I thought I better make another! This card used the same inks but they were sponged on the diecute panel and glued ontop of a black panel. So today you get two from me.


Imagine+SZ_MID_prize.jpg (1600×1600)

Imagine Crafts New StazOn Pads from Tsukineko

prize+pack.jpg (360×353)
Stay connected
Follow my blog (in the right column)
Follow me on Twitter
Follow me on Instagram- stampthis

https://blogger.googleusercontent.com/img/b/R29vZ2xl/AVvXsEh51wyTO6jT5VTdYnB6w_G_m5HpVcLHg74CtPgP_LxPEKzn_V-OoKqGG2xT1wqb9akJ4WnFtjyWN2v_w0oXJVDqSV3SyVI_lnvmji1y88Z-8_yaN4exn-xXopYtjiwAjsF2De1Y9Uh9R-yQ/s1600/Dreamweaver+logo.jpg

Hop With Stampendous and Core'dinations

Hop With Stampendous and Core'dinations! 

2014_06_coredinations

Hope you've enjoyed the terrific collaboration between Stampendous products and Core'dinations' gorgeous papers! We have been thrilled to bring it to you! Today is the final day!! Of course there are prizes! We'll give away three packs of goodness! The Prize Package includes the Lovely Garden Stamp Set; the Matching Lovely Garden Cutting Dies from Stampendous; a Sand It Kit from Core'dinations which includes a sanding block, replacement sandpaper, and a "must-have" Dust Buddy clean up cloth; Core'dinations will also be sending the lucky winners some of their fantastic 6" X 6" paper pads. PLUS an extra special bonus - our friends at Dreamweaver Stencil will be adding the gorgeous Stone Wall stencil that  Jamie Martin used in her terrific card she'll be posting this week (you can see a peek of it on this blog hop banner!) LET'S GET HOPPIN'! The official rules are HERE. You still need a U.S. mailing address to win, but we sure want to hear your comments anyway! You have until the end of Sunday, June 15th to finish your comments. If you missed any previous posts here they are for TUESDAYWEDNESDAY, and THURSDAY. We'll draw three random blog posts from all the posts this week. Then we'll choose one comment from each. Of course we'd be super grateful if you pin our projects to your Pinterest Boards, or if you Tweet, or Share on Facebook, follow us, like our pages. You know the drill!

 Here is how my card was made.
1.  Stamp Agapanthus Cluster on cream paper, sponge the edges with Vintage Sepia VersaFine.
2.  Sprinkle the edges with Shabby Blue Embossing Enamel and heat from underneath so the embossing powder doesn't blow off and layer onto a blue panel that has the edges sponged.
3.  Emboss Core'dinations paper from The Chocolate Box Collection with Dreamweaver Stencils LX7001 Damask by placing it into your embossing machine and be sure to use the embossing mat.
4.  Distress the edges, glue on the Agapanthus Cluster, add a blue rhinestone, tie with ribbon and glue to a blue card and sponge the edges.

  Here's who is posting today!

Core Blog

Debbie Standard

Kristine Reynolds

Krissy Fossmeyer

Tobi Crawford

Rhea Weigand

Trine Brandt Lassen

Tenia Nelson

Lea Kimmel

Jamie Martin

  ***Blog Hop Hint - if you click on a link that takes you to a page saying something like, "Sorry this page cannot be found," just click on the header at the top of the blog (usually a picture, or the blog's name), and it will take you to that blog's most recent post. That post *should* be our hop. If not, you can probably scroll down a short way to find the hop post. When in doubt type Stampendous in the search box to find the most recent post about our products.
***Blog Hop Hint - if you click on a link that takes you to a page saying something like, "Sorry this page cannot be found," just click on the header at the top of the blog (usually a picture, or the blog's name), and it will take you to that blog's most recent post. That post *should* be our hop. If not, you can probably scroll down a short way to find the hop post. When in doubt type Stampendous in the search box to find the most recent post about our products.

Stay connected
Follow my blog (in the right column)
Follow me on Twitter
Follow me on Instagram- stampthis


https://blogger.googleusercontent.com/img/b/R29vZ2xl/AVvXsEiBIB7cl3FWcUqRpVNE2xf0uD7bSSaDv8EJChhD3TSJRrDTTqubuFddCha_Vsye2BIOBKX1yGUjGJyPJvjizD-izRFYxEG1Q0kTmLKEiANGSeoreVxGdz2kjJCF6lGrlm9fopxLmRzM6V04/s1600/Stampendous+logo.jpg

Wednesday, June 11, 2014

See What You Can Do With Dreamweaver Stencils and Ink

IC_DW_Blog_Hop_Badge.jpg (688×212)


Welcome to our first ever collaboration week with Imagine Crafts/Tsukineko! We've shared all of our toys on both sides, so be prepared for Endless Possibilities! Three prize packages are available, each containing one set of each of these inks and stencils/dies. Just leave comments on each post of each day this week (June 9th - June 13th) for a chance to win! Winners will be announced on Tuesday, June 17th!

Imagine+SZ_MID_prize.jpg (1600×1600)
Imagine Crafts New StazOn Pads from Tsukineko

prize+pack.jpg (360×353)

Stencils and Dies Prize Package

Here's my creation for today:


1. Today I'm using one of  Dreamweaver Stencils new stencils, LL3039 Owl Buddy, you will tape onto white cardstock using REMOVABLE tape and sponge with Radiant Neon inks in Electric Yellow, Electric Orange, Electric Green and VersaFine Vintage Sepia.
2.  Remove stencil and place the new matching die DG751 Nesting Owls over the sponged owl, tape with removable tape and run through your diecut machine.
3.  To help me place my cut pieces I stenciled the owl on kraft colored paper with Electric Yellow so I would have proper placement.  Glue pieces down with Beacon Adhesives 3 in 1 glue except for the wings, beak and feet, use 3D Foam Squares by Scrapbook Adhesives by 3L.
4.  Glue on googly eyes using 3 in 1 glue, tear three sides of the paper and sponge with Vintage Sepia VersaFine ink.
5.  Wrap a twig with cream colored cord, add beads and glue as show.  Also glue a twig under the feet.  3 in 1 glue worked great to glue these down.
6.  I got a fun product to work with from Imagine Crafts that I haven't used before and I LOVE it!  It's the irRESISTible sprays, luckily the two I got are some of my favorite colors to work with Desert Sand and New Sprout.  They are colored texture spray so not only do you get pretty colors you get texture!  Spray both colors on a cream panel, let dry and glue the panel onto a kraft colored card.
7.  Diecut three of the DM2001 Petite Fern from sage green cardstock and glue to the cream panel and mount owl.

Just Imagine the possibilities of what everyone else has created!


Stay connected
Follow my blog (in the right column)
Follow me on Twitter
Follow me on Instagram- stampthis

https://blogger.googleusercontent.com/img/b/R29vZ2xl/AVvXsEh51wyTO6jT5VTdYnB6w_G_m5HpVcLHg74CtPgP_LxPEKzn_V-OoKqGG2xT1wqb9akJ4WnFtjyWN2v_w0oXJVDqSV3SyVI_lnvmji1y88Z-8_yaN4exn-xXopYtjiwAjsF2De1Y9Uh9R-yQ/s1600/Dreamweaver+logo.jpg

Tuesday, June 10, 2014

Stampendous and Core'dinations All Week!

2014_06_coredinations

Welcome to another week long collaboration! This week we're playing with Core'dinations' gorgeous papers! They always make a project pop with the addition of so much texture! Plus, they're just plain yummy colors! We love the way you can sand the papers to allow the coordinating color core show through. This card from our own Kristine Reynolds really highlights this fantastic technique. This works with embossing folders, metal dies (like those from our friends at Dreamweaver Stencils), or just sanding straight on the paper to create a distressed look.Sleepy Reader by Kristine Reynolds (House-Mouse Designs® Gruffies® by Ellen Jareckie)[/caption]   Of course there are prizes this week! Three prize packages will be awarded. Package includes the Lovely Garden Stamp Set; the Matching Lovely Garden Cutting Dies; a Sand It Kit from Core'dinations which includes a sanding block, replacement sandpaper, and a "must-have" Dust Buddy clean up cloth; Core'dinations will also be sending the lucky winners some of their fantastic 6" X 6" paper pads. PLUS an extra special bonus - our friends at Dreamweaver Stencil will be adding the gorgeous Stone Wall stencil that Jamie Martin used in her terrific card she'll be posting this week (you can see a peek of it on the blog banner!) LET'S GET STARTED! The official rules are HERE. You still need a U.S. mailing address to win, but we sure want to hear your comments anyway! We'll draw three random blog posts from all the posts this week. Then we'll choose one comment from each. Of course we'll love you even more if you pin our projects to your Pinterest Boards or if you Tweet, or Share on Facebook, follow us, like our pages. You know the drill!


1.  Emboss Dreamweaver Stencils LG611 on Core'dinations The Chocolate Box paper by running it through your Big Shot using the embossing mat.
2.  Use Core'dinations paper sander and sand the to of the paper to reveal the core color. Layer it onto yellow Core'dinations paper, mount piece to teal paper from the Spotted collection and set aside.
3.  Stamp small flower from Cling Jumbo Lovely Garden set three times, leaf one time and the butterfly once on white cardstock with Onyx Black VersaFine ink and heat set.
4.  Color flowers using Radiant Neon ink in Electric Orange, Electric Yellow and Electric Green using Inkblusher sponges.  To add shadows use Q-tips to place color exactly where you want it.  Do the same to the leaf using Electric Green.
5.  Color the butterfly with watercolor pencils.
6.  Cut out all of the pieces using the Lovely Garden Die Cut Set from Stampendous by placing them over the image, tape down using REMOVABLE tape and run it through your Big Shot.
7.  Mount flowers to the the top corner of your card using Beacon Adhesive 3 in 1 glue and Scrapbook Adhesives by 3L 3D Foam Squares and glue the butterfly after bending the wings up (don't glue down the wings).
8.  Stamp sentiment from the Say It Today set using Onyx Black on cream paper.  Layer onto a strip of cardstock that has been rubbed with Versamark ink, sprinkled with Aged Teal Embossing Enamel and heated from the bottom so the chunky powder doesn't blow off.  Mount to the card using 3D Foam Squares.

  Here's who is posting today!

Core Blog

Tenia Nelson

Jennifer Edwards

Lea Kimmel

Ava Gavloski

Jamie Martin

Suzanna Lee

Krissy Fossmeyer

Kristine Reynolds

  ***Blog Hop Hint - if you click on a link that takes you to a page saying something like, "Sorry this page cannot be found," just click on the header at the top of the blog (usually a picture, or the blog's name), and it will take you to that blog's most recent post. That post *should* be our hop. If not, you can probably scroll down a short way to find the hop post. When in doubt type Stampendous in the search box to find the most recent post about our products.

Stay connected
Follow my blog (in the right column)
Follow me on Twitter
Follow me on Instagram- stampthis


https://blogger.googleusercontent.com/img/b/R29vZ2xl/AVvXsEiBIB7cl3FWcUqRpVNE2xf0uD7bSSaDv8EJChhD3TSJRrDTTqubuFddCha_Vsye2BIOBKX1yGUjGJyPJvjizD-izRFYxEG1Q0kTmLKEiANGSeoreVxGdz2kjJCF6lGrlm9fopxLmRzM6V04/s1600/Stampendous+logo.jpg

Thursday, June 5, 2014

Two Hearts


 At Dreamweaver Stencils, we love to make our monthly challenges something for everyone, and not so strict that no one wants to play along. This month our challenge is, "Old, New, Borrowed, Blue", with the obvious thought being a wedding theme...but not necessarily. Add an old embellishment or picture. Use a new stencil design or technique. Borrow, or CASE (copy and say everything) another designers project, and obviously, blue...is blue. Where will YOUR creative process take you for this month? We'd love to see! And remember, linking your creations with the Inklinkz tool at the end of the team posts, provides you with the opportunity to win the stencil of your choice! Here's what I've created for this week...

June is a popular time for weddings and anniversaries so to celebrate this I have made an anniversary card which my husband will probably be getting since our anniversary is this month!  If you are in need of a wedding card all you have to do is use a different sentiment and this will be perfect.
Here is how my card was made. 

1.  Put stencil LL3010 Tole Heart on kraft color card stock, use removeable tape to keep it in place and run through your embossing machine. 
2.  Keeping the stencil on, sponge with Versamark ink, remove stencil and emboss paper with Shabby Pink Embossing Enamel. 
3.  Repeat the process but emboss the second one with Shabby Blue Embossing Enamel.
4.  Die cut or punch a small heart from cardstock, rub with Versamark ink and emboss with Shabby Blue Embossing Enamel.  Glue in the center of the blue heart.
5.  Layer the blue heart onto blue and black paper and the pink heart onto pink and black paper.
6.  Stencil LJ899 Petals Background on a kraft color card using Tea Dye Distress Ink and Beige Brilliance.
7.  Layer hearts on a heart doily and pink paper and glue to card.
8.  Stamp sentiment at the bottom of the card with Sepia Versafine ink.


Here's what our "A" team has been working on this week:


Supplies
Stencils-Dreamweaver Stencils
Embossing powders and stamps-Stampendous
Embossing machine
Heat tool
Inks from Imagine Crafts- Versamark, Brilliance
Distress Ink

Stay connected
Follow my blog (in the right column)
Follow me on Twitter
Follow me on Instagram- stampthis


https://blogger.googleusercontent.com/img/b/R29vZ2xl/AVvXsEh51wyTO6jT5VTdYnB6w_G_m5HpVcLHg74CtPgP_LxPEKzn_V-OoKqGG2xT1wqb9akJ4WnFtjyWN2v_w0oXJVDqSV3SyVI_lnvmji1y88Z-8_yaN4exn-xXopYtjiwAjsF2De1Y9Uh9R-yQ/s1600/Dreamweaver+logo.jpg

Link your monthly challenge project here.