Featured Post

Privacy Policy

I'm working on a new privacy policy for my followers, but for now you should know that if you comment on my site, my site collects your ...

Wednesday, March 30, 2022

Cute Cow Thank You


 Today I'm making thank you cards and I picked this Cowlik Bouquet stamp from Stampendous to use.  When we bought our first house it was across the street from a field of dairy cows, and this reminds me of that and the fun years that we had there.

This stamp was quick to color, I left the cow white except for her collar and horns and just had to color the flowers.  It was then layered onto decorative papers and mounted to a card.  Adhesives from Scrapbook Adhesives by 3L were used to stick down and pop things up. A few Liquid Pearls dots were added around the image in Cornflower Blue.

Let's connect!

Disclaimer- I get free goodies for blogging about craft products! Today I'm sharing a card made with products from Stampendous

Wednesday, March 23, 2022

Hugs, Kisses, Birthday Wishes


With the first days of Spring here we are finally getting a few blades of green grass and a few trees have leaves.  To welcome Spring, I have a bright and cheery birthday card made with stamps, stencils and dies from Rubbernecker Stamps.  Here's how my card was made-
  • To make the background, the Plaid Texture Stencil was used with Carved Pumpkin Ink.  


This time I used the same color with both stencils but it's also fun to use different colors for each stencil.  Die-cut the stenciled piece with the Nested Rectangle Stitch Die.

  • Stamp the vase of flowers on watercolor paper with Onyx Black VersaFine Ink and emboss it with clear embossing powder.
  • Color the image with Clean Color Real Brush Pens and cut it out.

  • Now to assemble the card, layer the stenciled panel onto a slightly larger purple panel. 
  • This was then layered onto a white cardstock panel that was die-cut using the largest die from the Nested Rectangle Die Set and then mounted to a purple card.
  • Glue leaves that have been die-cut using the Large Ivy Die to the bottom of the card.
  • Pop up the vase on top of the leaves.
  • Glue the sentiment down to the right side.  The sentiment from the set was stamped with black ink on white cardstock and die-cut using a circle die.  Purple rhinestones were randomly applied around the sentiment.

Click on the product below to go to the Rubbernecker Stamps Online Shop.
 
Other Products Used
Cardstock from PrintWorks

Have a crafty day!

Let's Connect!

Affiliate and Product Disclosure
I am on various Design Teams and get free goodies for blogging about craft products but only because I love their products and genuinely use them. Ultimately my opinions are my own. A list of companies is in my sidebar.
Being part of various affiliate programs – when you click on an affiliate link and then go on to make a purchase, at no cost to you, I receive a small commission.  The affiliates I use include Rubbernecker Stamps.

Tuesday, March 15, 2022

You are Fabulous!


I have this watercolor Spring card up on the Scrapbook Adhesives by 3L Blog with a full tutorial with all of the adhesives listed and link.

  • Stamp the flowers onto watercolor paper that has been die-cut with a rectangle die, using  Onyx Black VersaFine Ink and emboss with Clear Embossing Powder.
  • Watercolor the image with Zig Clean Color Real Brush Pens.
  • Once the image is dry, stamp "You" on the top left corner with black ink and emboss with Clear Embossing Powder.


  • Once the image is dry, stamp "You" on the top left corner with black ink and emboss with Clear Embossing Powder.
  • Place three strips of Extreme Double-Sided Tape 1/8" across the stems of the flowers.  Sprinkle with Champagne Embossing powder and set aside.


  • Stamp the sentiment on decorative paper with black ink and using a circle die, cut out the image.
  • Cut the circle in half leaving room to place a strip of Extreme Double-Sided Tape 1/8" and attach this underneath the flower panel on the right side so that you can see the words.


  • Now layer this to a slightly larger black panel.
  • Stamp the sentiment on decorative paper with black ink and using a circle die, cut out the image.
  • Cut the circle in half leaving room to place a strip of Extreme Double-Sided Tape 1/8" and attach this underneath the flower panel on the right side so that you can see the words.


  • Add Gold Creative Photo Corners to the top left and the bottom right of a white cardstock panel and use E-Z Squares to mount this to a larger light blue cardstock panel.


  • Add splatters of Stormy Sky Ink and let dry.
  • Adhere a decorative paper panel diagonally to the panels using E-Z Squares.


  • Place 3D Foam Squares on the back of the black cardstock panel and pop it up diagonally on the decorative paper.
  • Randomly add dots of Nuvo Crystal Drops on the card using a stylus to ensure the size and shape of the dots.


  • Here are the adhesives used to make my card.


Materials Needed:

Scrapbook Adhesives by 3L® E-Z Squares 3D Foam Squares Creative Photo Corners Self Adhesive Mix

Home Hobby by 3L® Extreme Double-Sided Tape 1/8"

Plus
Stampendous- Stamps, Embossing Powder
Rubbernecker Stamps- Rectangle Die
We R Memory Keepers- Circle Die
Decorative Papers- My Momenta & Pink Paislee

Have a crafty day 💜

Let's Connect

Affiliate and Product Disclosure
I am on various Design Teams and get free goodies for blogging about craft products but only because I love their products and genuinely use them. Ultimately my opinions are my own. A list of companies is in my sidebar.

Monday, March 14, 2022

Butterfly Wishes


Hi, I hope that everyone is having a good start to the week! I have a Best Wishes card made with some new release products from Stampendous,  Wings Perfectly Clear Set and the Vertical Wishes Rubber Stamp.  

This was an easy card to make, both butterflies were stamped on white cardstock with Onyx Black VersaFine Ink, colored with Prisma Pencils and cut out. The sentiment strips are from the Vertical Wishes Rubber Stamp, which I love because it's a bunch of words in boxes that you can use as a pretty background for a card or tag or you can cut them apart and use them individually which is what I did. I also stamped the Vertical Wishes Rubber Stamp with black ink but I also stamp and emboss it with pretty colors to match my projects.


The green circle under the top butterfly was rubbed with VersaMark Ink, sprinkled with Spring Sparkle Lime Embossing Powder and then heat embossed.  You can't tell from the picture but it's so pretty and sparkly in person!  The polka dot background is a decorative paper called Dots n Stripes from Dress Your Craft. It was die-cut with a rectangle die layered onto a slightly larger white panel then attached to a purple card.

And to make sure that everything stays stuck down, I used the E-Z Runner Squares for everything that is flat and 3D Foam Squares to keep the wings up, adhesives are from Scrapbook Adhesives by 3L.

Be sure to share what you're making with Stampendous products on their Stampendous! Fans Facebook page, we'd love to see what you're making!

Let's connect!

Disclaimer- I get free goodies for blogging about craft products! Today I'm sharing a card made with products from Stampendous


Wednesday, March 9, 2022

All Ears


Hi there!  My card today uses stamps from Rubbernecker Stamps March New Release.  I'm really glad that they came out with this cute Bunny and Flowers Set, it has bunnies that can be used for Easter but the sentiments that come with it allows you to use the set year round.

Here's how my card was made-
  • Stamp images from the Bunnies and Flowers Set on watercolor paper with Onyx Black VersaFine Ink and emboss with clear embossing powder.
  • Watercolor the image with Zig Clean Color Clear Brush Pens and cut out using the Bunnies and Flowers Die Set and set aside.


  • Die-cut white glitter paper using the Mini Slimline Cover #3.

Glue the die-cut piece to purple decorative paper and set side.


  • Stamp the sentiment from the set on white cardstock with Electric Purple Radiant Neon Ink and emboss with Spring Sparkle Lavender Embossing Powder.  Layer this onto a slightly larger black glitter panel.


  • Die-cut vellum with the Nested Circle Scallop w/ Holes.


  • Now to assemble, glue the Mini Slimline Cover #3 panel to a white mini slimline card.
  • Glue bunny in the basket to the center of the die-cut vellum and glue to the bottom portion of the card.
  • Pop up the sentiment using foam squares and glue a small flower to the bottom right corner of the sentiment.


Click on the product below to go to the Rubbernecker Stamps online shop.

Have a crafty day!

Let's Connect!

Affiliate and Product Disclosure
I am on various Design Teams and get free goodies for blogging about craft products but only because I love their products and genuinely use them. Ultimately my opinions are my own. A list of companies is in my sidebar.
Being part of various affiliate programs – when you click on an affiliate link and then go on to make a purchase, at no cost to you, I receive a small commission.  The affiliates I use include Rubbernecker Stamps.

Tuesday, March 8, 2022

New Release-Rubbernecker Stamps


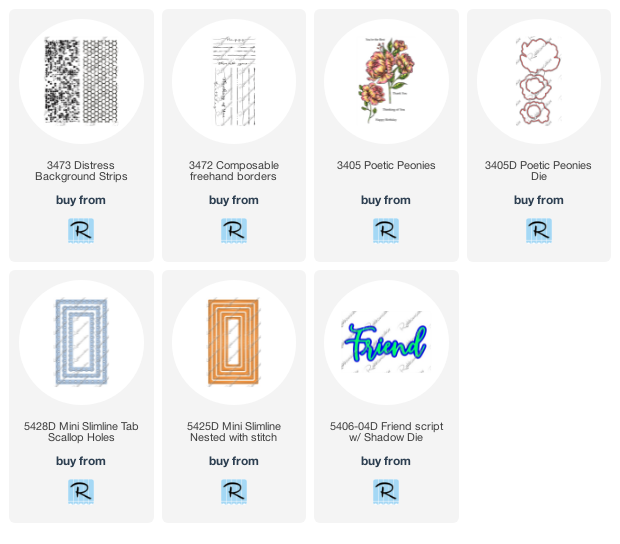
Today is New Release Day for Rubbernecker Stamps and I have a mini slimline card made with the new Distressed Background Strips and the Composable Freehand Borders Set.

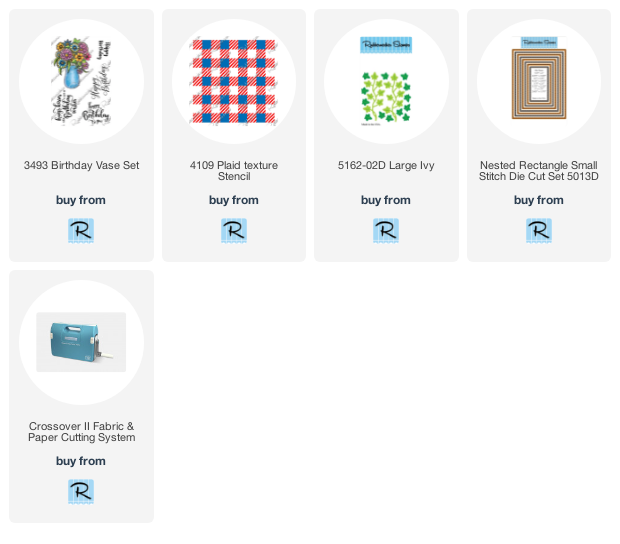
To make my card, the flower and leaves from the Poetic Peonies Set were stamped on watercolor paper and colored with Zig Clean Color Real Brush Pens and die-cut with coordinating dies.
Die-cut "Friend" using the Friend Script w/ Shadow Die from black cardstock.


Stamp gray cardstock with VersaMark Ink and emboss with White Embossing Powder, then die-cut the stamped image with the Mini Slimline Nested w/ Stitch Die.


Use the Mini Slimline Scallop Holes Die to die-cut white cardstock.


Use a tape runner to attach the Mini Slimline Scallop Holes onto slightly larger pink cardstock.
Stamp the link and the sentiment from the Composable Freehand Borders Set with Onyx Black VersaFine Ink and pop up the embossed piece in between them.


Use a tape runner to attach the leaves to the left side of the card and pop up the flower with foam squares.
Place 3D Foam Squares Micro Black on the back half of "Friend" and place as shown.


Click on product to go to the Rubbernecker Stamps online shop.
Have a crafty day!

Let's Connect!

Affiliate and Product Disclosure
I am on various Design Teams and get free goodies for blogging about craft products but only because I love their products and genuinely use them. Ultimately my opinions are my own. A list of companies is in my sidebar.
Being part of various affiliate programs – when you click on an affiliate link and then go on to make a purchase, at no cost to you, I receive a small commission.  The affiliates I use include Rubbernecker Stamps.

Monday, March 7, 2022

Beeyond Grateful


I just love this sweet Bee Kind Perfectly Clear Set from Stampendous, the bee is beautiful and the sentiments in the set are words to live by!

To make my card- 
  1. Stamp the bee on white cardstock with Onyx Black VersaFine Ink and color it with Prisma Colored Pencils.
  2. The dripping honey was also stamped on white cardstock, then sponged with yellow ink, cut out and glued to the top of the bee panel.
  3. Layer this onto a slightly larger black cardstock panel and set aside.
  4. Stamp the sentiments on white cardstock strips with black ink, outline the word "Bee" with a yellow pencil and glue the pieces to the card as shown.
  5. Glue decorative paper to a yellow card and mount the bee image.

PrintWorks- Yellow & Black Cardstock
Scrapbook Adhesives by 3L- Adhesives


Here's all that comes in the Bee Kind Perfectly Clear Set.

Let's connect!

Disclaimer- I get free goodies for blogging about craft products! Today I'm sharing a card made with products from Stampendous


Tuesday, March 1, 2022

So Sorry


Do you ever say or do something that maybe you shouldn't?  I'm guessing you do and what better way to say "sorry" than with a cute card that's sure to put a smile on that angry person's face.  I have this card up on the Scrapbook Adhesives Blog today, go check it out and see what the other Designers have been up to.

  • To start, die-cut white cardstock with a rectangle die and stamp the tree stump from the Adorable Otters Set with Onyx Black VersaFine Ink and color with Prisma Colored Pencils.
  • Next clouds were stenciled on the top portion of the rectangle with blue Distress Oxide Inks using a Cloud Stencil from Rubbernecker Stamps.

  • After the otter has been stamped, colored and cut out 3D Foam Circles White Mix were paced on the back.  You want to make sure that you put enough 3D Foam Circles on the back to ensure that the image doesn't sag.


  • After the red tape liner is removed, sprinkle Maroon Micro Glitter on the tape and rub the glitter to make sure all of the tape is covered with glitter.

  • Place E-Z Squares on the back of the otter panel and mount it to a slightly larger brown cardstock panel.

  • Pop up the panel on the card using 3D Foam Circles.


  • Stamp the sentiment below the otter, on the decorative paper with black ink.
  • Place a strip of Extreme Double-Sided Tape 1/4" below the sentiment and add glitter, this tape is thinner than the one used on the white cardstock.

Skill Level: Intermediate

Creative Time: 35 minutes


Materials Needed:

Scrapbook Adhesives by 3L® E-Z Squares 3D Foam Circles Permanent White Mix

Home Hobby by 3L® Extreme Double-Sided Tape 1/4" Extreme Double-Sided Tape 1/8"

Plus
Stampendous- Glitter
Rubbernecker Stamps- Nested Rectangle Die, Cloud Stencil

Have a crafty day 💜

Let's Connect

Affiliate and Product Disclosure
I am on various Design Teams and get free goodies for blogging about craft products but only because I love their products and genuinely use them. Ultimately my opinions are my own. A list of companies is in my sidebar.