Featured Post

Privacy Policy

I'm working on a new privacy policy for my followers, but for now you should know that if you comment on my site, my site collects your ...

Thursday, April 25, 2019

Fox Friend


The end of school is just around the corner and wouldn't this make a great thank you card for a teacher who has worked so hard all year with our little kiddos?  The fox and sentiment are from the Fox Clear Set from Rubberenecker Stamps.  They were stamped on a white panel with Black Onyx VersaFine Ink and embossed with Clear Embossing Powder.  The panel was then die-cut using the Nested Rectangle Stitch Die  and the fox was colored with Zig Clean Color Real Brush Pens.

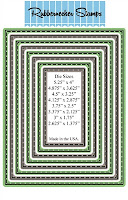
I wanted to frame the fox and sentiment and the Square Combo #1 OPC Die-cut framed both perfectly.  I love this frame, it doesn't come apart so when you cut your paper, you get a bunch of different size and shaped frames.

I just have to share the best-kept secret when it comes to die cutting machines, it's the Crossover II Fabric and Paper Cutting System.  I recently heard about it and was told I should get one because it's amazing, well I was skeptical because after all I already had three different ones but being the crazy crafter that I am, I thought why not.  Well oh my gosh I LOVE it!!
Here's why
1.  On the top of the Crossover is a wheel that adjusts the tension and how firm the pressure is on the die.
 2.  You can run embossing folders through it.
3.   You can even run your thick dies through it.
4.  The plates are thicker so the top plastic plate doesn't warp like the others.
Mine has only gotten a very slight bend but I just turn it over no problem.
5.  It comes with a metal cutting plate so you aren't cutting into a plastic plate.
6.  You can cut many different materials, click HERE to see a video of what all it cuts.

Click on picture to go to the Rubbernecker Stamps site.


Follow Me- Stamp This, on-
Twitter

Affiliate and Product Disclosure
I am on various Design Teams and get free goodies for blogging about craft products but only because I love their products and genuinely use them. Ultimately my opinions are my own. A list of companies is in my sidebar.
Being part of various affiliate programs – when you click on an affiliate link and then go on to make a purchase, at no cost to you, I receive a small commission.  The affiliates I use include Rubbernecker Stamps and Whimsy Stamps.


Wednesday, April 24, 2019

Poof!- Whimsy Stamps


Happy Whimsy Wednesday and your halfway to the weekend!  Whimsy Stamps has this cute new Cast a Spell Clear Set that I used for my card today and I used some of the smaller images to fit inside the Peekaboo Window 4 Die-cut.  If you click on the set below, you will be taken to the Whimsy Stamps site and you can see some of the other samples that were made by the design team. 


Click on product to go to Whimsy Stamps website

*NEW Cast a Spell Clear Stamps  *NEW Peekaboo Window 4 Die  *NEW 6x6 Paper Pack - Pretty Pastels   Polka Dot Stencil


Follow me, Stamp This


Affiliate and Product Disclosure
I am on various Design Teams and get free goodies for blogging about craft products but only because I love their products and genuinely use them. Ultimately my opinions are my own. A list of companies is in my sidebar.
I am also part of various affiliate programs – when you click on an affiliate link and then go on to make a purchase, at no cost to you, I receive a small commission.  The affiliates I use include Rubbernecker Stamps and Whimsy Stamps.
I hope if you like the content of my blog you will support me by clicking through these links to make your purchases.


Monday, April 22, 2019

Humming Bird Vine Shaker Card


Doesn't this shaker card just look like Spring!  The new Hummingbird Vine Set from Stampendous goes so well with the WindowRama Die-Cut Set I just had to use them together. **Here's a little secret when making shaker cards, rub the inside of the acetate with a new dryer sheet, this helps prevent the shaker bits from sticking to the acetate.

1.  Stamp hummingbird and flower from the Hummingbird Vine Set in black, color with colored pencils and die cut using the matching Hummingbird Vine Die Set.
2.  Make a shaker card using the WindowRama Die Set and fill it with Frantage Glass Glitter, in Champagne.
3.  Glue the hummingbird to the front top left of the shaker.
Stamp the sentiment on blue paper with black ink and emboss with clear embossing powder.  4.  Glue to the bottom right of the card.

Click on the product to go to the Stampendous website


Crossover II Die Cutting System
Rubbernecker Stamps

Supplies
Stampendous
DCP1012 WindowRama Die Set
QS5020 Hummingbird Vine Cling Set
QD5020 Hummingbird Vine Die Set
MPW811 Mixed Media White Cardstock
VersaFine- Onyx Black Ink
Crushed Glitter Glass

Plus
My Colors Cardstock- My Mind's Eye
Prisma Colored Pencils
Foam Tape Roll

Disclaimer- I get free goodies for blogging about craft products! Today I'm sharing a card made with products from Stampendous.

Friday, April 19, 2019

Birthday GateFold Card


I made a gatefold Birthday card using the new Star Die-Set from Whimsy Stamps and the have a Happy Everything Clear Set that has a star that fits perfectly in the larger die-cut start!  The stars were stamped with VersaMark Ink and embossed with Opaque Primary Frozen Embossing Powder from WOW Embossing Powder.  The round images on the sides are also stamped with VersaMark Ink then they are dusted with Perfect Pearls, Perfect Gold Powder.  This will stick to the ink and doesn't rub off.


The Birthday band was made by repeatedly stamping "birthday" with VersaMark Ink and embossing with the same powder on light blue paper, it was layered onto a darker blue paper and glued in the back.


A goldenrod colored card was cut to fit and glued inside the gatefold card.  This way you can write your message without it being seen when the gatefold is closed.

Click on the product to go to the Whimsy Stamps site.

*NEW Upon a Star Die Set  Happy Everything  VersaMark Full-Size Ink Pad - Original (Clear)


Follow me, Stamp This


Affiliate and Product Disclosure
I am on various Design Teams and get free goodies for blogging about craft products but only because I love their products and genuinely use them. Ultimately my opinions are my own. A list of companies is in my sidebar.
I am also part of various affiliate programs – when you click on an affiliate link and then go on to make a purchase, at no cost to you, I receive a small commission.  The affiliates I use include Rubbernecker Stamps and Whimsy Stamps.
I hope if you like the content of my blog you will support me by clicking through these links to make your purchases.

Thursday, April 18, 2019

The Sky's The Limit- Rubbernecker Stamps


This card was so much fun to make with the new Rubbernecker stamps.  They have a great new Watercolor Background Set that I used to make the clouds and am so happy how it turned out!  The images popped up on the sky are from the Lift Off set and are colored with Prisma colored pencils.  I used the Boarders #2 Set to cut the bottom of the "sky" paper and the gray, then popped them up on a white top folding card.  The houses and trees from the same set are stamped on the white card and colored with pencils.  The Banner and seperate sentiment were stamped on yellow paper and popped up.  The products used from Rubbernecker Stamps are shown below, click on them to be taken to the Rubbernecker Stamps site.


Have a creative day!

I just have to share the best-kept secret when it comes to die cutting machines, it's the Crossover II Fabric and Paper Cutting System.  I recently heard about it and was told I should get one because it's amazing, well I was skeptical because after all I already had three different ones but being the crazy crafter that I am, I thought why not.  Well oh my gosh I LOVE it!!
Here's why
1.  On the top of the Crossover is a wheel that adjusts the tension and how firm the pressure is on the die.
 2.  You can run embossing folders through it.
3.   You can even run your thick dies through it.
4.  The plates are thicker so the top plastic plate doesn't warp like the others.
Mine has only gotten a very slight bend but I just turn it over no problem.
5.  It comes with a metal cutting plate so you aren't cutting into a plastic plate.
6.  You can cut many different materials, click HERE to see a video of what all it cuts.

Click on product to go to the Rubbernecker Stamps site.


Follow Me- Stamp This, on-
Twitter

Affiliate and Product Disclosure
I am on various Design Teams and get free goodies for blogging about craft products but only because I love their products and genuinely use them. Ultimately my opinions are my own. A list of companies is in my sidebar.
Being part of various affiliate programs – when you click on an affiliate link and then go on to make a purchase, at no cost to you, I receive a small commission.  The affiliates I use include Rubbernecker Stamps and Whimsy Stamps.


Wednesday, April 17, 2019

Smile


Happy Whimsy Wednesday!  Last weekend we had rain so I broke out the new Raindrops Background stamp and thought it would be a perfect backdrop for the Chickadee Rubber Cling Stamp.  The Raindrops Background was stamped with VersaMark Ink, embossed with White Embossing Powder then sponged with Tumbled Glass and Faded Jeans Distress Inks. 
I used two circle dies from the Pierced and Stitched Circles Die Set to cut out a frame from kraft colored cardstock by using removable tape to hold the dies while it's being die cut.


The Chickadee was stamped with black ink and embossed with Clear Embossing Powder and colored with Zig Clean Color Real Brush Pens.  Once cut out it was glued to the Raindrops panel along with the circle.  

Smile was cut from the bottom of the Raindrop panel, then it was glued to a kraft colored card.  A couple of pieces needed to be glued back in so the word could be easily read.


After the little bits got some glue on them the die was placed back over where it was cut out and the pieces were pusehed down.  I left this here for about a minute to make sure the pieces wouldn't move.
 And it's done!


Click on the product to be taken to the Whimsy Stamps site.

*NEW Rain Drops Background Rubber Cling Stamp  *NEW Chickadee Rubber Cling Stamp  Pierced and Stitched Circles Die Set  Smile Large Word Die


Follow me, Stamp This


Affiliate and Product Disclosure
I am on various Design Teams and get free goodies for blogging about craft products but only because I love their products and genuinely use them. Ultimately my opinions are my own. A list of companies is in my sidebar.
I am also part of various affiliate programs – when you click on an affiliate link and then go on to make a purchase, at no cost to you, I receive a small commission.  The affiliates I use include Rubbernecker Stamps and Whimsy Stamps.
I hope if you like the content of my blog you will support me by clicking through these links to make your purchases.


Tuesday, April 16, 2019

Butterfly Thanks


Hi my crafty friends, today I have a card made with Dies and Stamps from Rubbernecker Stamps.  The Butterflies are the 2 Part Butterfly #3 Die with the intricate die cut from silver glitter paper and the bold cut from pink decorative paper. The sentiment is from the Best Friends Etc Clear Set, stamped in black ink and embossed with clear embossing powder.  Strips of silver Washi Tape are used as accents.


Click on the product to go to Rubbernecker Stamps site.


Hope you all are having a creative day!!

Follow Me- Stamp This
Twitter

Affiliate and Product Disclosure
I am on various Design Teams and get free goodies for blogging about craft products but only because I love their products and genuinely use them. Ultimately my opinions are my own. See the sidebar for a list of companies.
I am part of various affiliate programs – when you click on an affiliate link and then go on to make a purchase, at no cost to you, I receive a small commission.  The affiliates I use include Rubbernecker Stamps and Whimsy Stamps.


Monday, April 15, 2019

The Stamps of Life


Today is my last day Guest Designing for The Stamps of Life featuring their March Card Kit.  I've had so much fun using all of the goodies that were packed in the really CUTE box that it was shipped in!

And a reminder of all that comes in this Kit.

I wanted to share the cards that I made with this March Card Kit in one post.  I'll show the cards below with a link to the Blog post.  Hope you have enjoyed seeing all of these Birthday Celebration cards I've made!
Blog Post click HERE

Blog Post click HERE

Blog Post click HERE

Blog Post click HERE

Blog post click HERE


The April Card Kit is available now and you can see it HERE!
Here's how the monthly Card Kits work

New Card Kit (retail value over $50) automatically sent each month, charged on the 15th and shipped the next business day.
$39.98 per month / $34.88 per month for current Stamp or Die Hard Club Members
FREE shipping in the USA on your club shipments
FREE stamp set from The Stamps of Life as a welcome gift!
Yearly $25 Gift Certificate on your anniversary
15% Off every purchase (excludes Big Shots and classes)
24 hour Early Access to LIMITED EDITION products
Minimum 3 month commitment
Card Kits include various supplies to create 12+ cards, including an exclusive stamp set, die set, paper pad, embellishments, storage folder, envelopes and more. Also includes an idea post card, a video on our site, and an idea gallery.

Product Disclosure
I am on various Design Teams and get free goodies for blogging about craft products but only because I love their products and genuinely use them. Ultimately my opinions are my own. A list of companies is in my sidebar.