Featured Post

Privacy Policy

I'm working on a new privacy policy for my followers, but for now you should know that if you comment on my site, my site collects your ...

Wednesday, June 24, 2020

Boat Docking


Hi, my crafty friends today's card uses the beautiful scenic Boat Docking stamp from Stampendous, how I wish I could be on that dock enjoying the water!

Here's how my card was made-

  • Stamp Boat Docking on white cardstock with black ink and color with colored pencils.
  • Layer onto a larger black and red panels set aside.
  • Glue the decorative paper onto a larger white panel and tie white and brown twine around the bottom before gluing to a red card.
  • Mount Nautical Anchor on the card with foam squares.
  • Stamp sentiment from the Ocean Wisdom Perfectly Clear Set on white cardstock with black ink and cut out using the Fitted Frames A Die Cut Set.


Click on the product to go to the Stampendous site.


Stampendous
P351 Boat Docking
SSC1246 Ocean Wisdom Perfectly Clear Set
DCP1005 Fitted Frames A Die Cut Set
MPW811 Mixed Media White Paper
STF082 Onyx Black VersaFine Ink

Plus
3D Foam Squares- Scrapbook Adhesives by 3L
Zip Dry Glue- Beacon Adhesives
Prisma Color Pencils
Cardstock- Red, Black
Decorative Paper

Have a creative day and follow me on 

Disclaimer- I get free goodies for blogging about craft products! Today I'm sharing a card made with products from Stampendous

Monday, June 22, 2020

Sunflower Perch Shaker


What better way to start off a Monday than with a shaker card, I used this new Sunflower Perch from Stampendous.  The pretty scenic background scene looks so nice framed by the shaker, it's a real focal point.

Here's how I made my card-
  • Stamp Sunflower Perch with black ink on white cardstock and color with Prisma colored pencils.
  • Die-cut a blue frame using a rectangle die.
  • Use the Fitted Frames B Die Set and cut a panel from yellow cardstock and stamp a background using the Grunge Script Set and Butterscotch ink. Glue this to a top folding blue card.
  • Glue acetate to the underside of the rectangle frame, apply foam tape around all edges.  Sprinkle shaker bits in the center of the Sunflower Perch panel and place the frame over this.
  • Tie ribbon around the card and glue the shaker panel to the card.


Stampendous Products
P352 Sunflower Perch
CRS5109 Cling Grunge Script Stamp Set With Template
DCP1006 Fitted Frames B Die Set

Have a creative day and follow me on 

Disclaimer- I get free goodies for blogging about craft products! Today I'm sharing a card made with products from Stampendous


Thursday, June 18, 2020

Bon Bon Birthday


Oh I just can't get enough of these House-Mouse Design stamps from Stampendous, they're the cutest!!  If you haven't seen all that Stampendous carries you'll want to check it out, they even have clear sets. 

Here's how my card was made-

  • Stamp Bon Bon Birthday on white cardstock with black ink, color with colored pencils and shade the edges with Scatter Straw Ink.
  • Layer onto a larger black panel and set aside.
  • Glue a strip of decorative paper onto a blue card and glue Bon Bon Birthday to this.
  • Stamp sentiment from Friend Wishes Perfectly Clear Stamp Set on white cardstock with black ink and cut out using the Fitted Frame B Die Set.
  • Pop up using foams squares.
  • Randomly apply orange Nuvo Crystal Drops.


Stampendous
MP120 Bon Bon Birthday
SSCM5003 Friend Wishes Perfectly Clear Stamp Set
DCP1006 Fitted Frames B Die Set
MPW811 Mixed Media White Paper
STF082 VersaFine Ink- Onyx Black

Plus
Prisma Colored Pencils
Nuvo Crystal Drops- Orange
3D Foam Squares- Scrapbook Adhesive by 3L
Zip Dry Glue- Beacon Adhesives
Paper- Blue Cardstock, Decorative Paper
Distress Inks- Scattered Straw

Have a creative day and follow me on 

Disclaimer- I get free goodies for blogging about craft products! Today I'm sharing a card made with products from Stampendous


Tuesday, June 16, 2020

Band of Mice Embrace Today


Embrace today, is something we all should do and make each day the best we can.  That's exactly what this Band of Mice is doing while playing their little miniature instruments.  
The Band of Mice is a House-Mouse Designs stamp from Stampendous and the sentiment is from the Smile Sentiments Perfectly Clear Stamp Set.

Here's how my card was made-
  • Stamp Band of Mice on white cardstock with black ink and color with colored pencils.
  • Shadow around the image with green decorative chalk and layer the image onto a larger black panel then set aside.


  • Glue decorative papers onto a white card and apply gold washi tape to cover the seam.
  • Pop up the Band of Mice on the card using foam squares.
  • Stamp sentiment from the Smile Sentiments Perfectly Clear Stamp Set on a strip of white cardstock with black ink. Glue to the bottom of the card.

Click on the product below to go to the Stampendous site.


Products
Stampendous
P121 Band of Mice
SSC1316 Smile Sentiments Perfectly Clear Stamp Set
MPW811 Mixed Media White Paper
STF082 VersaFine Onyx Black Ink

Plus
Prisma Colored Pencils
3D Foam Squares- Scrapbook Adhesives by 3L
Zip Dry Glue- Beacon Adhesives
Decorative Chalk- Green
Washi Tape
Black Cardstock
Decorative Paper- The Paper Studio
Nuvo Crystal Drops- Copper

Have a creative day and follow me on 

Disclaimer- I get free goodies for blogging about craft products! Today I'm sharing a card made with products from Stampendous


Monday, June 15, 2020

Alligator Hugs


Hi there, Jamie here today with a card to send to friends we haven't been able to see for a while to let them know that we're thinking of them.  Green is my favorite color and it goes so well with the pinks from the Color Fuse Ink Set #5 and with a touch of black, the card really pops!

Here's how my card was made-
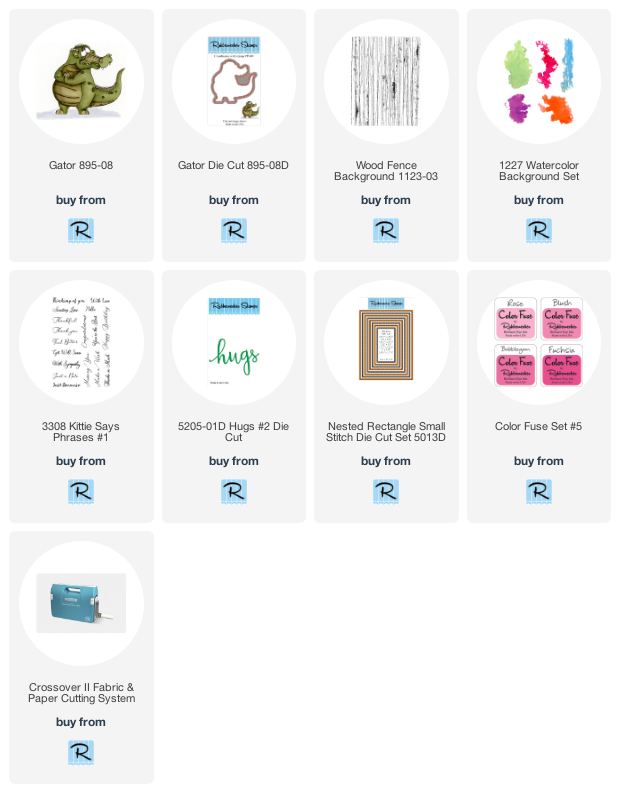
  • Stamp  Gator on watercolor paper with Onyx Black VersaFine Ink and color with Inktense Pencils  #100, #1530, #1540 and use the matching die-cut to cut out.
  • Stamp Wood Fence on white cardstock Color Fuse Ink #5 and use a blending brush to add a lighter shade of pink ink to the panel.
  • Die-cut the panel using the largest die from the Nested Rectangle Small Stitched Die Cut Set and glue this to a black card.
  • Take a 4" x 5 1/4" piece of white cardstock, hold it over the right side diagonally until you get the look that you like and while holding it, cut off the excess paper hanging off of the right side and bottom.
  • Use the Watercolor Background Set and the two lightest colors from the Color Fuse Ink Set #5 to stamp the watercolor image on the bottom of the white cut panel.
  • Glue this panel to the Wood Fence panel leaving some of the pink showing on the right side.
  • Stamp the sentiment from the Kittie Says Phrases #1 Set on a pink strip of cardstock with black ink and glue to the white panel.
  • Use the Hugs #2 Die Cut to cut hugs out of black cardstock and glue above the white panel.
  • Pop up the cut-out Gator on the card using foam squares and add a few self-adhesive rhinestones.

Click on the product to go to the Rubbernecker Stamps online shop


Follow Me- Stamp This, on-
Twitter

Affiliate and Product Disclosure
I am on various Design Teams and get free goodies for blogging about craft products but only because I love their products and genuinely use them. Ultimately my opinions are my own. A list of companies is in my sidebar.
Being part of various affiliate programs – when you click on an affiliate link and then go on to make a purchase, at no cost to you, I receive a small commission.  The affiliates I use include Rubbernecker Stamps.


Tuesday, June 9, 2020

Bizzy Bees- June Paper Door Kit


Today's June 10th and that means it's release day for Whimsy Stamps,  June Paper Door Kit  and boy do they have another cute one this month!  The stamp set comes with nine adorable bees and sentiments that can be mixed and matched. 

Directions

  • Stamp the three bees from the Bizzy Bee Stamp Set with Onyx Black VersaFine Ink, heat set to dry ink and color with colored pencils.
  • Cut out the bees using the Bizzy Bee Outline Dies and set the bees aside.
  • Use the Slimline Card Builder Die to cut out a long panel from white cardstock.
  • Place the Honeycomb Drips Stencil on top of the white die-cut panel and using a blending brush, apply Wild Honey.  Once dry apply Squeezed Lemonade also using a blending brush.  Glue this to a long white card.
  • Using the shapes in the Slimline Card Builder Die Set, die-cut two squares and one circle on the honeycomb panel and set aside.
  • Die-cut the same shapes from decorative paper from the 6 x 6 Paper Pack and glue into the matching die-cut shapes.
  • Pop up the bees on the card using foam squares.

  • Stamp sentiments on black cardstock with VersaMark Ink and emboss with white embossing powder.  Glue two of them down and pop up the middle one with foam squares.

No photo description available.


Paper Door Supplies: 
6 x 6 paper pack- Bizzy Bee
Bizzy Bees Stamp Set
Bizzy Bees Outline Dies
Slimline Card Builder Die
Honeycomb Drips Stencils

Whimsy Stamps Supplies:
Nuvo Deluxe Adhesive
VersaFine Onyx Black Ink
3D Foam Circles

Other: 
Prisma Colored Pencils
White Embossing Powder
White Cardstock
Black Cardstock

Cardstock Measurements:


Here's how the Paper Door Kits work and what a great value it is.
Whimsy Stamps PAPER DOOR kits for 2020, now your monthly crafty goodness delivered right to your front door is even more affordable, and includes even more exclusive Whimsy Stamps products!
BRAND NEW kit debuting on the 10th of each month
Each kit is a $50+ retail value for only $29.95 plus shipping
You get PRIVATE access to PDF files with step-by-step instructions for at least 4 different projects
We’ve made PAPER DOOR an easy and affordable way for you to enjoy a monthly card making kit:
NO minimums
NO subscriptions to commit to
NO wait lists to sweat out
NO multi-tier pricing
Each kit is a LIMITED EDITION and individual items may or may not be released at a later date. Supplies are limited so order yours today, and unlock your creativity with Whimsy Stamps PAPER DOOR kits!


Have a creative day and follow me on 
Instagram

Affiliate and Product Disclosure
I am on various Design Teams and get free goodies for blogging about craft products but only because I love their products and genuinely use them. Ultimately my opinions are my own. A list of companies is in my sidebar.
Being part of various affiliate programs – when you click on an affiliate link and then go on to make a purchase, at no cost to you, I receive a small commission.  The affiliates I use include Whimsy Stamps.

Monday, June 8, 2020

Let's Do This Together


Hi my friends, Stampendous just released and absolutely adorable House-Mouse Designs set called Masked Mice Perfectly Clear Stamp Set.  It has mice being responsible and wearing masks, how cute is that!!?  It also comes with a bunch of mouse sayings about our current situation, not only is this a great set for what we are going through but it really is a piece of history that will be talked about for years to come.


I added a bottle of hand sanitizer to the bottom of my card and that comes from another new set, Survived 2020 Perfectly Clear Set it's a very funny set and oh so true, I'll be sharing cards made with this soon.


Have a creative day and follow me on 

Disclaimer- I get free goodies for blogging about craft products! Today I'm sharing a card made with products from Stampendous


Monday, June 1, 2020

Birthday Time!


Hi there, Jamie here with you today, I don't know about you but I'm always in need of birthday cards and Rubbernecker Stamps has this Party Balloons stamp that has the string from one of the balloons spelling out happy birthday in a really pretty font.  

Do you want to share what you have made with Rubbernecker Stamps products?  Be sure to go to the Rubbernecker Stamps Fans Facebook page and add your creation, we'd love to see it!!

Here's how my card was made-
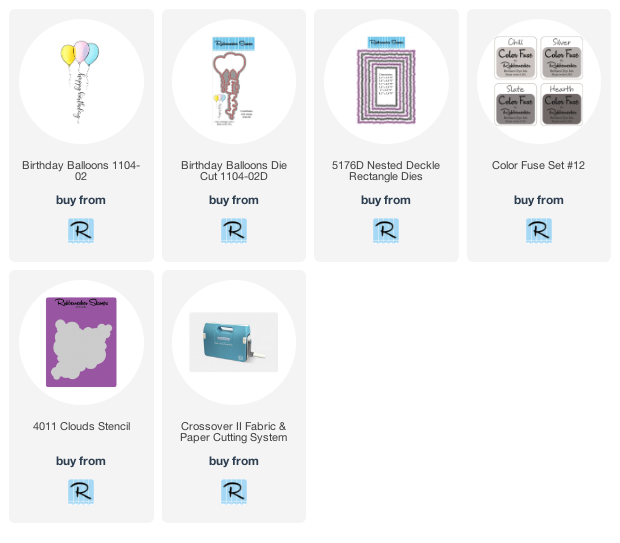
  • Stamp Party Balloons on watercolor paper with Onyx Black VersaFine ink, emboss with clear embossing powder and color with Zig Clean Color Real Brush pens.  
  • Use the matching Party Balloons Die Cut to cut out the balloons and set aside.
fP
  • Use the Clouds Stencil to stencil clouds on a 5 1/2" x 4 1/4" white cardstock panel using the grey inks from the Color Fuse Set #12.
  • Die-cut this panel using the Nested Rectangle Dies and glue this to a slightly larger pink panel then to a slightly larger white panel and finally glue this to a grey top folded card.

  • Pop up the balloons using 3D Foam Squares, then glue green and white ribbon towards the bottom of the card.
  • Take some of the same ribbon, fold it in half, diagonally trim the ends and push a cream color small brad through the ribbon and glue to the right top of the card.


  • Now for the final touch randomly add a few sequins to the card.

Click on these links below to go to the Rubbernecker Stamps online shop!

Follow Me- Stamp This, on-
Twitter

Affiliate and Product Disclosure
I am on various Design Teams and get free goodies for blogging about craft products but only because I love their products and genuinely use them. Ultimately my opinions are my own. A list of companies is in my sidebar.
Being part of various affiliate programs – when you click on an affiliate link and then go on to make a purchase, at no cost to you, I receive a small commission.  The affiliates I use include Rubbernecker Stamps.