Featured Post

Privacy Policy

I'm working on a new privacy policy for my followers, but for now you should know that if you comment on my site, my site collects your ...

Tuesday, June 22, 2021

Under the Sea


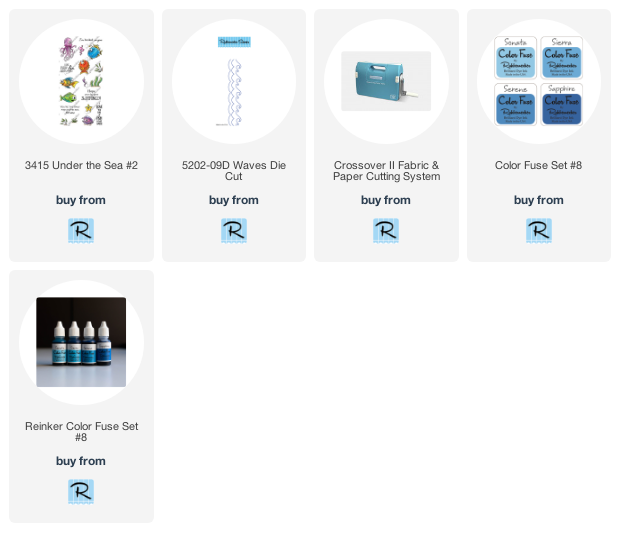
Today's card uses the new release Under the Sea Set #2 from Rubbernecker Stamps to make this fun summer card.  Be sure to read on to see how the waves were made!

Here's how my card was made-
  • Die-cut blue cardstock 4" x 5 1/4" with the Waves Die Cut about 1/3 from the top.
  • Use the top portion that was cut off like a stencil and leaving the top of the wave panel un-inked, start applying blue inks from the Color Fuse Inks #8 Set starting with the lightest color and move the "stencil" down each time you go darker.

  • Glue the waves to a white cardstock panel 4" x 5 1/4" using the Dual Tip Glue Pen from Home and Hobby by Scrapbook Adhesives by 3L.
  • Stamp the sentiment from the Under the Sea #2 with Onyx Black Ink and emboss with clear embossing powder from Stampendous.


  • Glue this to a light blue card using the same adhesive.
  • Stamp the fish from the Under the Sea #2 Set with black ink on watercolor paper and emboss with clear embossing powder. 
  • Watercolor the fish and cut them out.
  • Pop up the fish with 3D Foam Adhesive Squares as shown.
  • Glue on blue and clear Dew Drops for the bubbles above the fish.
  • Add a seashell sequin near the sentiment.

 
Plus
Cardstock- PrintWorks
Watercolour Cake Set- Mont Marte
Have a crafty day!

Let's Connect!

Affiliate and Product Disclosure
I am on various Design Teams and get free goodies for blogging about craft products but only because I love their products and genuinely use them. Ultimately my opinions are my own. A list of companies is in my sidebar.
Being part of various affiliate programs – when you click on an affiliate link and then go on to make a purchase, at no cost to you, I receive a small commission.  The affiliates I use include Rubbernecker Stamps.

Saturday, June 19, 2021

Sweet Wishes


Hi my friends, I got some new watercolors that I've been playing with, the Mont Marte Watercolour Cake Set.  I'm really happy with the way my ice cream cones from the Dessert Set from Rubbernecker Stamps turned out! 

Here's how my card was made- 
  • The cones were stamped on watercolor paper with Onyx Black VersaFine Ink and embossed with Clear Embossing Powder.

  • The cones were popped up on a strip of decorative paper using 3D Foam Circles Mixed White.
  • This was then layered onto a white panel that was dry embossed using the Vertical Lines Stencil from Rubbernecker Stamps.  Then it was mounted to a green card using E-Z Runner Grand Refillable Dispenser.
  • Sweet from the Build a Phrase #1 Set was stamped on a strip of white cardstock and a piece of ribbon was stapled onto the left side and it was popped up on the card.
  • Wishes, was die-cut from black cardstock and adhered to the bottom of the card.


  • Mont Marte- Watercolour Cake Set
  • PaperWorks Cardstock- Floral  Cardstock Pack (Green), Americana Cardstock Pack (White), Halloween Cardstock Pack (Black)
  • Decorative Paper Momenta Cardstock
  • Scrapbook Adhesives by 3L- 3D Foam Circles, Dual Tip Glue Pen, E-Z Runner Grand            Refillable  Dispenser
  • Stampendous- Onyx Black VersaFine Ink, Clear Embossing Powder

Have a crafty day!

Let's Connect!

Affiliate and Product Disclosure
I am on various Design Teams and get free goodies for blogging about craft products but only because I love their products and genuinely use them. Ultimately my opinions are my own. A list of companies is in my sidebar.
Being part of various affiliate programs – when you click on an affiliate link and then go on to make a purchase, at no cost to you, I receive a small commission.  The affiliates I use include Rubbernecker Stamps.

Tuesday, June 15, 2021

Peace, Tranquility & Harmony


Hi!  Today I'm up on the Scrapbook Adhesives by 3L Blog with this pretty springtime friendship card.  You can see the step-by-step directions with pictures by clicking HERE.


Have a crafty day!

Let's Connect!

Affiliate and Product Disclosure
I am on various Design Teams and get free goodies for blogging about craft products but only because I love their products and genuinely use them. Ultimately my opinions are my own. A list of companies is in my sidebar.


Sunday, June 13, 2021

Keep Blooming!


Look at this cute little mouse relaxing in a flower!  Dream Flower from Stampendous was stamped on white cardstock with Onyx Black VersaFine Ink and colored with Prisma Colored Pencils.  Shabby Blue Embossing Enamel was sprinkled at the top of the image for the sky, it gives a pretty sparkly blue that the camera just can't capture.  Below is a close-up so you can see it a bit better.


Let's connect!


Disclaimer- I get free goodies for blogging about craft products! Today I'm sharing a card made with products from Stampendous


Friday, June 11, 2021

Love Grows Here


Happy Friday my friends!  My project today is a quick and easy card made with the POP Bouquet Perfectly Clear Set and the Coordinating POP Shapes Die Set from Stampendous, along with pretty cardstock from PrintWorks.  I didn't need to color anything, just stamped, die-cut and added shadowing with a little ink as the same color as the cardstock.

The POP Shape Cutting Dies can be used alone or with one of the 6 stamp sets that it works with, such a GREAT deal!  Stop by the Stampendous website to see other projects made with this die set.


Supplies
Stampendous
POP Shapes Die Set
POP Bouquet Perfectly Clear Set
Best Day Perfectly Clear Set
POP Frame Die Set
Slim Woodgrain
White Embossing Powder
VersaMark Ink

Plus
Cardstock- PrintWorks- Pink, Blue, Purple, Green
Adhesive- Scrapbook Adhesives by 3L- 3D Foam Circles, E-Z Runner Grand 

Let's connect!


Disclaimer- I get free goodies for blogging about craft products! Today I'm sharing a card made with products from Stampendous


Monday, June 7, 2021

A Million Thanks


Hi there, today I have a thank you card using stamps, stencils and dies from Rubbernecker Stamp that can be used for many different occasions.

Here's how my card was made-
  • Die-cut gray cardstock using the Slimline Skyline Die.
  • Die-cut the Skyline using the Nested Scallop w/Stitch Die and die-cut white cardstock using the same die.

  • Place the Skyline on the white die-cut panel being sure to line up the edges.  Then place the top of the Skyline die-cut piece above the Skyline.  I used the Wendy Vecchi STAY-tion and placed the magnets on the top portion to make sure the piece wouldn't move.

  • Remove the bottom portion of the Skyline and apply Lemon Color Fuse Ink with a brush or sponge.


  • Glue the Skyline over the inked area.
  • Stencil the clouds using the Clouds Stencil with Sonata, Sierra and Sapphire Color Fuse Inks.

  • Stamp Thanks from the Thanks Set in the top right corner with blue pigment ink and emboss       with clear embossing powder.
  • Stamp A Million with Slate Color Fuse Ink above the Thanks.
  • Layer this piece onto slightly larger blue cardstock.
  • Tie the bottom with black and white twine and pop up on a white card.


  • Have a crafty day!

    Let's Connect!

    Affiliate and Product Disclosure
    I am on various Design Teams and get free goodies for blogging about craft products but only because I love their products and genuinely use them. Ultimately my opinions are my own. A list of companies is in my sidebar.
    Being part of various affiliate programs – when you click on an affiliate link and then go on to make a purchase, at no cost to you, I receive a small commission.  The affiliates I use include Rubbernecker Stamps.

    Wednesday, June 2, 2021

    Give Love


    Hi, today and I have a quick and easy card up on the Scrapbook Adhesives by 3L Blog, that is perfect for the paper crafter, paper hoarder and those who like to make pretty cards but don't want to color them.  I fall into the paper hoarder category and I have quite a bit of 12" x 12" decorative paper. I use the small patterns on cards but never used the large patterns until now!

    Be sure to go to the Scrapbook Adhesives by 3L Blog for a tutorial on how to make this card and what adhesives to use by clicking HERE.  


    Have a crafty day!

    Let's Connect!

    Affiliate and Product Disclosure
    I am on various Design Teams and get free goodies for blogging about craft products but only because I love their products and genuinely use them. Ultimately my opinions are my own. A list of companies is in my sidebar.


    Tuesday, June 1, 2021

    Slimline Birthday Shaker Card


    Happy July 1st everyone, today I'm up on the Scrapbook Adhesives by 3L Blog with this shaker card! I always like to have plenty of birthday cards on hand so that I have a lot to choose from, so I thought I would go big and bold with a shaker Birthday card.  

    Head on over to the Scrapbook Adhesives by 3L Blog for the tutorial and to see how easy it is to make!

    Have a crafty day!

    Let's Connect!

    Affiliate and Product Disclosure
    I am on various Design Teams and get free goodies for blogging about craft products but only because I love their products and genuinely use them. Ultimately my opinions are my own. A list of companies is in my sidebar.