Featured Post

Privacy Policy

I'm working on a new privacy policy for my followers, but for now you should know that if you comment on my site, my site collects your ...

Showing posts with label Christmas. Show all posts

Sunday, July 28, 2024

Three Cards From The St. Nick Set


 Today I have a clean and simple Christmas card that was made with the new St. Nick Die Set and Argyl Plaid 3D Embossing Folder from Spellbinders.

1.  To make my card, I embossed 3/4ths of a white cardstock panel with the Argyl Plaid 3D Embossing Folder, applied thin gold glitter washi tape where the embossing folder ends and glued it to a kraft colored card.
2.  I die-cut the trees from the St. Nick Die Set from two shades of green cardstock, kraft colored cardstock and the star from gold cardstock.
3. Once assembled, the trees on the right and left were glued flat and the center tree was popped up using foam tape from Scrapbook Adhesives by 3L.
4.  The Believe was die-cut from gold cardstock using the Snowflake Wishes Stamp and Die Set and glued to the bottom of the card.  The sentiment from the same set was stamped in green, die-cut and glued below the Believe.
5. Green rhinestones were randomly placed around the card.

This is the 3rd card that I have made with this set, here are the other two.

Click HERE to see more details on how this was made.


Click HERE to see more details on how this card was made.


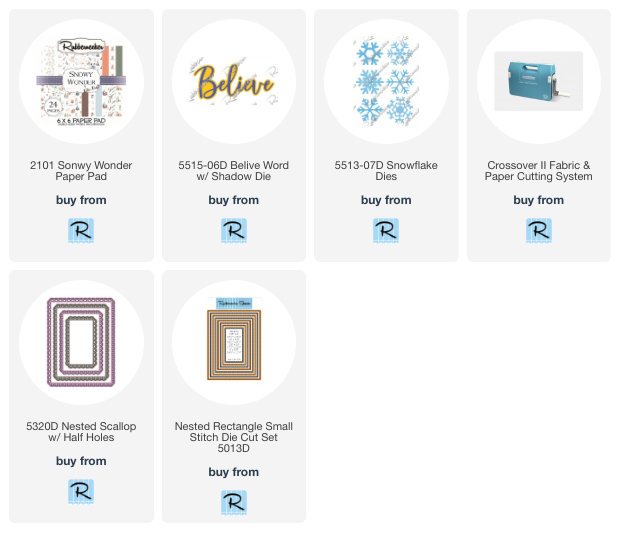
Here are the Spellbinder products used to make the top card. Click on and of the blue words to go to that product on the Spellbinder's site.


Let's Connect!

Affiliate and Product Disclosure
I am on various Design Teams and get free goodies for blogging about craft products but only because I love their products and genuinely use them. Ultimately my opinions are my own. A list of companies is in my sidebar.

Thursday, July 18, 2024

Slimline Santa Card


Today I have another card made using the St Nick Die Set from Spellbinders. This time I used the same die-cut pieces and sentiment but put it on a slimline card and got a completely different look.

For the background, I sponged blue ink on a white cardstock panel and glued white snowflakes that were die-cut from the St. Nick Set, to the background. 
The star was cut from gold cardstock and glued to the top right corner.
White glitter paper was hand cut and glued to the bottom of the panel. 
This panel was then mounted to a white slimline card.


Let's Connect!

Affiliate and Product Disclosure
I am on various Design Teams and get free goodies for blogging about craft products but only because I love their products and genuinely use them. Ultimately my opinions are my own. A list of companies is in my sidebar.


Saturday, July 13, 2024

St. Nick Christmas Card


 It's Christmas in July, that's when crafters start on Christmas cards, so they'll be done by the end of November and ready to mail out. After doing all of the work to make our beloved Christmas cards, we want the recipient to have the full month of December to display our cards.

My card is made using the St. Nick Die Set .


The background was made by adding Stormy Sky Distress Ink on a white cardstock that had been cut with the Emerald Cut Labels and Tag Die Set.  


The panel was then embossed using the Argyle Plaid 3D Embossing Folder.  This panel was mounted on a white cardstock panel that was also cut with the same die set and glued to a red card. St. Nick and the tree were then glued on the front panel.

Argyle Plaid 3D Embossing Folder

The Sentiment was made using the Snowflake Wishes Stamp and Die Set, with the Wishes die-cut from gold cardstock and the sentiment stamped in black on white cardstock.

Let's Connect!

Affiliate and Product Disclosure
I am on various Design Teams and get free goodies for blogging about craft products but only because I love their products and genuinely use them. Ultimately my opinions are my own. A list of companies is in my sidebar.


Wednesday, December 6, 2023

Christmas Card Gift Card Holder


Cut cardstock to 5 1/2" x 8 1/2" and fold in half to a 5 12" x 4 1/2" card.
Score the left side of the card at 1 14". 
Place double sided tape on each end of the 1 1/4" scored piece and fold to seal the edges. This will be for the gift card.
Cut the house decorative paper from the Snowy Wonder Paper Pad to 2 3/4" x 5 1/4" and glue it to a slightly larger brown panel from the same paper pad. Glue this to the top card panel.
Cut brown decorative paper from the same pad to 1 1/4" x 5 1/4".
Stamp this panel using snowflakes from the Christmas Cheer Gnomes Set using white ink and glue to the left side of the open card.
Die cut blue and white cardstock using the Nested Scallop w/ Half Holes and just white cardstock from the Nested Rectangle Stitch Die Cut Set.
Stamp the white Nested Rectangle Stitch panel with the sentiment from the Bells and Garland Set with Pecan Color Fuse Ink using a stamping apparatus such as a Misti, clean your stamp without removing it, then ink it with VersaMark Ink and restamp.
Emboss this with clear glitter embossing powder and glue it to the top of the blue die cut piece.
Randomly stamp this with snowflakes using a blue ink and add small rhinestones to the center of the snowflakes.
Stamp the white Nested Scallop w/ Half Holes with the sentiment from the Kittie Says Christmas with Pecan Color Fuse Ink and glue to the inside of the card and add a gift card.


Place double sided tape on each end of the 1 1/4" scored piece and fold to seal the edges. This will be for the gift card.


Cut the house decorative paper from the Snowy Wonder Paper Pad to 2 3/4" x 5 1/4" and glue it to a slightly larger brown panel from the same paper pad. Glue this to the top card panel.


Die cut blue and white cardstock using the Nested Scallop w/ Half Holes and just white cardstock from the Nested Rectangle Stitch Die Cut Set.


Stamp the white Nested Rectangle Stitch panel with the sentiment from the Bells and Garland Set with Pecan Color Fuse Ink using a stamping apparatus such as a Misti, clean your stamp without removing it, then ink it with VersaMark Ink and restamp.
Emboss this with clear glitter embossing powder and glue it to the top of the blue die cut piece.
Randomly stamp this with snowflakes using a blue ink and add small rhinestones to the center of the snowflakes.


Cut brown decorative paper from the same pad to 1 1/4" x 5 1/4".
Stamp this panel using snowflakes from the Christmas Cheer Gnomes Set using white ink and glue to the left side of the open card.
Stamp the white Nested Scallop w/ Half Holes with the sentiment from the Kittie Says Christmas with Pecan Color Fuse Ink and glue to the inside of the card and add a gift card.


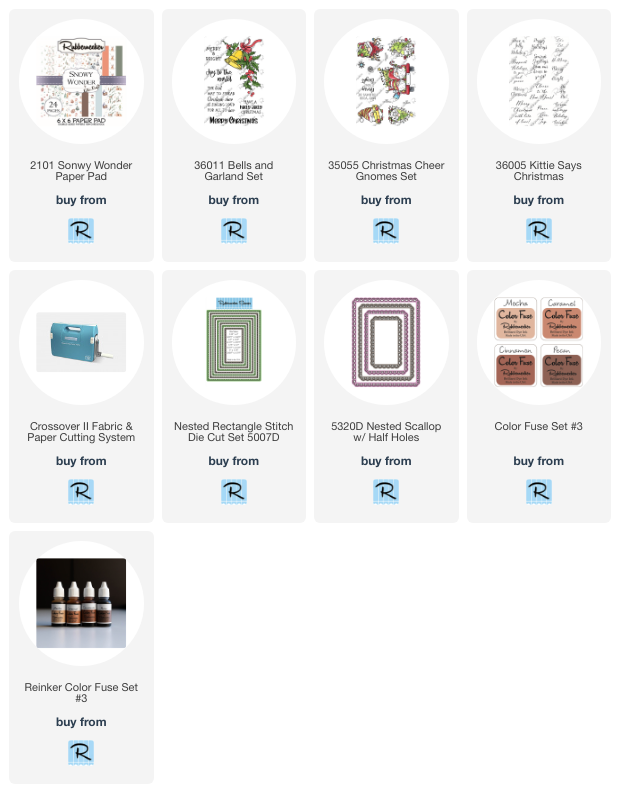
Click on the product below to go to the Rubbernecker Stamps online store.
 
Have a crafty day!

Let's Connect!

Affiliate and Product Disclosure
I am on various Design Teams and get free goodies for blogging about craft products but only because I love their products and genuinely use them. Ultimately my opinions are my own. A list of companies is in my sidebar.

Sunday, November 26, 2023

A Winter Hello


Today I have an all-occasion winter card that can be for Christmas, birthday, thank you, or a card just to say hi.

To make my card, I used the Snowman Etched Dies from Spellbinders

The small snowman, scarf and hat band were die cut three times from white glitter cardstock from Printworks Specialty paper. The scarves and hat bands were sponged with different colors of Distress Inks.
Since this glitter paper is smooth, it can be stamped on and run through your printer. The faces were stamped using Onyx Black VersaFine Ink and the nose was colored using an orange alcohol marker, I used the ones from Spectrum Noir. 
The hats were die cut from black glitter paper.

SPELLBINDERS HUGE SALE

Spellbinders is having a huge sale going on now!
Hear are the links, you'll want to be sure to check it out the prices are amazing!!


Spellbinders Black Friday Sale- https://shrsl.com/4bnw6
Spellbinders Clearance- https://shrsl.com/4bnwb


Have a crafty day!

Let's Connect!

Affiliate and Product Disclosure
I am on various Design Teams and get free goodies for blogging about craft products but only because I love their products and genuinely use them. Ultimately my opinions are my own. A list of companies is in my sidebar.


Monday, November 20, 2023

Season's Greetings Pink & Gray Card


I love traditional colors for Christmas cards but sometimes it's fun to use colors that aren't expected and that's what I've done.

Pink and gray are pretty together and I love how this turned out. The Merry Mugs Set ( https://shrsl.com/49sra ) was used to die cut decorative paper. The sentiment die and stamp is from Bibi's Snowflake Collection ( https://shrsl.com/4a73v ) AND it's currently on sale at Spellbinders.

Here's the link for the HUGE SPELLBINDERS SALE- https://shrsl.com/4bcmo be sure to take a look, you don't want to miss this!


Have a crafty day!

Let's Connect!

Affiliate and Product Disclosure
I am on various Design Teams and get free goodies for blogging about craft products but only because I love their products and genuinely use them. Ultimately my opinions are my own. A list of companies is in my sidebar.


Saturday, November 18, 2023

Magic of Christmas


 I'm playing along with Color Hues Color Challenge #76, the colors are red and metallic gold, but you can also use neutrals.

I made a Christmas card using dies and stamps from Spellbinders
I used the Shapeabilities Layered Poinsettia Etched Die Set (it's on sale for $10.99 off!) and die cut red cardstock. A couple of layers were sponged with red ink to get some color variation. 
The leaves were die cut from gold foil cardstock.
To make the background, a white cardstock panel was embossed using the Autumn Serenade 3D Embossing Folder and it was glued to a top folding red card.
The Sentiment was made using the Snowflake Wishes Clear Stamp & Die Set ( sale $6.75 off ), "believe" was die cut from gold foil cardstock and black cardstock. The gold was layered on top of the black, slightly askew.
Have a crafty day!

Let's Connect!

Affiliate and Product Disclosure
I am on various Design Teams and get free goodies for blogging about craft products but only because I love their products and genuinely use them. Ultimately my opinions are my own. A list of companies is in my sidebar.


Wednesday, November 15, 2023

Fun Fold Christmas Card


Today I have a fun fold Card using dies and decorative paper from Rubbernecker Stamps and all of the adhesives used are from Scrapbook Adhesives by 3L.  To make my card, I cut a sheet of 8 1/2" x 11" periwinkle cardstock diagonally. The cardstock was then scored to create the fold. Next a 4" x 5 1/4" piece of decorative paper paper was then cut diagonally (this will make two cards) and one piece was taped to the bottom fold using TAPE RUNNER.


Snow fakes were die-cut from white cardstock and glued to the top fold of the card using the DUAL TIP. The snowflakes that were hanging over the edge were cut off.


To make the frame, white cardstock was die-cut using a scalloped rectangle and and a stitched rectangle that's slightly smaller was cut from periwinkle cardstock and attached using RUNNER


The frame was centered and glued to the left top fold of the card, using the DUAL TIP.  Believe was die-cut from the same carstock colors, glued together using the DUAL TIP. Hearts were placed aroud the sentiment using the HEARTS RUNNER and crystal micro fine glitter was sprinkled on.


Click on the product below to go to the Rubbernecker Stamps online store.

Have a crafty day!

Let's Connect!

Affiliate and Product Disclosure
I am on various Design Teams and get free goodies for blogging about craft products but only because I love their products and genuinely use them. Ultimately my opinions are my own. A list of companies is in my sidebar.


Friday, October 20, 2023

Christmas Cheer


Wish your friends and family a little Christmas Cheer this holiday season with a cup of cocoa or hot toddy.
I used the Merry Mugs Die Set
and the Fran's Frames Dies both of these sets are from Spellbinders

I've had these red and black buffalo plaid note cards for a while and thought it would make a pretty background for my cup of cocoa. That's how I came up with this color combo, and I think I'll make more experimenting with different colors.
The white paper is white glitter paper from PrintWorks Specialty Paper (available on Amazon) so it has a lot of sparkle for the holidays.

Have a crafty day!

Let's Connect!

Affiliate and Product Disclosure
I am on various Design Teams and get free goodies for blogging about craft products but only because I love their products and genuinely use them. Ultimately my opinions are my own. A list of companies is in my sidebar.


Tuesday, October 10, 2023

Snow Glad We're Friends Card


Today is new release day over at Spellbinders and part of the release is this, Stampendous FransFormer Snowy Friends Clear Stamp Set


* I colored the snowmen with Prismas Colored Pencils and added Crystal Stickles to the fur on the hats.
* The postage die from the Stampendous Fran's Frames Etched Dies was used to layer the sentiment and it was popped up.


* The snow on the ground was embossed using some chunky white and gold embossing powder. It was heated from underneath so the embossing powder wouldn't blow away.

You'll want to take a look at the full Cool FranFormers Collection to see the three new cute winter sets.

Have a crafty day!

Let's Connect!

Affiliate and Product Disclosure
I am on various Design Teams and get free goodies for blogging about craft products but only because I love their products and genuinely use them. Ultimately my opinions are my own. A list of companies is in my sidebar.


Friday, September 29, 2023

Sending Sparkle Tag


Do you make gift tags for your gifts? It's a fun way to add a special touch to those pretty packages.

I used dies from the Dancin' Christmas Collection from Spellbinders
The Dancin' Penguin was used for my tag, he's just the cutest!


The sentiment is from the Bibi's Snowflakes Collection and I used the Snowflake Wishes Clear Stamp and Die Set to make the pretty sentiment.


The background of the tag is decorative paper.
Adhesives from Scrapbook Adhesives were used to stick things down and to pop them up.

Have a crafty day!

Let's Connect!

Affiliate and Product Disclosure
I am on various Design Teams and get free goodies for blogging about craft products but only because I love their products and genuinely use them. Ultimately my opinions are my own. A list of companies is in my sidebar.