Featured Post

Privacy Policy

I'm working on a new privacy policy for my followers, but for now you should know that if you comment on my site, my site collects your ...

Tuesday, September 29, 2020

I Don't Do Mornings!


Oh this little lady could be me, I am NOT a morning person even though I've tried, my brain just doesn't turn on before 11:00 am.  So needless to say coffee is my friend!  To make my card I used stamps, dies, and inks from Rubbernecker Stamps and in case you didn't know you can share what you've made with Rubbernecker Stamps on their Facebook page "Rubbernecker Stamps Fans. 

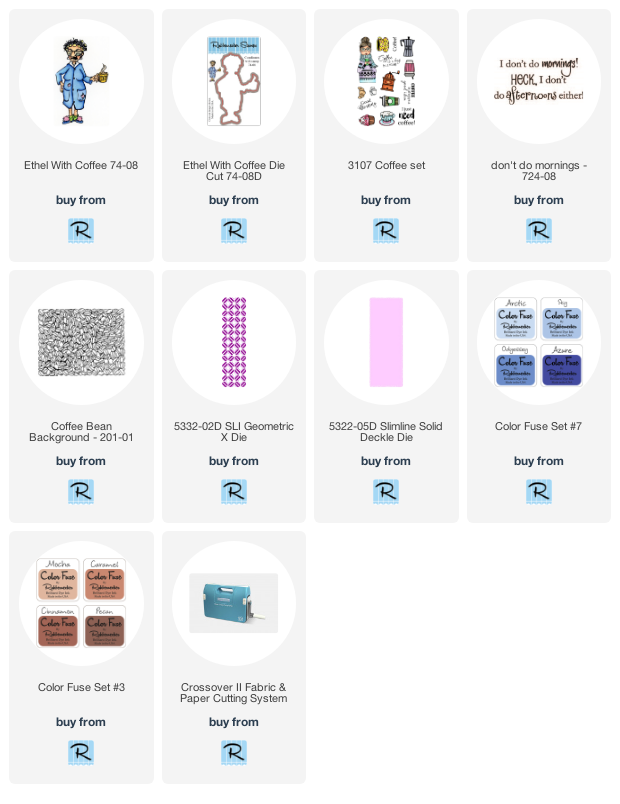
  • Die-cut white cardstock using the SLI Geometric X Die and cut out close to the design.  
  • Sponge Color Fuse Inks with Caramel, Mocha, Artic and Sky.  Glue to a slightly larger white piece of cardstock.


  • Die-cut white cardstock with the Slimline Deckle Die and stamp with the Coffee Bean Background stamp and Mocha Color Fuse Ink.  Glue this to a blue panel then onto a kraft colored slimline card.
  • Stamp Ethel With Coffee on watercolor paper using Onyx Black VersaFine Ink and color with Inktense Pencils.
  • Cut Ethel out with the Ethel With Coffee Die Cut and set aside.
  • Pop up Ethel with foam squares towards the bottom of the card.

  • Stamp Don't Do Mornings on a strip of white cardstock with Pecan Color Fues ink and sponge the edges with the same color.  
  • Glue this to a slightly larger kraft colored piece of cardstock and cut to leave a thin border and pop us with foam squares.


  • Stamp Coffee! three times on strips of white cardstock with Odyssey Color Fuse Ink and glue to the card as shown.
  • Add Unicorn Stickles to Ethel's rollers, slipper pom poms and earings.


Have a creative day!! 


Let's Connect!

Affiliate and Product Disclosure
I am on various Design Teams and get free goodies for blogging about craft products but only because I love their products and genuinely use them. Ultimately my opinions are my own. A list of companies is in my sidebar.
Being part of various affiliate programs – when you click on an affiliate link and then go on to make a purchase, at no cost to you, I receive a small commission.  The affiliates I use include Rubbernecker Stamps.

Monday, September 21, 2020

Chillin' With My Gnomies


Hi there, today I'm sharing my card Chillin' With My Gnomies, a slimline card.  I'm really loving the new releases that Rubbernecker Stamps has been coming out with lately, with all of the beautiful slimline dies and great stamps!   


Here's how my card was made-
  • I stamped three of the gnomes from the Garden Gnomes Set with Onyx Black VersaFine Ink on watercolor paper and colored them with Inktense pencils.
  • They were then cut out with the Garden Gnome Dies and set aside.
  • A white cardstock panel was die-cut with the Slimline Solid Postage Die with the SLI Circle Lattice Die in the center.
  • It was then glued to a slightly larger dark pink panel and glued to a white slimline card.

  • Next I die-cut white card stock with the Nested Banner Stitch Die Set, sponged Fern and Grass Die Inks on the bottom of the tag.
  • A sentiment from the Holly Circle Gnome Sentiment Set was stamped above the sponged ink on the tag with black ink.  A hole was punched in the top of the tag, ribbon was added and attached with a brad.
  • The tag was glued diagonally in the center of the card and the three Gnomes were popped up with foam squares as shown.


Now go and have a creative day!


Let's Connect!

Affiliate and Product Disclosure
I am on various Design Teams and get free goodies for blogging about craft products but only because I love their products and genuinely use them. Ultimately my opinions are my own. A list of companies is in my sidebar.
Being part of various affiliate programs – when you click on an affiliate link and then go on to make a purchase, at no cost to you, I receive a small commission.  The affiliates I use include Rubbernecker Stamps.

Wednesday, September 16, 2020

Apple Smile Jar Shaker Card


I'm so excited that Fall begins next week, it's my favorite season I'm ready for some cool weather Fall decorations and to pull out my sweaters and boots.  So to start off the season I have a shaker card made with the new Apple Smile stamp and the Dome Jar Shaker Die Set from Stampendous.  

-To make my card I die-cut decorative paper with the Dome Jar Shaker Die Set to make the jar card which is dimensional but lays flat and fits into a standard size envelop.  This die set is a great way to use up that decorative paper we all have been hoarding!  The lid of the jar was die-cut from glossy gold cardstock.
-Apple Smile was stamped with Onyx Black VersaFine Ink and colored with Prisma Pencils.  Mustard Distress Ink was sponged around the image.
-For the shaker bits I used Champagne Glass Glitter.  I live where it's humid and I have a problem with shaker bits clinging to the acetate, to help with this I rub the acetate with a new dryer sheet, then rub it with a paper towel to remove some of the dryer sheet film that it leaves behind.


Be sure to share the projects you've made with Stampendous products on their 
Stampendous! Fans Facebook page, they'd love to see what you're creating!  Have a creative day!
Let's connect!

Disclaimer- I get free goodies for blogging about craft products! Today I'm sharing a card made with products from Stampendous

Here are some places that you can find Stampendous Products-
First off check out your local Stamp Store, if they don't have it they can order it.
Online Stores


Thursday, September 10, 2020

Thanks for Everything!


Today I have a card made with the Happy Mother's Day Clear Set from Rubbernecker Stamps, but this set isn't only for Mother's Day since it includes four sentiment stamps and only one is for the Mom's, the others can be used for a variety of occasions.

To stamp the rose I used several different Color Fuse Ink Sets to create a pretty dimensional rose,  these inks are pretty to mix and match or use to use the colors in one set.


After the rose was stamped I went around the petals and leaves with Crystal Stickles to add shimmer but unfortunately, the camera didn't pick up the shimmer.  I'll take a video and post it on Instagram, if you're on Instagram be sure to follow me HERE.

The sentiment was stamped over the stem with Onyx Black VersaFine Ink then it was die-cut using the Nested Oval Small Stitched Die Set and layered onto a larger green die-cut oval.

A salmon-colored cardstock panel was stamped with the Wrapped String background stamp with Nectar Color Fuse Ink and layered onto a white card.  The rose was then popped up on the card using 3D Foam Squares.


Let's Connect!

Affiliate and Product Disclosure
I am on various Design Teams and get free goodies for blogging about craft products but only because I love their products and genuinely use them. Ultimately my opinions are my own. A list of companies is in my sidebar.
Being part of various affiliate programs – when you click on an affiliate link and then go on to make a purchase, at no cost to you, I receive a small commission.  The affiliates I use include Rubbernecker Stamps.

Wednesday, September 9, 2020

Make Every Day Great!


Have you seen the line of House-Mouse Designs from Stampendous?  Oh my gosh, they're the cutest and there are stamps for all occasions and just because.  Since this Corn Toothed stamp makes me think of Thanksgiving because the mice are having a yummy feast, I colored it in Fall colors.

  • To make my card I used Onyx Black VersaFine Ink to stamp it on white cardstock, then it was colored with Prisma Pencils.  
  • After it was colored, it was layered onto black and green cardstock. Set aside.
  • Next, I wrapped two corners of a taupe panel with glitter gold washi tape and glued it to a green card.  The stamped image was then popped up on the card using 3D Foam Squares from Scrapbook Adhesives by 3L.
  • Next, the sentiment from Courage Quotes Perfectly Clear Set was stamped with black ink and embossed with clear embossing powder on light green cardstock.  This set is full of wonderful encouraging sentiment that we all can appreciate.


  • The Fitted Frames A Die Set was then used to cut out the sentiment and pop it up in the right corner.  Take a look at this set and all of the dies that it comes with!


Supplies
Stampendous
HMP124 Corn Toothed
SSC1366 Courage Quotes
DCP1005 Fitted Frames A
MPW811 Mixed Media White Paper
STF082 Onyx Black VersaFine Ink

Plus
Cardstock- Taupe, Black, Green
Prisma Colored Pencils
3D Foam Squares and Tape Runner- Scrapbook Adhesives by 3L
Washi Tape- Glitter Gold
Heat Gun

Let's connect!

Disclaimer- I get free goodies for blogging about craft products! Today I'm sharing a card made with products from Stampendous

Here are some places that you can find Stampendous Products-
First off check out your local Stamp Store, if they don't have it they can order it.
Online Stores


Monday, September 7, 2020

Loving Hugs


Hi there, Jamie here with you today on this first Monday of September with a card that's good for any time of the year, because it's always a good time to send hugs!

Here's how my card was made-
  • Stamp white cardstock from The Paper Company 3.25" x 8.25" with Not So Many Random Dots repeatedly using Blush Color Fuse Ink.  Set aside.

  • Die-cut three shades of pink cardstock using the Slimline OPC Hearts and save all of the circles and hearts.

  • Place one of the die-cut panels on the stamped cardstock and place a small dot of Nuvo Adhesive in the centers of the hearts on the stamped panel, then place the hearts inside of the negative space of the die-cut piece as seen below.
  • Once the hearts and circles have been glued, carefully remove the larger slimline piece to reveal the pattern. 

  • Layer this piece onto a slightly larger black panel and apply black and white check washi tape to the left side.
  • Pop this up on a pink slimline card.


Follow Me- Stamp This, on-
Twitter

Affiliate and Product Disclosure
I am on various Design Teams and get free goodies for blogging about craft products but only because I love their products and genuinely use them. Ultimately my opinions are my own. A list of companies is in my sidebar.
Being part of various affiliate programs – when you click on an affiliate link and then go on to make a purchase, at no cost to you, I receive a small commission.  The affiliates I use include Rubbernecker Stamps.

Saturday, September 5, 2020

Haunted Hallow


Hi crafty friends!  I have another card ready for Halloween, isn't this Haunted Hallow stamp from Stampendous the cutest.  I know Halloween is supposed to be spooky but these pumpkins look pretty happy to me.

Here's how my card was made-
  • Stamp Haunted Hallow on Mixed Media White Paper, color with colored pencils and shadow around the image with blue decorative chalk. Here's a close up look at the coloring, I use the colored pencils to blend my colors, not blending pencils, blending pens, or blending fluid, it's not needed.

  • Layer onto a slightly larger black cardstock panel.  Set aside.
  • Glue decorative papers to a top folding orange card as shown and tie with a ribbon.
  • Stamp sentiment on white cardstock with black ink and emboss with clear embossing powder.
  • Pop up Haunted Hallow and sentiment using foam squares.

Supplies
Stampendous
P356 Haunted Hallow
SSC1320  Faboolous Perfectly Clear Set
EP020 Clear Embossing Powder
MPW811 Mixed Media White Paper
STF082 Onyx Black VersaFine Ink

Plus
Cardstock- Black, Orange
Decorative Paper-
Prisma Colored Pencils
3D Foam Squares- Scrapbook Adhesives by 3L
Zip Dry Glue- Beacon Adhesives
Decorative Chalk
Ribbon

The sentiment is from this set, so many to choose from!

Let's connect!

Disclaimer- I get free goodies for blogging about craft products! Today I'm sharing a card made with products from Stampendous