Featured Post

Privacy Policy

I'm working on a new privacy policy for my followers, but for now you should know that if you comment on my site, my site collects your ...

Showing posts with label Valentine's Day. Show all posts

Wednesday, February 23, 2022

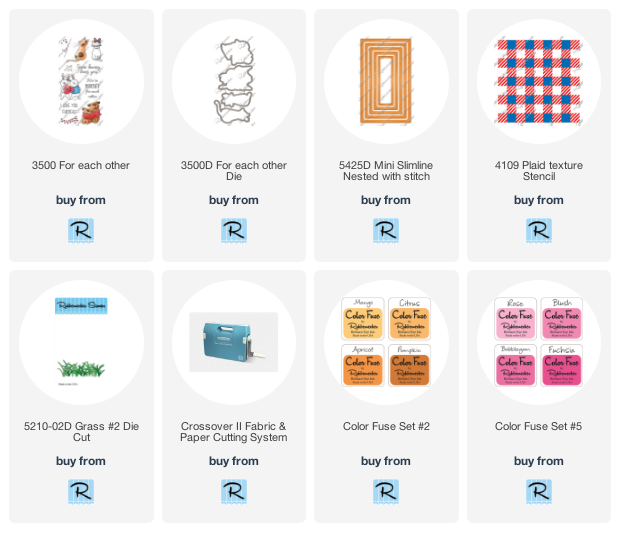
We're Purrfect


Die-cut white and pink cardstock with the Mini Slimline Nested with Stich Die.
Stencil the white die-cut panel with the Plaid Texture Stencil which is a two-part stencil with Blush from the Color Fuse Ink Set #5 and Citrus Color Fuse Ink Set #2.
Glue the stenciled panel onto a slightly larger white panel. Set aside.


Stamp cats from the new For Each Other Set, on watercolor paper with Onyx Black VersaFine Ink and emboss with clear embossing powder.
Watercolor the cats with Zig Clean Color Real Brush Pens and cut out.


Die-cut the grass using the Grass #2 Die Cut, from green cardstock and glue the pieces behind the cats, then pop them up on the sides of the card.
Stamp the sentiment on pink cardstock with VersaMark Ink and emboss with white embossing powder.  Layer this onto a slightly larger black cardstock panel, then glue between the cats.
Add clear self-adhesive rhinestones around the sentiment and pink hearts randomly on the card.


Add clear self-adhesive rhinestones around the sentiment and pink hearts randomly on the card.


Thursday, February 7, 2019

Valentine's Forever


Hi my friends, I'm up on the Rubbernecker Blog today with this Valentine's Day card.  It's not always easy making a Valentine's Day card for the guys in our life.  We're so used to making pretty Valentine's, so I decided to go in a different direction with a bit of grunge.  My husband will really appreciate this! 
I used the  Sm Heart Outline Stitch Die which cuts the solid heart and the frame all at once.  The spots that are stamped in gray are from the Splatter Stains set and the Forever which is stamped with VersaMark Ink and embossed with white embossing powder is from the Best Friends Etc set. 

Affiliate and Product Disclosure
I am on various Design Teams and get free goodies for blogging about craft products but only because I love their products and genuinely use them. Ultimately my opinions are my own. See the sidebar for a list of companies.
I am part of various affiliate programs – when you click on an affiliate link and then go on to make a purchase, at no cost to you, I receive a small commission.  The affiliates I use include Rubbernecker Stamps and Whimsy Stamps.                                                                                                                                                                  


Thursday, January 24, 2019

Just Best Friends


With Valentine's Day coming up, I thought it would be nice to make a Valentine's Day card for a friend.  Who wouldn't be happy pulling out a card to see Epstein looking at you with those big eyes?!  He's stamped on watercolor paper and colored with Zig Clean Color Real Brush Pens.
White cardstock was die cut with the Nested Circle Stitched Die Cut Set and layered onto pink decorative paper die cut with the Nested Circle Scallop With Holes Die.
The sentiment from the Best Friends Etc Clear Set was stamped on a strip of black paper with VersaMark Ink, embossed with white embossing powder.  A heart was die cut with the Heart Outline Stitch and slipped over the black strip before being glued down.

Follow Me- Stamp This
Twitter

Affiliate and Product Disclosure
I am on various Design Teams and get free goodies for blogging about craft products but only because I love their products and genuinely use them. Ultimately my opinions are my own. See the sidebar for a list of companies.
I am part of various affiliate programs – when you click on an affiliate link and then go on to make a purchase, at no cost to you, I receive a small commission.  The affiliates I use include Rubbernecker Stamps and Whimsy Stamps.


Monday, November 26, 2018

Valentine's Hearts


I know it's still November but your Christmas cards should already be done, so why let those hands be idle?  Get started on Valentine's Day cards, Anniversary cards or Wedding cards!  This week I'm sharing two cards made with the Wings Die Set from Stampendous and you'll be surprised both cards were made using the same die set.  I really love this delicate heart die, it's so pretty and elegant.

Here's how my card was made;

1.  Die cut hearts from the Wings Die Set from kraft and pink glitter paper and glue to a white panel that has been splattered with Victorian Velvet Distress Ink.
Wings Die Set

2.  Run a strip of kraft colored cardstock through a paper crimper and glue to the white panel below the hearts.
3.  Stamp the sentiment from the Greetings Galore Perfectly Clear Set with Sepia VersaFine Ink on a white strip of paper.

4.  Glue sentiment to the kraft strip of cardstock and add a pink glitter heart.
5.  Layer the white panel onto a kraft panel and glue to a pink card.


Disclaimer- I get free goodies for blogging about craft products! Today I'm sharing a card made with products from Stampendous.

Thursday, February 8, 2018

Toad-ally Awesome!


Do you have your cards made for Valentine's Day?  If not, here's a little inspiration for you.  I think this Frog On Lily Pad and sentiment Toad-Ally from Rubbernecker Stamps are adorable!  The frog is colored with Prisma Pencils and blended with Gamsol.  The sentiment is stamped in black and embossed with clear embossing powder.
Other product used is heart die from Sizzix, heart punch from The Paper Studio and I don't know who makes the banner die. Decorative and glitter paper is by The Paper Studio.

You can follow me, Stamp This on


Disclaimer- I get free goodies for blogging about craft products!  Today I'm sharing some fun new products sent to me from Rubbernecker Stamps.

Tuesday, January 30, 2018

Forever


Today's challenge at Rubbernecker Stamps is "Love Is In The Air."  I decided to show that you can use a floral stamp and make it a Valentine's card, Anniversary card or just a card to show your love.  I used Bunch of Tulips, it's a three part watercolor stamp and stamped it on watercolor paper.  The Forever is from Best Friends Etc, a clear stamp set and is stamped with black ink and embossed with clear.  A few dots were added with red and green Nuvo Crystal Drops.  The decorative paper, glitter paper and heart punch is from The Paper Studio.

Now head on over to this weeks Rubbernecker Stamp Blog by clicking HERE and add your card for your chance to win one of two prizes, good luck!!

 You can follow me, Stamp This on

Disclaimer- I get free goodies for blogging about craft products!  Today I'm sharing some fun new products sent to me from Rubbernecker Stamps.

Monday, June 26, 2017

Wedding & Anniversary Gift Caddy


Now's the season for weddings and anniversaries, this little caddy would be perfect for a sweet surprise to give to that special someone.  I found the easy to follow directions on how to make the box on the Fancy Pants Designs blog.  I have also made these caddies for Christmas, Easter and Birthdays, the possibilities are endless!

Here is how the caddy was made using stamps and embossing powders from Stampendous.  The larger hearts were diecut with Spellbinders dies from kraft colored corrugated paper. The hearts were rubbed with VersaMark ink and embossed with Shabby Pink Embossing Enamel.  The tag was stamped with the Eiffel Tower Perfectly Clear Set with Tea Dye Distress ink and the key was stenciled over this with pink ink. The sentiment from Love Always Perfectly Clear Set was stamped with Onyx Black VersaFine Ink and embossed with clear. Everything was glued together with 3 in 1 Glue from Beacon Adhesives.  

Disclaimer- I get free goodies for blogging about craft products! 

Stampendous Supplies
Eiffel Tower Perfectly Clear Set
Love Always Perfectly Clear Set
Heart Lock Stencil-Dreamweaver Stencil
Shabby Pink Embossing Enamel

Stay connected and don't miss a thing!

 Follow Stamp This 
(I follow crafty people back!)


https://blogger.googleusercontent.com/img/b/R29vZ2xl/AVvXsEiBIB7cl3FWcUqRpVNE2xf0uD7bSSaDv8EJChhD3TSJRrDTTqubuFddCha_Vsye2BIOBKX1yGUjGJyPJvjizD-izRFYxEG1Q0kTmLKEiANGSeoreVxGdz2kjJCF6lGrlm9fopxLmRzM6V04/s1600/Stampendous+logo.jpg


Friday, March 3, 2017

Stencil Love


This week has sure been fun sharing cards made with metal stencils from Stampendous and different techniques, but this is my last stencil post of the week.  This card used the double glitter technique for the heart and dry embossing for the background.  Here is how my card was made.

1.  Cut a piece of Double Sided Mounting Paper (it's sticky on both sides) the size of the Ornate Heart Metal Stencil.  Remove the backing from one side and stick to a piece of white cardstock.
2.  Rub Ornate Heart Metal Stencil with Coconut Soap and place soap side down on Double Sided Mounting Paper after removing the backing.  This step is a must!! It allows the stencil to be removed from the Mounting paper without ripping it.  Here is a link to the Stampendous INSTRUCTIONS on this technique and it says to use VersaMark as a release.  I'm sure this works great but I haven't tried it. There is also a link to a video on this page.
3.  Sprinkle the stencil with Crystal Micro Glitter and rub with finger.  Shake off excess glitter and return to the jar.
4.  Hold stencil, stencil side down over a trashcan and pull Mounting Paper off of stencil.
5.  Now sprinkle Mounting Paper with Black Micro Glitter, rub with finger and throw out excess glitter (it might be mixed with some of the Crystal Glitter).
6.  Cut heart out and set aside.
7.  Dry emboss Antique Keys on rose paper and sponge with pearlized metallic acrylic paint before removing stencil. Place the stencil in warm soapy water and clean.
8.  Layer onto black paper and glue to a rose colored card.
9.  Glue heart to the card diagonally, glue rose colored ribbon to the center and glue a key charm below the bow.
10.  Stamp sentiment on white paper with black ink, layer onto black paper and pop up on card.

Supplies
Stampendous
FMS4060 Ornate Heart Metal Stencil
FMS4053 Antique Keys Metal Stencil
SSCM5002 Painted Wishes
MG01 Crystal Micro Glitter
MG18 Black Micro Glitter

Plus
May Arts Ribbon
Paper- rose, black, white
Pearlized Metallic acrylic paint
key charm
Double Sided Mounting Paper/Sticker Paper
Coconut Soap

I hope I have inspired you to try some of the techniques with stencils that I've shared this week, I know you will love the results!


Stay connected and don't miss a thing!

 Follow Stamp This 
(I follow crafty people back!)


https://blogger.googleusercontent.com/img/b/R29vZ2xl/AVvXsEiBIB7cl3FWcUqRpVNE2xf0uD7bSSaDv8EJChhD3TSJRrDTTqubuFddCha_Vsye2BIOBKX1yGUjGJyPJvjizD-izRFYxEG1Q0kTmLKEiANGSeoreVxGdz2kjJCF6lGrlm9fopxLmRzM6V04/s1600/Stampendous+logo.jpg

Friday, January 6, 2017

Valentine's Day Hearts And Tag


Wow I can't believe it's already time to make Valentine's Day cards, the holidays just flew by! Today's card doesn't use any stamps, it's all made with the Sizzix Triplits Chevron Tags set of dies from The Stamps Of Life.  To make the background, Wilted Violet, Tea Dye and Walnut Stain Distress inks were splattered on a white panel, wahsi tape was placed on the left side and the panel was glued to a purple card with 3 in 1 Glue.  The tag and heart pieces were diecut from purple and tan papers, then layered to make the tag. The heart were glued to the card with Glossy Accents as were the confetti pieces that were left over from diecutting. The tag was popped up with foam tape and tied with ribbon.


Tuesday, February 2, 2016

Metal Stencil Duo


Stampendous just released some really great new Metal Stencil Duo Sets at CHA, and all week the Design Team will be sharing their creations so you can see the many ways they can be used.  Since Valentine's Day is fast approaching, I used the Heart Duo Stencil Set with the Double Glitter Technique (click to see video tutorial) to make a pretty sparkly card.  Here is how my card was made;

1.  Cut Double Sided Mounting Paper the size of the duo Stencil. Remove the carrier from one side and place on white cardstock.
Heart Duo Stencil Set
2.   Rub the back of the patterned stencil with Coconut Soap or a vegetable oil soap.  Remove the carrier from one side of the Double Sided Mounting Paper and place the stencil, soap side down on the sticky paper and lightly rub the stencil.  The soap is rubbed on the stencil so the stencil can be removed from the paper.
3.  Sprinkle Red Micro Glitter over the stencil and rub it into the paper with your finger.  Shake off excess glitter and place back into the jar.  Hold the piece over the trash can and flick the back of the paper so excess glitter falls off.  Holding the piece upside down over the trash can, gently remove the paper from the stencil.
4.  With piece on your work surface, lightly sprinkle with Micro Crystal Glitter, rub into the paper with your finger and shake off excess.  Do NOT return this to the jar since some of the red glitter may also come off.
5.  Turn piece over, lay heart stencil on the back and trace the heart.  Cut out and set aside.  Here is a close up of the heart but you just can't see how pretty and sparkly the glitter is.

6.  Dry emboss a strip of black cardstock with the Diamond Grid Stencil and glue to the left side of a white panel that's 1/4" smaller than a red card.  Glue white panel to card.
Diamond Grid Stencil
7.  Glue heart diagonally to card with Zip Dry Glue and apply tiny self adhesive pearls to the black panel.
        
8.  Stamp sentiment from the Love Always Perfectly Clear Set with Onyx Black VersaFine Ink.
Love Always Perfectly Clear Stamps Set

Now go see what the other Designers have for you today!
Jamie Martin (That's me!)
Stay connected and don't miss a thing!

Thursday, January 21, 2016

Key To My Heart


Valentine's Day cards don't have to be just pink or red, we are artists and can make them any color we want!  My card today envolves NO stamping, it is all made using Dreamweaver Stencils.  I dry embossed, paste embossed and stippled through the stencil.  You can use stencils in sooooo many ways, I love them!
Here is how my card was made:
1.  Dry emboss the back ground with the Design I Beam Stencil on white paper, wrap with May Arts Ribbon and glue to a light blue card.
2.  Place the Heart Lock Stencil on white paper that has been die cut using the Fitted Frames A Die Cut Set and stipple with Sky Blue Brilliance ink.
3.  Then the key portion of the stencil was placed over the heart and paste embossed with Dreamweaver Stencils Metallic Sliver Embossing Paste.
4.  Once the key was dry the panel was layered onto a larger Fitted Frame in light blue and popped up on the card using foam tape.

Stop by the Stampendous Blog to see what the other Design Team members have for you today, the link is below.

Stay connected and don't miss a thing!

Tuesday, January 19, 2016

Heart Filagree Oct 2015


Need a card in a hurry for Valentine's Day, an Anniversary or a Wedding? Try this clean and simple card in four easy steps.

1.  Sponge coral ink (it looks pink) on the bottom half of a white panel.
Mixed Media White Paper
2.  Stamp Swirl Flourish in the center of the panel with the same ink and add self adhesive pearls.
Swirl Flourish Rubber Stamp
3.  Stamp sentiment from the Love Always Perfectly Clear set with black ink.
Love Always Perfectly Clear Stamps Set
4.  Layer onto a black panel and glue to a pink card using Zip Dry glue.

Stampendous
CRR239 Swirl Flourish
SSC1238 Love Always Perfectly Clear Set
MPW811 Mixed Media White Paper
VersaFine

Plus
Pearlescent Coral Brilliance
Self Adhesive Pearls
sponge


Stay connected and don't miss a thing!

Monday, January 18, 2016

Your Heart

This week the Stampendous Design Team is sharing cards with hearts.  I will apologize in advance, I love hearts and will be posting three times this week with stamps and stencils from the October and January catalog.
Here is how my card was made-

1.  Stamp Roots Of Love on white paper with black ink.
2.  Color with colored pencils.
3.  After coloring the hearts, go over the hearts with a VersMark Pen, sprinkle with pink embossing powder from the Spring Sparkle Embossing Kit and heat.
4.  Sprinkle the top of the panel with Shabby Blue Embossing Enamel and heat from underneath so it doesn't blow off.
5.  Sprinkle PEARLustre Moonstoe Embossing Poweder on the bottom of the panel and heat from underneath.
6.  Stamp sentiment beside the tree with black ink.
7.  Layer onto a pink card with a strip of craft colored paper on the left side.

Stampendous
R243 Roots Of Love
SSC1238 Love Always Perfectly Clear Set
EK20 Spring Sparkle Embossng Kit
EP223 PEARLustre Moonstone Embossing Powder
FREG029 Shabby Blue Embossing Enamel
MPW811 Mixed Media White Paper
VersaMarker Watermark Pen by Imagine Crafts

Plus
Prisma Colored Pencils
Blender Pencil
Zip Dry Glue by Beacon Adhesives

Stay connected and don't miss a thing!


Tuesday, February 3, 2015

Valentine's with Hearts and Bunnies


Tips and Tricks Tuesday
Oh, what to do with those large images that almost take up the whole card?  I love to use corner punches on them, it makes all the difference and there are so many to choose from.  Here I used a punch to just snip off a piece of the corner and really you could just cut it if you don't have it.  Then I added red Dot Sparklers from Stampendous to the layered corners, which I use on so many of my cards.  This is then layered on a heart shaped doily and glued onto a red card that has been tied with pink ribbon.  This Bon Bon Bunny from Stampendous, colored with Prisma pencils doesn't need anything else!

Stay connected and don't miss a thing!
Follow my blog (in the right column)

Monday, February 2, 2015

Forget Me Nots


1.  Stamp Forget Me Nots on white paper with black ink, color with Prisma pencils and use blue chalk around image .
2.  Cut image out with a circle die and layer onto a purple scallop circle. Set aside.
3.  Stamp Botanical Blooms on a white strip with purple ink, layer onto green paper, wrap with checkered ribbon and glue to card.
4.  Stamp Botanical Blooms on a white tag, layer onto a green tag and stamp sentiment from the Beary Mice Perfectly Clear Stamp Set, in black.
5.  Glue white doily on the card and pop up image with foam squares.
Pop up tag.

Supplies
Stamps- HHQ05 Forget Me Nots, SSC1213, R162 Botanical Blooms
Inks- Tuxedo Black Memento, Purple Surf Sea Brights
Paper- Coredinations Signature Series Graphic 45 green, white, purple
Plus- May Arts Ribbon, white heart doily, Beacon Adhesives Zip Dry, Scrapbook Adhesives by 3L 3D Foam Squares, blue chalk, Spellbinder dies.

Be sure to stop by for Tips and Tricks Tuesday and Wednesday I'll show you what you will have a chance to win on "Giveaway Wednesday," the last Wednesday of the month!!

Take a look at what the other Designers have for you today.

Stampendous Blog

Jennifer Dove

Jamie Martin

Rhea Weigand

Stay connected and don't miss a thing!