Featured Post

Privacy Policy

I'm working on a new privacy policy for my followers, but for now you should know that if you comment on my site, my site collects your ...

Tuesday, August 22, 2023

Festive Farmhouse Christmas


Cut a sheet of Festive Farmhouse paper to 4" x 5 1/4", then on the right-side center, cut a line 1/4" and fold the paper back as shown making sure the folds go to the corners of the paper. 
Glue this to a kraft colored cardstock pane that's slightly thinner than 5 1/2" and mount it to a dark green card to a bit of the right side of the card is showing.
Add a strip of green glitter washi tape to the left side of the decorative paper. If you don't have washi tape, you can also cut a thin strip of glitter paper and glue it down.


A piece of the same Festive Farmhouse paper was die-cut using the Nested Scallop w/ Half Holes.
Die-cut white cardstock using the Nested Rectangle Stitch Die Set and stamp the sentiment using the Build A Phrase Holiday set with Cinamon Color Fues Ink. Glue this to the decorative paper panel, then pop it up on the fold using 3D Foam Squares.


Using the Holly #2 Die, die-cut dark green and red cardstock. Glue the leaves together as shown and add three berries to each. 
Use a white gel pen on the leaves and glue these to the upper left and bottom right of the sentiment.


Tuesday, August 15, 2023

Hello Strips Card


Today I have this strips card up on the Scrapbook Adhesives Blog. If you're like me, you have lots of scraps that you just can't bear to throw away but don't know what to do with them. I had these pretty strips laying around and decided to make a strips background for my card. My strips are all the same size, but they don't have to be, just let your creativity flow!

To make my card I cut white cardstock to 4" x 5 1/4" and die-cut a circle in the upper center. Extreme Double-Sided Tape 1/8" was placed on the back of the strips EXCEPT for the strips that go over the die-cut circle. These strips only had the Double-Sided Tape 1/8" placed on the sides so that if the strips get pushed down, they won't stick to the card base.


This panel will be popped up on the card, so 3D Foam Strips are placed on the back of the panel. Make sure the strips are close to the outer edge and closer to the circle, so it doesn't sag.  


Remove the paper backing from the 3D Foam Strips. Before I popped it up, I decided to place 3D Micro Foam Squares Black on the back of the strips that go over the circle to make sure they wouldn't sag. Pop this up on a tan card, I used the same color as one of the strips.


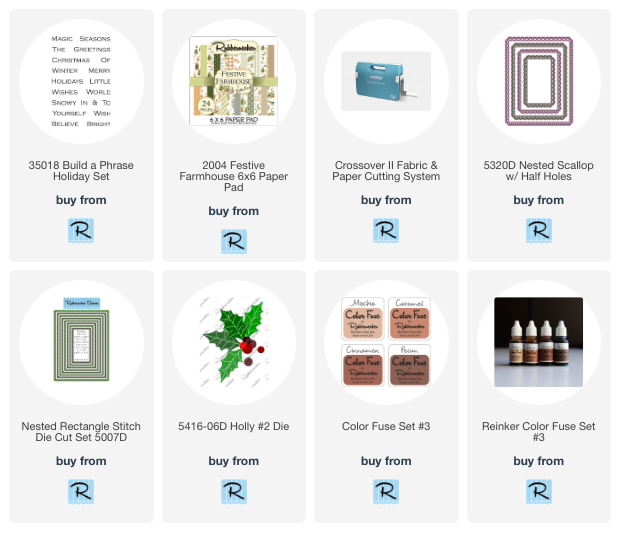
Next the flower was stamped using layering stamps, then it was die-cut.


The flower was also popped up, 3D Foam Squares were placed on the back and a 3D Micro Foam Squares Black at the bottom of the stem. Pop this up to the left side of the circle.


Die-cut the Hello from gold card stock and the shadow from one of the colors of strips. Use the Dual Tip Glue Pen the glue these together. Also use the glue to glue the Hello to the card as shown. For the final touch, gold glitter enamel dots were placed on the bottom right of the card.


Click on the link below to go to the Rubbernecker Stamps online store

Have a crafty day!

Let's Connect!

Affiliate and Product Disclosure
I am on various Design Teams and get free goodies for blogging about craft products but only because I love their products and genuinely use them. Ultimately my opinions are my own. A list of companies is in my sidebar.

Thursday, August 10, 2023

Three Cards One Collection


Welcome to new release day for Bibi's Snowflake Colllection carried by Spellbinders! Today I have three cards to share using her new release. The first two use the same products to show how you can get completely different looks using the same products. And the third card uses two of the same products plus one additional.

 Directions-

1. I used the Snowflake Card Creator Etched Dies From The Bibi's Snowflake CollectionTo make this card I die-cut the solid snowflake from gray cardstock and the leaf snowflake from white cardstock. The leaves were glued on top of the gray snowflake. 
2. The pine needles and stem were cut die-cut from green cardstock, the flowers from peach cardstock and the inner flower from pink cardstock. 
3. The pine needles and stem were then glued to the snowflake and the flowers were popped up using foam adhesive.
4. Then the pierced mini label was die-cut from gray cardstock using the Pierced Mini Labels Etched Dies From The Bibi's Snowflake Collection and popped up in the center of the snowflake.
5. "believe" was die-cut from peach and gold cardstock using the Snowflake Wishes Clear Stamp And Die Set From The Bibi's Snowflake Collection. The peach "believe" was layered off center over the gold "believe".  
6. Next, the sentiment was stamped on white cardstock with pink ink and die-cut, then glued below the "believe".


Directions-

1. The leaves from Snowflake Card Creator Etched Dies From The Bibi's Snowflake Collection were die-cut from light purple cardstock and glued to a tan 4" x 5 1/4" panel. The leaves that were hanging over the panel on the left side were cut off. This was then glued to a darker purple card.
2. The flowers were die-cut from white cardstock and the center of the flowers from darker purple cardstock. The flowers were popped up and the center were glued on.
3. The mini label from Pierced Mini Labels Etched Dies From The Bibi's Snowflake Collection was die-cut from darker purple cardstock and popped up on the upper right side of the card using foam squares.
4. The sentiment from the Snowflake Wishes Clear Stamp And Die Set From The Bibi's Snowflake Collection was stamped on light purple cardstock using VersaMark Ink and embossed with white embossing powder.
5. This was then die-cut, along with white cardstock, layered onto the white cardstock and glued to the center of the piered mini label.


Directions-

1. Place the circle stencil from the Snowflake Ornaments Stencil From the Bibi's Snowflake Collection on a white cardstock panel and sponge with pink ink.
2. Now place the snowflake stencil over the sponged circle and apply burgundy glitter embossing paste. Set aside to dry.
3. Once the embossing paste is dry, place the line stencil above the ornament and sponge with burgundy ink.
4.. Place the ornament top stencil on white cardstock, sponge with VersaMark Ink and emboss with silver glitter embossing powder and cut out. Pop this up on top of the ornament with 3D foam squares.
5. Using the Snowflake Card Creator Etched Dies From The Bibi's Snowflake Collection, die cut the leaves from green cardstock and the berries from pink cardstock. Glue these to the top of the ornament cap.
6. With the Snowflake Wishes Clear Stamp And Die Set From The Bibi's Snowflake Collection, die-cut "wishing" from gold cardstock and pop up over the center of the ornament.
7. Stamp the sentiment on white cardstock with burgundy ink, die-cut it with the banner die and glue it below the "wishing".
8. Layer this onto pink and white panels, then mount to a pink card.
9. Apply silver enamel dots as shown.

Have a crafty day!

Let's Connect!

Affiliate and Product Disclosure
I am on various Design Teams and get free goodies for blogging about craft products but only because I love their products and genuinely use them. Ultimately my opinions are my own. A list of companies is in my sidebar.

Monday, August 7, 2023

Merry and Bright


Hi there! Even though it's over a hundred degrees here, I'm making Christmas cards and singing Christmas songs, I don't want to be caught just a few weeks before Christmas without any cards. I used stamps, papers and dies from Rubbernecker Stamps to make my card. Here's how it was made-

Die-cut white cardstock using the Quilted Stitch Pierced Cover and cut it down so that the pattern of the die completely covers your paper.
Cut a piece of decorative paper from the Festive Farmhouse 6x6 Paper Pad to cover the bottom half of the white panel.
Place thin gold glitter washi tape just above the decorative paper.


Layer this panel on gold cardstock and mount it to a green card.


Stamp the poinsettia and leaves from the Buildable Poinsettia Set on watercolor paper using VersaMark Ink and emboss with gold embossing powder.
Watercolor the images and die-cut it with the Buildable Poinsettia Die Set.


Glue the leaves to the underneath bottom of the poinsettia and pop it up using foam squares, to the center left of the card.
Stamp the sentiment on vellum using VersaMark Ink and emboss it with gold embossing powder.
Tape the vellum to the bottom of the card using vellum tape, I used Specialty Tape from Scrapbook Adhesives by 3L.


 Click on the product below to go to the Rubbernecker Stamps online store.

Tuesday, August 1, 2023

A Purr-fect Day Kitty Card


Happy August!! Today I have this sweet kitty shaker card up on the Scrapbook Adhesives Blog with a tutorial on how it was made using papers from Doodlebug Designs and dies from Rubbernecker Stamps.


Click on the product below to go to the Rubbernecker Stamps online store.
Have a crafty day!

Let's Connect!

Affiliate and Product Disclosure
I am on various Design Teams and get free goodies for blogging about craft products but only because I love their products and genuinely use them. Ultimately my opinions are my own. A list of companies is in my sidebar.