Featured Post

Privacy Policy

I'm working on a new privacy policy for my followers, but for now you should know that if you comment on my site, my site collects your ...

Showing posts with label Mini Slimline. Show all posts

Tuesday, October 18, 2022

Floral Friendship Mini Slimline Card


Hi crafty friends, today I have a mini slimline card made with stamps, dies, stencils and inks from Rubbernecker Stamps. I'm really enjoying this new Friends forever set with coordinating dies and stencils, so no coloring is required other than brushing on the pretty inks through the stencil.

Here's how my card was made-

Die-cut white cardstock using the Mini Slimline Window Cover and layer it onto decorative paper.
Replace four of the little squares in the corners and two of the long strips using glue.


Use the Flower #6 Die Cut to cut white glitter paper and sponge it with Rose Color Fuse Ink.


Glue the Flower #6 flat to the left side of the card.


Stamp the flower from the Friends Forever Set on white cardstock with black ink.
Use the Friends Forever Mask to color the flower using purple, pink, yellow and orange Color Fuse Inks with a sponge or brush, I used a brush.
Rub the die-cut flower on a VersaMark Ink pad and heat emboss it with a clear glitter embossing powder.
Rub it again on the VersaMark Ink pad and emboss it with clear embossing powder for a smooth finish.


Pop the flower up with 3D Foam squares over the sponged die-cut piece.
Stamp the sentiment in black on the white die-cut center from the Mini Slimline Window Cover.
Randomly glue on Dew Drops around the flower and one by the sentiment.


Click on the images below to go to the Rubbernecker online Shop.
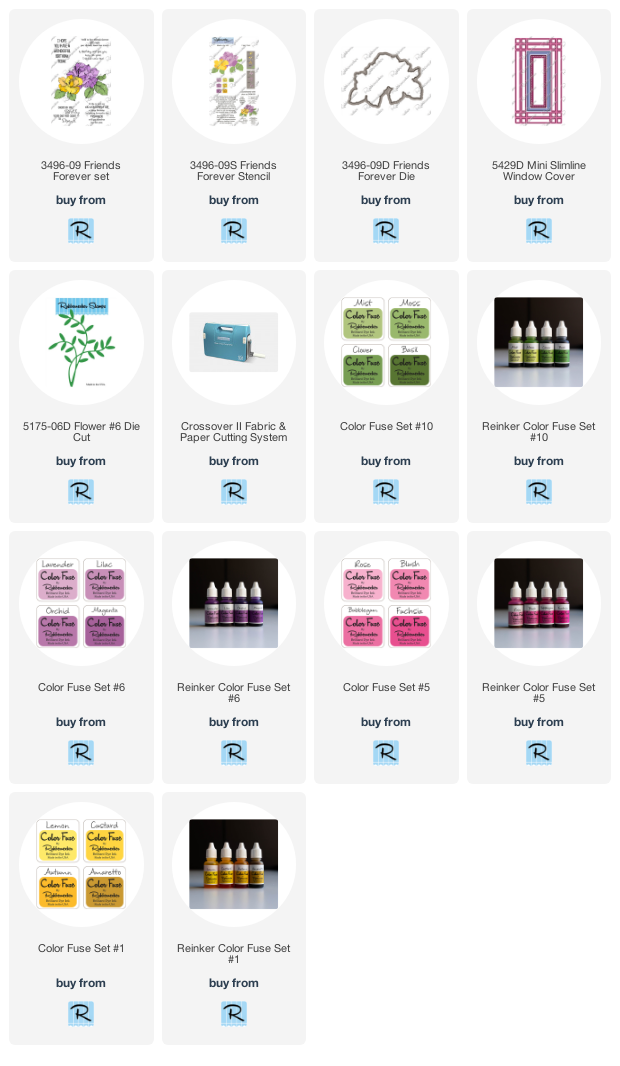
Click on the items below to go to the Rubbernecker Stamps online shop.

Have a crafty day!

Let's Connect!

Affiliate and Product Disclosure
I am on various Design Teams and get free goodies for blogging about craft products but only because I love their products and genuinely use them. Ultimately my opinions are my own. A list of companies is in my sidebar.

Friday, July 1, 2022

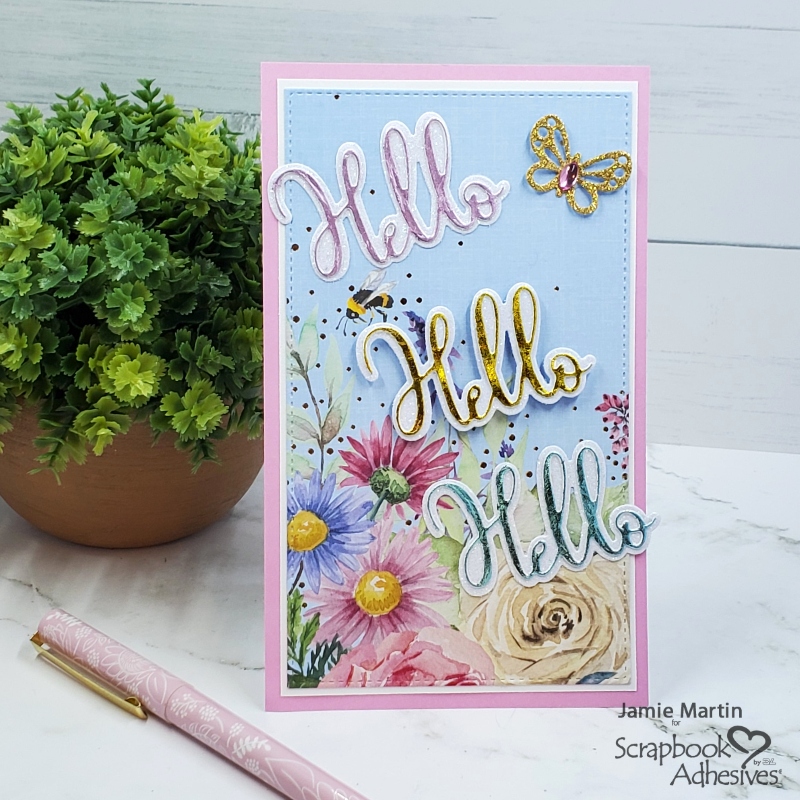
Hello, Hello, Hello Mini Slimline Card


Happy July my crafty friends!  To start off the month, I have this mini slimline card up on the Scrapbook Adhesives by 3L Blog.


An Adhesive Sheet was placed on a white cardstock panel and Hello was die-cut three times.


Peel off the top paper liner from the words and apply gold Transfer Foil.


Do the same with both pink and blue Transfer Foil.


Use 3D Foam Micro Squares on the back of the gold foil Hello to pop it up. 
The other two were glued flat using the Dual Tip Glue Pen.


Use a mini slimline die to die-cut decorative paper, use the Dual Tip Glue Pen to adhere this to a slightly larger white panel and then onto a pink card.
A small butterfly was die-cut from gold glitter paper and glued to the top right of the card and a self-adhesive gem was added to the body.


Materials Needed:

Scrapbook Adhesives by 3L®

Metallic Transfer Foil Sheets Pastel Colors

3D Foam Micro Squares

Home Hobby by 3L® Dual Tip Glue Pen

Plus from Rubbernecker Stamps (click on the image to go to the Rubbernecker Stamps online shop).

Wednesday, May 18, 2022

You Are Amazing Mini Slimline Card


Hi crafty friends, today I have a mini slimline card using the new Someone Like You Stamp Set and the Someone Like You Stencil, this does all of the coloring for you, all you have to do is place the stencils over the rose and use different shades of ink, then you have a beautiful rose.
Here's how my card was made-

Die-cut gold glitter paper using the Crosshatch Design Die.


Stamp the Rose on white cardstock with black ink and use the Someone Like You Stencil and use Color Fuse Inks #5 and #10 Sets to blend the inks using blender brushes.


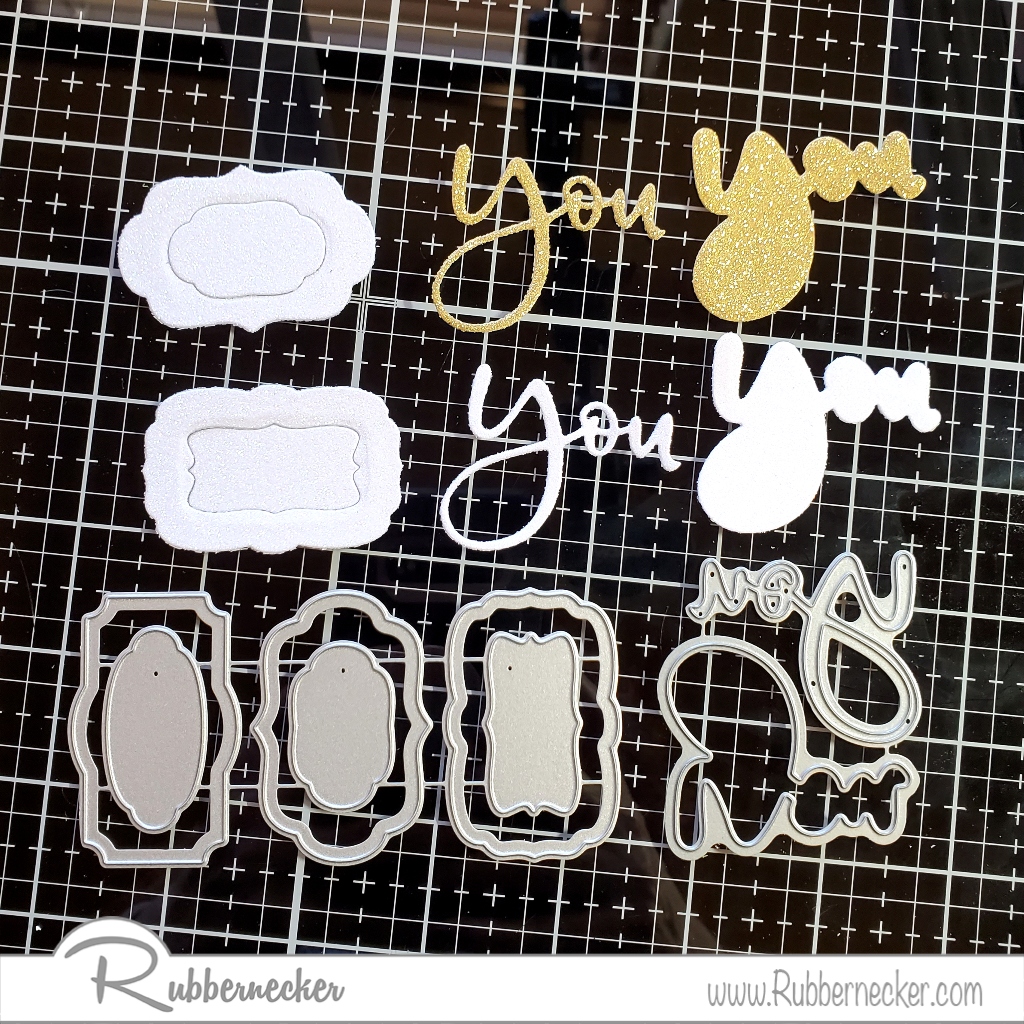
Die-cut the You Script w/ Shadow from both gold glitter paper and white glitter paper and glue the gold glitter You to the white glitter You Shadow and set aside.
Also, die-cut white glitter paper with the Small Tags Die.  Stamp the sentiment from the Someone Likes you set on the centerpiece from one of the dies with Bubble Gum Color Fuse Ink and set this aside.


Die-cut the Mini Slimline Cover #4 from white glitter paper and layer it over green decorative paper and mount this to a white slimline card.


Glue the gold Crosshatch Design to the left side of the card and pop up the rose using foam squares on top of the Crosshatch Design.
Pop up the You on the right side and glue down the sentiment below it.


 Click on the product below to go to the Rubbernecker Stamps online shop.

Adhesives- Scrapbook Adhesives by 3L
Glitter Paper, White & Gold- Printworks Specialty Paper

Have a crafty day!

Let's Connect!

Affiliate and Product Disclosure
I am on various Design Teams and get free goodies for blogging about craft products but only because I love their products and genuinely use them. Ultimately my opinions are my own. A list of companies is in my sidebar.

Wednesday, April 20, 2022

Love and a Dog Mini Slimline Card


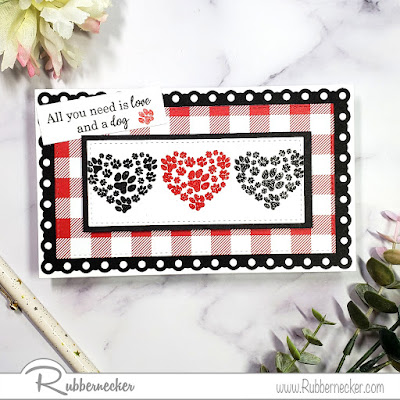
Today I have a mini slimline card using the new Dogs Front and Back from Rubbernecker Stamps.  I love the paw heart from the set, it's just the cutest.  I thought I'd make a bold card using red, black and white, the colors look great together.  

Here's how I made my card-
Die-cut white cardstock using the Mini Slimline Nested with Stitch Die.
Stamp the heart from the Dogs Front and Back Set in the center of the die-cut panel with VersMark Ink and emboss it with Red Tinsel Embossing Powder. Then stamp the heart again, one on each side to the embossed heart also with VersaMark Ink, but this time emboss it with Twilight Embossing Powder.


Die-cut red and white decorative paper using a larger die from the Mini Slimline Nested with Stitch Die and layer it onto a black cardstock panel that was die-cut using the Mini Slimline Scallop Holes Die.


Mount this to a white slimline card and pop up the heart's panel using foam squares.


Stamp the sentiment from the set onto a strip of white cardstock with Onyx Black VersaFine Ink and stamp the little paw also from the set with Crimson Color Fuse Ink and glue it diagonally to the left corner.


Click on the product below to go to the Rubbernecker Stamps Online Shop.

Have a crafty day!

Let's Connect!

Affiliate and Product Disclosure
I am on various Design Teams and get free goodies for blogging about craft products but only because I love their products and genuinely use them. Ultimately my opinions are my own. A list of companies is in my sidebar.
Being part of various affiliate programs – when you click on an affiliate link and then go on to make a purchase, at no cost to you, I receive a small commission.  The affiliates I use include Rubbernecker Stamps.

Wednesday, March 9, 2022

All Ears


Hi there!  My card today uses stamps from Rubbernecker Stamps March New Release.  I'm really glad that they came out with this cute Bunny and Flowers Set, it has bunnies that can be used for Easter but the sentiments that come with it allows you to use the set year round.

Here's how my card was made-
  • Stamp images from the Bunnies and Flowers Set on watercolor paper with Onyx Black VersaFine Ink and emboss with clear embossing powder.
  • Watercolor the image with Zig Clean Color Clear Brush Pens and cut out using the Bunnies and Flowers Die Set and set aside.


  • Die-cut white glitter paper using the Mini Slimline Cover #3.

Glue the die-cut piece to purple decorative paper and set side.


  • Stamp the sentiment from the set on white cardstock with Electric Purple Radiant Neon Ink and emboss with Spring Sparkle Lavender Embossing Powder.  Layer this onto a slightly larger black glitter panel.


  • Die-cut vellum with the Nested Circle Scallop w/ Holes.


  • Now to assemble, glue the Mini Slimline Cover #3 panel to a white mini slimline card.
  • Glue bunny in the basket to the center of the die-cut vellum and glue to the bottom portion of the card.
  • Pop up the sentiment using foam squares and glue a small flower to the bottom right corner of the sentiment.


Click on the product below to go to the Rubbernecker Stamps online shop.

Have a crafty day!

Let's Connect!

Affiliate and Product Disclosure
I am on various Design Teams and get free goodies for blogging about craft products but only because I love their products and genuinely use them. Ultimately my opinions are my own. A list of companies is in my sidebar.
Being part of various affiliate programs – when you click on an affiliate link and then go on to make a purchase, at no cost to you, I receive a small commission.  The affiliates I use include Rubbernecker Stamps.

Tuesday, March 8, 2022

New Release-Rubbernecker Stamps


Today is New Release Day for Rubbernecker Stamps and I have a mini slimline card made with the new Distressed Background Strips and the Composable Freehand Borders Set.

To make my card, the flower and leaves from the Poetic Peonies Set were stamped on watercolor paper and colored with Zig Clean Color Real Brush Pens and die-cut with coordinating dies.
Die-cut "Friend" using the Friend Script w/ Shadow Die from black cardstock.


Stamp gray cardstock with VersaMark Ink and emboss with White Embossing Powder, then die-cut the stamped image with the Mini Slimline Nested w/ Stitch Die.


Use the Mini Slimline Scallop Holes Die to die-cut white cardstock.


Use a tape runner to attach the Mini Slimline Scallop Holes onto slightly larger pink cardstock.
Stamp the link and the sentiment from the Composable Freehand Borders Set with Onyx Black VersaFine Ink and pop up the embossed piece in between them.


Use a tape runner to attach the leaves to the left side of the card and pop up the flower with foam squares.
Place 3D Foam Squares Micro Black on the back half of "Friend" and place as shown.


Click on product to go to the Rubbernecker Stamps online shop.
Have a crafty day!
Let's Connect!

Affiliate and Product Disclosure
I am on various Design Teams and get free goodies for blogging about craft products but only because I love their products and genuinely use them. Ultimately my opinions are my own. A list of companies is in my sidebar.
Being part of various affiliate programs – when you click on an affiliate link and then go on to make a purchase, at no cost to you, I receive a small commission.  The affiliates I use include Rubbernecker Stamps.

Wednesday, February 23, 2022

We're Purrfect


Die-cut white and pink cardstock with the Mini Slimline Nested with Stich Die.
Stencil the white die-cut panel with the Plaid Texture Stencil which is a two-part stencil with Blush from the Color Fuse Ink Set #5 and Citrus Color Fuse Ink Set #2.
Glue the stenciled panel onto a slightly larger white panel. Set aside.


Stamp cats from the new For Each Other Set, on watercolor paper with Onyx Black VersaFine Ink and emboss with clear embossing powder.
Watercolor the cats with Zig Clean Color Real Brush Pens and cut out.


Die-cut the grass using the Grass #2 Die Cut, from green cardstock and glue the pieces behind the cats, then pop them up on the sides of the card.
Stamp the sentiment on pink cardstock with VersaMark Ink and emboss with white embossing powder.  Layer this onto a slightly larger black cardstock panel, then glue between the cats.
Add clear self-adhesive rhinestones around the sentiment and pink hearts randomly on the card.


Add clear self-adhesive rhinestones around the sentiment and pink hearts randomly on the card.