Featured Post

Privacy Policy

I'm working on a new privacy policy for my followers, but for now you should know that if you comment on my site, my site collects your ...

Wednesday, February 14, 2024

Window Shaker Card


 Hi crafty friends! Today I have a window shaker card with a pretty Springtime view. I used the Windows With a View Collection from Spellbinders.

The flowers were die-cut from Precision Cardstock Spring Colors using the Up In The Air Die Set and the kite was die-cut from white cardstock using the same set.

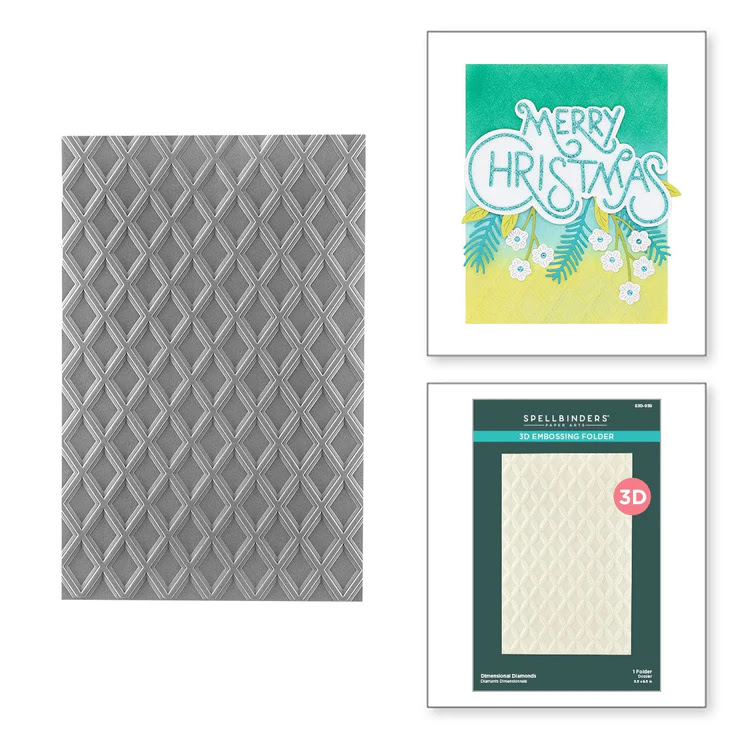
The background was embossed using the Dimensional Diamonds 3D Embossing Folder on peach cardstock.


The sentiment was made using the So Many Sentiments Die Set.


Have a crafty day!

Let's Connect!

Affiliate and Product Disclosure
I am on various Design Teams and get free goodies for blogging about craft products but only because I love their products and genuinely use them. Ultimately my opinions are my own. A list of companies is in my sidebar.

Friday, February 9, 2024

A Card With A View


Hi! Today I have a card with a view that's making me dream of Spring. To make my card, I used new release dies and stencils from Spellbinders

To make my card, I first used the Vista View Window Die Set to cut white cardstock for the window frame, the back panel that gets stenciled and the window box.


Next, the back panel was stenciled using the Background Scapes Stencils for the mountains and the clouds.


The next step is to die-cut the window box, flowers, grass, butterfly and sun using the Up In The Air View Die Set to cut white cardstock. Inks and a blending brush were then used to color the different pieces. Once the sun was colored, it was glued to the top right of the stenciled panel and the window frame was popped up on the stenciled panel using 3D Foam Squares from Scrapbook Adhesives by 3L.


The window box was popped up at the bottom of the window and the grass and flowers were glued in.  The butterflies were then glued, one to the grass and one out the window. 
The sentiment was glued to the top left of the window.

These are the new release items from Spellbinders, used on my card.
Vista View Window Die Set
Have a crafty day!

Let's Connect!

Affiliate and Product Disclosure
I am on various Design Teams and get free goodies for blogging about craft products but only because I love their products and genuinely use them. Ultimately my opinions are my own. A list of companies is in my sidebar.

Wednesday, February 7, 2024

Birthday Wishes CardT


 I just can't get enough of the Flowers & Foliage 3D Embossing Folder from Spellbinders. I made another card that's quick and easy.

To make my card, I used the Flowers & Foliage 3D Embossing Folder to emboss decorative paper and used a small stencil brush to add green ink to the flowers. Yellow rhinestones were added to the center of the flowers.

The sentiment was die-cut from white and pink cardstock using the Popular Sentiments Die and it was popped up towards the top of the card.

Hearts were die-cut from decorative paper and glued to the left side of the sentiment.

The embossed panel was layered onto pink cardstock and glued to a white card.


The sentiment was made by using the Popular Sentiments Die and cutting white and pink cardstock. The sentiment was then popped up om the card.


For the finishing touch, several hearts were die-cut from decorative paper and glued to the left side of the sentiment.

Have a crafty day!

Let's Connect!

Affiliate and Product Disclosure
I am on various Design Teams and get free goodies for blogging about craft products but only because I love their products and genuinely use them. Ultimately my opinions are my own. A list of companies is in my sidebar.


Saturday, February 3, 2024

Hello Embossed Card


Hi crafty friends, today I have a card made with the Flowers & Foliage 3D Embossing Folder by Wendy Vecchi from Spellbinders along with dies also from Spellbinders.

To make my card I used the Flowers & Foliage 3D Embossing Folder to embossed white cardstock that had blue inks color blended from the bottom up, leaving the top portion white.

Next white cardstock was die-cut using the Sealed Twine Die and it was glued just below center of the card.


The flowers were then die-cut using the Garden Wreath Add Ons Die Set, from white cardstock with the leaves being cut from silver glitter paper.
The large flower was cut three times, inked with purple ink and layered together, then popped up on the center of the Sealed Twine piece. the smaller flowers and leaves were glued around the larger flower.


The sentiment was then die-cut from white, purple and silver glitter paper using the So Many Sentiments Die Set then popped up diagonally at the top of the card.

Have a crafty day!

Let's Connect!

Affiliate and Product Disclosure
I am on various Design Teams and get free goodies for blogging about craft products but only because I love their products and genuinely use them. Ultimately my opinions are my own. A list of companies is in my sidebar.


Saturday, January 27, 2024

Floral Embossed Birthday Card


Happy Saturday my crafty friends! Today I have a birthday card that's made using and
embossing folder, die and a stamp. The embossing folder is the new Flowers and Foliage 3D Embossing Folder by Wendy Vecchi from Spellbinders.

To make my card, I started my ink blending orange inks on the bottom half, then put only the top half of the panel in the embossing folder and ran it through my machine.

Diamond Dotz were glued to the center of the flowers and thin black glitter washi tape was glued below the flowers. This was then glued to a slightly larger black panel and glued to a top folding white card.

The sentiment from the So Many Sentiments Set was die-cut from white and black cardstock and popped up on the card.

Happy Birthday from the Party Time Set was stamped with Onyx Black VersaFine Ink.


Here is another card that I made using the Flowers and Foliage 3D Embossing Folder. This time I embossed decorative paper with the image pressed down into the paper then painted the flowers with white paint and used enamel dots for the center of the flowers.

To make the shaker portion, 3D Foam Circle Frames from Scrapbook Adhesives by 3L were used. These frames make it super easy to make a shaker! The sentiment was die-cut using Thanks Enclosed Sentiments set


Affiliate and Product Disclosure
I am on various Design Teams and get free goodies for blogging about craft products but only because I love their products and genuinely use them. Ultimately my opinions are my own. A list of companies is in my sidebar.


Birthday Wish Card


Hi my friends, today I have a birthday card made with Simon Hurley's new collection from Spellbinders. I usually make girly color birthday cards but with a few boy birthdays coming up, I thought I would use blue orange and terracotta colors.

To make my card, I used the Big Hugs Stamp and Die Bundle and stamped the cat, present and balloon on watercolor paper with Onyx VersaFine Ink and used Derwent Inktense watercolor pencils to color it. Once it was dry, the coordinating dies were used to cut it out.

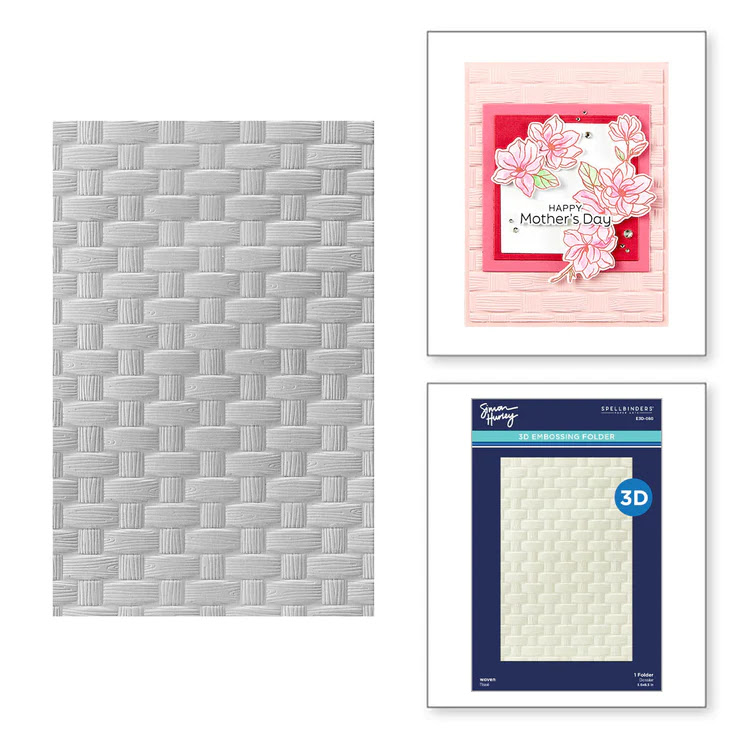
To make the background, terracotta cardstock was embossed using the Woven 3D Embossing Folder and glued onto a top folding white card that had blue ink blended on the edges.


A frame was made using the Essential Arches Etched Dies from white cardstock and sponged with blue ink.

The sentiment from the set was stamped on a strip of terracotta cardstock with VersaMark ink and embossed with white embossing powder.

For those who only want the Big Hugs Clear Stamp Set, Spellbinders has that too.

 \Have a crafty day!

Let's Connect!

Affiliate and Product Disclosure
I am on various Design Teams and get free goodies for blogging about craft products but only because I love their products and genuinely use them. Ultimately my opinions are my own. A list of companies is in my sidebar.

Make A Wish Birthday Card


Hi my friends, today I have a birthday card made with Simon Hurley's new collection from Spellbinders. I usually make girly color birthday cards but with a few boy birthdays coming up, I thought I would use blue orange and terracotta colors.

To make my card, I used the Big Hugs Stamp and Die Bundle and stamped the cat, present and balloon on watercolor paper with Onyx VersaFine Ink and used Derwent Inktense watercolor pencils to color it. Once it was dry, the coordinating dies were used to cut it out.

To make the background, terracotta cardstock was embossed using the Woven 3D Embossing Folder and glued onto a top folding white card that had blue ink blended on the edges.


A frame was made using the Essential Arches Etched Dies from white cardstock and sponged with blue ink.

The sentiment from the set was stamped on a strip of terracotta cardstock with VersaMark ink and embossed with white embossing powder.

For those who only want the Big Hugs Clear Stamp Set, Spellbinders has that too.

 \Have a crafty day!

Let's Connect!

Affiliate and Product Disclosure
I am on various Design Teams and get free goodies for blogging about craft products but only because I love their products and genuinely use them. Ultimately my opinions are my own. A list of companies is in my sidebar.