Featured Post

Privacy Policy

I'm working on a new privacy policy for my followers, but for now you should know that if you comment on my site, my site collects your ...

Thursday, January 7, 2021

Have a Ball


Have you seen the new release from Stampendous?  They have come out with a new POP Frame Die Set and a bunch of stamp sets that work with it, one is the Sports Frame Perfectly Clear Set that I used to make this Birthday shaker card.
Here's how my card was made;
  1. Stamp Sports Frame on watercolor paper with black ink and emboss with clear embossing powder and watercolor with Inktense Pencils.
  2. Die-cut the Sports Frame using the           Die Set.
  3. Die-cut white cardstock with the largest of the frames and trim the two edges with scissors.
  4. Lay the frame on top of the last die-cut piece and stamp the sentiment in the center of the frame so that it's stamped on the panel behind the frame.
  5. Glue the acetate to the back of the Sports Frame.
  6. Place foam tape around the backside of the frame being sure not to leave any gaps.
  7. Place a small amount of Glitter Glass on top of the sentiment and adhere the frame over it.
  8. Cut red and white striped decorative paper slightly smaller than a blue card and glue it on.
  9. Glue the frame diagonally to the card.
        

 Supplies
Stampendous
SSC1376 Sports Frame
MPW811Mixed Media White Paper
FRG01C Silver Crushed Glitter Glass
STF082 VersaFine Ink- Onyx Black
EP020  Clear Embossing Powder

Plus
Inktense Pencils
Decorative Paper
Cardstock- Blue
Acetate 
Foam Tape
Zip Dry Glue, Beacon Adhesives
Scissors
Paper Cutter
Heat Gun
Let's connect!


Disclaimer- I get free goodies for blogging about craft products! Today I'm sharing a card made with products from Stampendous

Here are some places that you can find Stampendous Products-
First off check out your local Stamp Store, if they don't have it they can order it.
Online Stores


Wednesday, January 6, 2021

Warm Thoughts


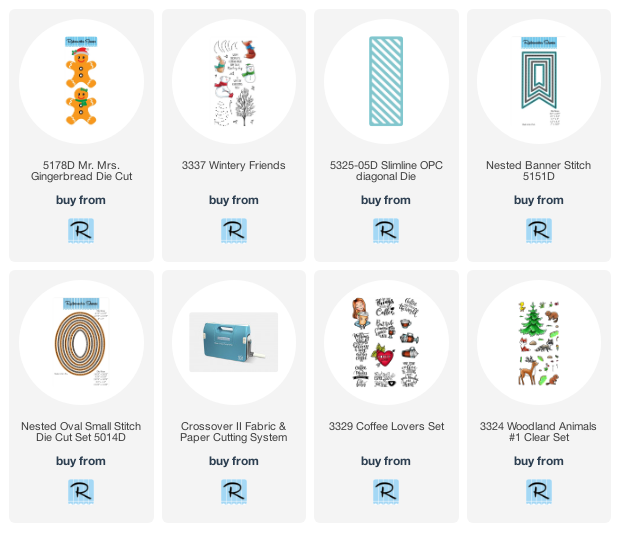
  • Die-cut two pieces of kraft color cardstock, one-piece each of light blue cardstock, lavender cardstock,  black cardstock, and one piece of decorative paper using the Mr. Mrs. Gingerbread Die Cut.
  • Glue blue and black pieces onto one of the gingerbread men as shown and set aside.


  • Cut the hands and feet off of the decorative paper gingerbread man to make a cute little outfit for the Mrs.
  • Glue the pieces on as shown.
  • Apply two pink adhesive heart rhinestones for the buttons and set aside.


  • Die-cut white cardstock using the Nested Banner Stitch Die Set and Slimline OPC Diagonal die.
  •  Die-cut white cardstock with the Nested Oval Small Stitch Die Cut Set from light blue cardstock.
  • Glue the Slimline OPC Diagonal onto lavender paper, pop this up onto slightly larger decorative paper, and glue it onto a grey slimline card.
  • Die-cut white glitter paper with the Small Snow Flake Die 5100-03D and 5100-04D.  Glue these to the card.
  • Stamp sentiment from the Wintery Friends stamp set with black in on the die-cut banner, glue it on top of the blue oval die-cut and glue flat to the center of the card.
  • Randomly add dots of Nuvo Crystal Crushed Grape around the sentiment.
  • Pop up Mr. and Mrs. Gingerbread Die Cut to each side of the sentiment.


  • There were some cutout images on my desk and thought they would also look good on the card, so I added the bottom two cards for a couple more ideas.


These are the Rubbernecker Stamps products used for the cards.

Let's Connect!

Affiliate and Product Disclosure
I am on various Design Teams and get free goodies for blogging about craft products but only because I love their products and genuinely use them. Ultimately my opinions are my own. A list of companies is in my sidebar.
Being part of various affiliate programs – when you click on an affiliate link and then go on to make a purchase, at no cost to you, I receive a small commission.  The affiliates I use include Rubbernecker Stamps.

Monday, January 4, 2021

We Survived!


We did it everyone, we survived 2020!!  Stampendous has the Hello 2021 set to celebrate this and many other occasions for years to come.  I paired Hello 2021 with the POP Frame Die Set to create dimension and interest for this fun card.  
Here's how my card was made;

  1. The frame was die-cut from watercolor paper, stamped with Onyx Black VersaFine Ink, and embossed with clear embossing powder.
  2. It was then watercolored with Inktense Pencils and popped up using foam squares on decorative.
  3. The decorative paper was layered onto a slightly larger white cardstock and glued to a purple card.
  4. 2020 was stamped on white cardstock and sponged with purple inks then cut out and glued to the center of the frame.

Supplies

Stampendous
SSC1383 Hello 2021 Perfectly Clear Die Set
DCP1021 POP Shapes Die Set
MPW811Mixed Media White Paper
STF082 VersaFine Ink- Onyx Black
EP020  Clear Embossing Powder

Plus
Inktense Pencils
Watercolor Paper
Decorative Paper
Cardstock- Purple 
Foam Tape
Zip Dry Glue, Beacon Adhesives
Scissors
Paper Cutter
Heat Gun

Have a creative day!

Let's connect!


Disclaimer- I get free goodies for blogging about craft products! Today I'm sharing a card made with products from Stampendous

Here are some places that you can find Stampendous Products-
First off check out your local Stamp Store, if they don't have it they can order it.
Online Stores


Sunday, December 27, 2020

Just For You Gift Card Holder


When I give gifts I really like to give gift cards, that way the person that I gave it to can get exactly what they want and don't have to deal with returning the gift if it's not what they can use.  I like to make those gift cards extra special by making unique personalized gift card holders.  Stampendous has a great Gift Card Wallet Die Set and along with Hands Hold Perfectly Clear Set
it makes a special holder for any occasion.

The images were stamped on watercolor paper with Onyx Black VersaFine Ink and watercolored with Inktense Pencils. 


Have a creative day!

Let's connect!


Disclaimer- I get free goodies for blogging about craft products! Today I'm sharing a card made with products from Stampendous

Here are some places that you can find Stampendous Products-
First off check out your local Stamp Store, if they don't have it they can order it.
Online Stores


Monday, December 21, 2020

White Christmas


I'm dreaming of a white Christmas but here in Oklahoma, I don't know if it will be happening but I'm keeping my fingers crossed.  Today I have one card with two different backgrounds, I couldn't decide which I liked best so I'm sharing them both, which do you like best?
Here's how they were made-


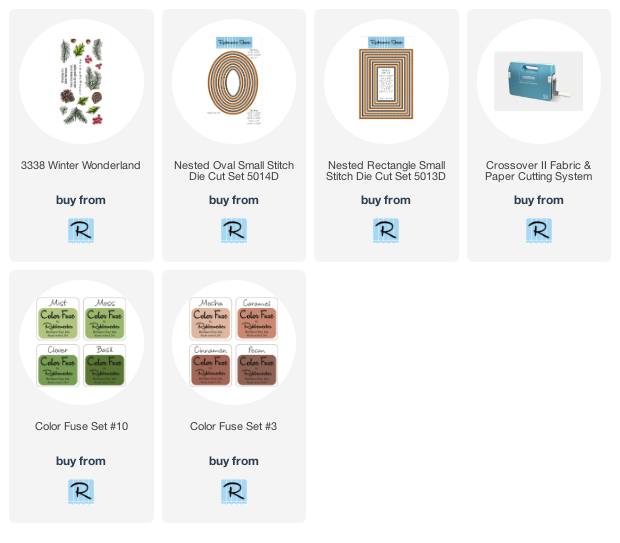
  • Die-cut white cardstock using the Nested Rectangle Small Stitch Die.
  • Die-cut an oval from red cardstock using the Nested Oval Small Stitch Die.

  • Stamp sentiment in the center of the red oval with VersaMark Ink and emboss with clear embossing powder. 
  • Place the red die in the empty space of the white panel and tape the oval into place using removable tape from the backside of the panel.
  • Randomly stamp the branches from the Winter Wonderland set so they are going towards the oval using VersaMark Ink and
  •  emboss with white embossing powder.

  • Apply Moss Color Fuse Ink with a brush to all off the branches, be generous and go outside of the branches a bit.
  • Next use Clover Color Fuse Ink on just the branches, don't go outside of the branches.
  • Finally, apply Basil Color Fuse Ink to just the center of the branches.

  • Stamp from the set, the acorn twice and the pinecone once on white cardstock with VersaMark Ink and emboss with white embossing powder.
  • Sponge both with Cinnamon Color Fuse Ink, cut out, and glue to the card as shown.
  • Pop up the panel with foam squares on a slightly larger white cardstock panel and glue the red oval in the center.  
  • Glue to a red card and you're done!


Have a creative day!

Let's Connect!

Affiliate and Product Disclosure
I am on various Design Teams and get free goodies for blogging about craft products but only because I love their products and genuinely use them. Ultimately my opinions are my own. A list of companies is in my sidebar.
Being part of various affiliate programs – when you click on an affiliate link and then go on to make a purchase, at no cost to you, I receive a small commission.  The affiliates I use include Rubbernecker Stamps.

Wednesday, December 9, 2020

Festive Christmas Tags


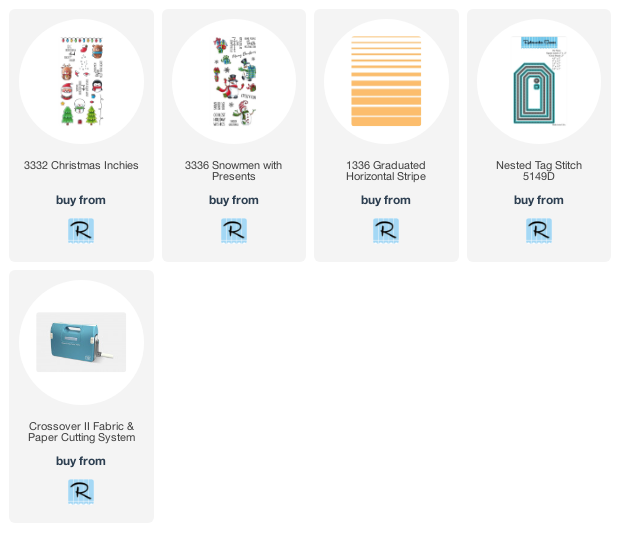
This Christmas Season don't forget to make some cute little tags for those gifts under the tree.  I used the Christmas Inchies Stamp Set from Rubbernecker Stamps that I used on Monday to make my slimline card (see it HERE), this set is not only cute but also versatile.  
Here's how my card was made-

  • Stamp Christmas Inchies on white cardstock with Onyx Black VersaMark Ink and color with Prisma Colored Pencils.  
  • Cut out and set aside.

  • Stamp tan cardstock with the Graduated Horizontal stamp using white pigment ink.
  • Stamp snowflakes from the Snowman with Presents stamp set over the stamped tan panel.
  • Die-cut the stamped tan panel twice using a tag from the Nested Tag Stich Die Set.

  • Cut a wave at the top of white glitter paper and use the same tag die to cut the glitter paper just tall enough for the bottom of the tag.
  • Glue the glitter paper to the bottom of the tags and layer and glue the tags, one on red and one on green cardstock that has been die-cut with the same tag die having them be a bit offset.  

  • Pop up the Christmas Inchies on the tag as shown. 
  • Glue the small Christmas stocking to the top of the reindeer tag and stamp the sentiment on the Santa tag with black ink.
  • Tie the tops of the tags with ribbon and cord.


  • Have a creative day!


    Monday, December 7, 2020

    Merry Christmas Cuties


    Hi there, I hope you're having a good start to your week.  How are you doing on those Christmas cards?  If you haven't started, today is the day!  For my card, I made a slimline card using the new Christmas Inchies stamp set.  Be sure to come back in a couple of days, I'll have tags that I made using the same set for a completely different look.
    Here's how my card was made;

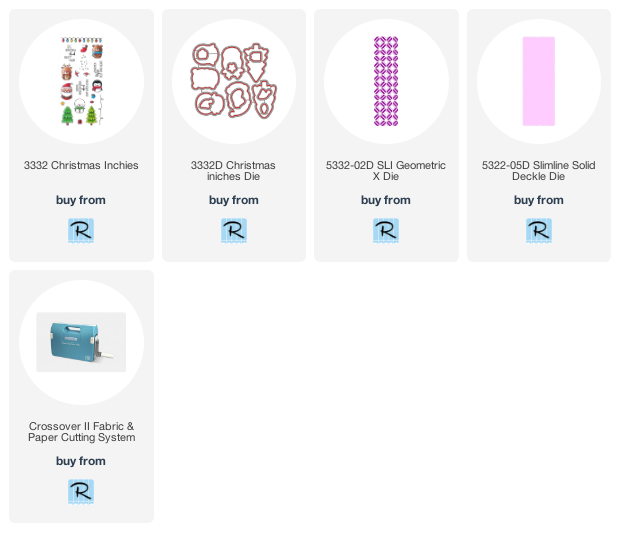
    • Stamp the Santa, Christmas tree and Rudolph from the Christmas Inchies set on white cardstock with Onyx Black Ink and color with Prisma Colored Pencils.
    • Die-cut the images with the Christmas Inchies Die set and set aside.

    • Using the Slimline Solid Deckle Die, die-cut white cardstock.
    • Place the SLI Geometric X Die in the center of the Solid Deckle panel, keep it in place using a low tack tape and run it through the Crossover ll.
    • Repeatedly stamp the string of lights across the top of the die-cut panel with black ink.
    • Stamp Merry Christmas on the bottom center of the panel with black ink.

    • Color lights green, red, and yellow using Bottle Green Nuvo Crystal Drops, Carnation Red Liquid Pearls, and Sunflower Liquid Pearls. 
    • Apply Diamond Glaze over the top of the painted lights and let dry.

    • Layer the die-cut slimline panel onto slightly larger decorative paper and glue to a red slimline card.
    • Place foam squares on the back of the three Inchies and pop upon the card as shown.


    Follow Me- Stamp This, on-

    Affiliate and Product Disclosure
    I am on various Design Teams and get free goodies for blogging about craft products but only because I love their products and genuinely use them. Ultimately my opinions are my own. A list of companies is in my sidebar.
    Being part of various affiliate programs – when you click on an affiliate link and then go on to make a purchase, at no cost to you, I receive a small commission.  The affiliates I use include Rubbernecker Stamps.