Featured Post

Privacy Policy

I'm working on a new privacy policy for my followers, but for now you should know that if you comment on my site, my site collects your ...

Showing posts with label Gelatos. Show all posts

Friday, November 3, 2017

Thank You


Today Stampendous is sharing Thank you cards to thank all of their customers for  purchasing Stampendous stamps and products!  So thank you for supporting Stampendous throughout the years!!!

Here's how I made my card:
1.  Stamp Butterfly Wings on white paper with Versamark ink and emboss with white embossing powder.
2.  Rub Gelatos in blues and pinks over the embossed image and rub with a baby wipe to spread the color.
3.  Layer onto a black panel, tie with ribbon and glue onto a blue card.
4.  Die cut a white and black frame from the Fitted Frames A set.  Stamp sentiment from Painted Wishes Perfectly Clear Set with pink ink, layer onto the black frame and pop up on card.
5.  Apply Turquoise Dot Sparklers to the body of the large butterfly.

Supplies
Stampendous
R282 Butterfly Wings
SSCM5002 Painted Wishes
DCP1005 Fitted Frames A
AC672HSQ Turquoise Dot Sparklers
MWP811 Mixed Media White Paper
EPA50 Embossing Heat Tool

Plus
My Colors Cardstock- Sky
Creative Impressions ribbon
Zip Dry Glue by Beacon Adhesives
3D Foam Squares Scrapbook Adhesives by 3L
Gelatos- lavender, boysenberry, snow cone, passion fruit


Stay connected and don't miss a thing!

 Follow Stamp This 
(I follow crafty people back!)



https://blogger.googleusercontent.com/img/b/R29vZ2xl/AVvXsEiBIB7cl3FWcUqRpVNE2xf0uD7bSSaDv8EJChhD3TSJRrDTTqubuFddCha_Vsye2BIOBKX1yGUjGJyPJvjizD-izRFYxEG1Q0kTmLKEiANGSeoreVxGdz2kjJCF6lGrlm9fopxLmRzM6V04/s1600/Stampendous+logo.jpg

Disclaimer- I get free goodies for blogging about craft products!  Today I'm sharing some fun new products sent to me from Stampendous!

Wednesday, September 6, 2017

You're Amazing


Stampendous has some really neat new 8" x 8" stamps that can be used in so many ways.  This week the design team will be sharing projects made with these stamps. Today I used the DECOR Cling Leaves to make my background.

Here's how my card was made.
1.  Lay DECOR Cling Leaves on desk with rubber side up.  Ink with VersaMark Ink and lay a watercolor panel on top and press.
2.  Sprinkle watercolor panel with white embossing powder and heat.
3.  Scribble pink and orange Gelatos on the watercolor paper to make color blocks.
4.  Use a baby wipe to wipe across the colors so they blend.  Use a clean piece of the wipe for each color.
5.  Use a circle die to cut the circle and glue the panel onto a white card.
6.  Stamp "So Amazing" inside the circle with Onyx Black VersaFine Ink and emboss with clear.
7. Glue on orange and pink sequins and add washi tape.

Supplies
Special Friends
DCR101 Decor Cling Leaves
EP100 White Embossing Powder
So Amazing
EP020 Clear Embossing Powder
Onyx Black VersaFine
VersaMark Ink

Plus
Gelatos
The Paper Studio Decorative Paper
3 in 1 Glue
Watercolor paper
White Cardstock
Circle Die
Baby Wipes

Stay connected and don't miss a thing!


Disclaimer- I get free goodies for blogging about craft products!  Today I'm sharing some fun new products sent to me from Stampendous!


Wednesday, February 1, 2017

Obsessive Cat Disorder


Stampendous is now carrying Laurel Burch line of stamps and the Stampendous Design Team has a bunch to show you this week.  The Laurel Burch style is vibrant, primary colors which is beautiful and I love looking at her fun and creative creations.  Primary colors aren't my specialty and this is about as primary as I can get.

1.  The cat and butterfly from the Cling Indigo Cats Set, are colored with Staedtler Watercolor Pencils and matching die from the Indigo Cats Die Set were used to cut them out.
2.  To make the background, Leather Flowers was stamped on watercolor paper with VersaMark Ink and embossed with clear embossing powder.  Different colors of Gelato's were scribbled on the flowers.  A baby wipe was used to spread the color and a dry paper towel was wiped across the top to remove any remaining Gelato's from the embossing powder.This was glued to a larger black and white panels then glued to a blue card. Set aside.
3.  The sentiment from Cat Sayings Perfectly Clear Set was stamped on acetate with black StazOn Ink then cut out.
4.  The diecut pieces were glued to the card with Zip Dry Glue and the sentiment was attached to the card with Blue Dot Sparklers.  Additional Dot Sparklers were placed down the left side of the card.

Stay connected and don't miss a thing!

 Follow Stamp This 
(I follow crafty people back!)


https://blogger.googleusercontent.com/img/b/R29vZ2xl/AVvXsEiBIB7cl3FWcUqRpVNE2xf0uD7bSSaDv8EJChhD3TSJRrDTTqubuFddCha_Vsye2BIOBKX1yGUjGJyPJvjizD-izRFYxEG1Q0kTmLKEiANGSeoreVxGdz2kjJCF6lGrlm9fopxLmRzM6V04/s1600/Stampendous+logo.jpg


Sunday, January 29, 2017

Funky Flower


Hi, it's Sunday to it's time again to share a card made with stamps from I Brake For Stamps.  Here's a friendship card made with Sending Smiles and Funky Cone Flower.  When buying a stamp, keep in mind you don't always have to use all of the stamped image.  The Funky Cone Flower stamp has a pretty swirl background around the flower, but today I'm only using the flower part of the stamp. You can see a card I made HERE that used all of the stamped image.

Here is how my card was made;
1.  Stamp Funky Cone Flower on watercolor paper with Onyx Black VersaFine ink, heat set and color only the flower with Staedtler colored pencils. Cut out the flower only and set aside.
2.  The background panel was made by scribbling different colors of Gelatos on watercolor paper and it was then rubbed with a baby wipe to blend. Once dry, I rubbed Mowed Lawn Distress Ink on my craft mat and picked it up with a wet paint brush and flicked water drops on the panel and let it dry.
3.  Stamp Sending Smiles at the top of the panel with Onyx Black VersaFine ink.
4.  I diecut a frame from black glitter paper and glued it to the panel with Art Glitter glue.
5.  The Funky Cone Flower was popped up over the frame with foam squares.
6.  Black Dot Sparklers were randomly place on the panel.
7.  The panel was layered onto a larger black panel and glued to a white card with Zip Dry Glue.

If you buy anything from the I Brake For Stamps website, be sure to use the coupon code SAVE10JAMIE to receive 10% off your order.


Monday, April 4, 2016

You Look Fabulous!


Don't you just love this birthday sentiment?! It's Look Fabulous from Stampendous and it makes me laugh every time I see it. This was the project my stamp club made, it is stamped on a background I made with Gelatos.  Orange, blue, grey and yellow were scribbled in rows and a baby wipe was used to blend the colors.  Once dry the sentiment was stamped with Onyx Black VersaFine Ink. Originally I hadn't intended to add a black strip but I got an ink smudge on the panel and had to cover it up but I love it and the blue flower brings out the light blue Gelato color.

Thanks for stopping by, have a great week!! :)

Stay connected and don't miss a thing!

Wednesday, October 21, 2015

Friends

BLOG Banner2

Prizes

PrizeBanner
Comment on our blog and that of each designers blog posting this week for our Getting Messy theme. Be sure to mention where you live when you comment. One lucky commenter from the US will win a prize package! For our US commenters see Official Rules.
A prize package includes:
  • Cling Fiesta Stamps Set
  • Jumbo Acrylic Stamp Handle
  • Cling Marks Stamps Set
Australian fans, one lucky commenter will win a great prize package from our Australian Distributor The Stencil Specialist. Let us know where you live when you comment.
We said three prize packages, right? Our UK Distributor Woodware Craft is joining in and will also give away one prize package! How cool is that

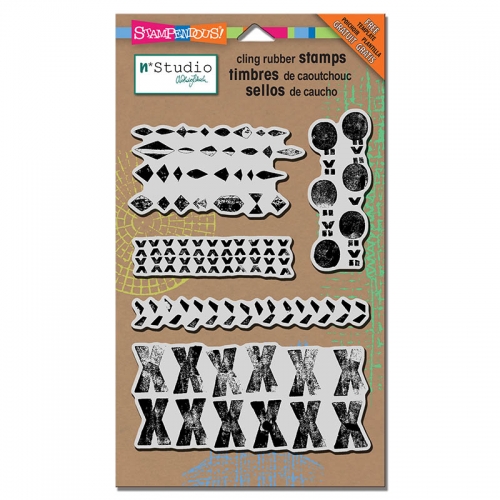
On my card today I used the NK Studio Marks set to create the background.


NK Studio Marks
1.  I started off coloring a white panel with orange and pink Gelatos.
2.  The stencil that comes with the set was laid on top of the colored panel and sponged with gesso.
3.  Once dry several stamps from the Marks set were stamped with London Fog Memento ink.
4.    Stamp Sentiment from the Happy Greetings Perfectly Clear Set on tissue paper with Tuxedo Black Memento ink, cut out and glue to the center of the colored panel using Fast Finish Decoupage using a flat brush to brush it on.  The tissue paper almost become invisible.
                                       Happy Greetings Perfectly Clear Stamps SetFast Finish DECOUPAGE GLUE
5.  Stamp Friend from the same set on a window diecut with Pearlescent Orange Brilliance ink and shade letters with a dark orange pencil.  Apply pink Dot Sparklers and tie the left edge with orange and pink ribbons.  Mount diagonally to card popping up with foam tape.
6.  Glue a white flower that has been sprayed with orange spray to the bottom of the card using 3 in 1 Glue.

Now go take a look at what the other Stampendous Designers have for you today!!
Jamie Martin (That's me)

Stay connected and don't miss a thing!