Klik Interchangeable Jewelry from Metal Complex is a fantastic new line of DIY accessory options. Whether you are new to jewelry crafting like I am or experienced, this is a fun product to be creative with. There are two snap sizes and many snap settings, so you can interchange your pieces to suit your mood.
 You can see all the wonderful Klik products and tons of ideas for creating with this super fun product in their flippy catalog HERE and you can find a retailer HERE. We’d like to recommend www.resinobsession.com because they carry Stampendous products as well!
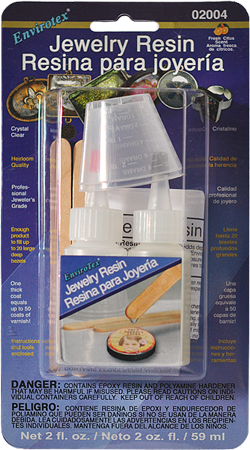
 We used products by Environmental Technology, Inc. (ETI) who generously sent our design team some of their wonderful Jewelry Resin to make our Klik jewelry pieces . This two part resin is incredibly easy to use and creates professional results. This is my first time using resin to make jewelry and I have to say I did it kicking and screaming because it is out of my comfort zone and I thought it sounded really hard to do. To my surprise, it was REALLY easy and I love the results. This easy to use resin is sold at Resin Obsession, but you can also find it at Michael's and other fine craft stores. You can get thousands of ideas for using resin to create your own pieces on the resincrafts blog or on the I Love Resin blog.
Prizes
There are 3 prize packages from Stampendous that include Klik jewelry, resin and Eclectic Perfectly Clear™Stamp Set. Visit the Stampendous blog for details.
So hop around with us this week and leave comments for your chance to win, as we play with Klik© jewelry and two-part resin to create some of our best work ever!!
Here is my project for today.
2. Cut out to fit the bezel, apply Zig 2 Way Glue Pen around the edges and sprinkle with China Blue Micro Glitter.
3. Place butterfly in Bezel and fill with Environmental Technology, Inc. (ETI) resin. Be sure to read and follow the directions. Don't worry if there are some bubbles, mine disappeared on their own. Set aside to dry.
4. Apply Glossy Accents in the small snaps and sprinkle one with fuchsia Crushed Glass Glitter and one with Bronze Glass Glitter. Let dry.
5. When dry snap pieces in as desired. Here is a picture of it on.
Here’s who is sharing today:
Jamie Martin (that's me)
Stay connected and don't miss a thing!
Follow my blog (in the right column)
Pinterest http://www.pinterest.com/jamieusc/
Twitter https://twitter.com/Jamieusc
Instagram- http://instagram.com/stampthis


19 comments:
Wow! I love your bracelet! This is something I would make. But, I'd really want to make rings? Not sure if that's included, and earrings. Great job!!
What a fun piece of jewelry. I love the idea of interchangeable parts. What a great way of expressing myself through a piece of art and jewelry. Thanks for sharing.
Fantastic! I have so much to learn about using resin. The butterfly is gorgeous-really looking forward to giving this a try.
I love this idea. Thanks for sharing your ideas!
How cool! This is so pretty! Love the idea of making my own!
This turned out beautifully!
Beautiful butterfly! Your coloring is amazing. Thanks for sharing your project with us.
Stunning! LOVELOVELOVE the beautiful butterfly! Definitely need to get some of these products to create some pieces for myself and a few friends! TFS!
I love the little butterfly and the glass glitters are so pretty!
Wow! I love this idea. Thanks for sharing your pieces.
Love the bracelet. The butterfly really stands out. I'm assuming that you can snap out the pieces and replace them whenever you want to change designs or color.
Sounds like a wonderful new craft to try.
thanks for sharing.
This turned out very pretty, Jamie! Love the sparkle!
I love it - Can't wait to try. It is something I can do with my 8 year old niece for her mom (my sister) for Mother's Day. And it seems easy.
Such a sweet mix of color in your butterfly designs and love the texture from the Glass Glitter bezels. So much fun, thank you for sharing today!
Such a unique piece! I'd love to give this a try! Thanks for sharing!
Beautiful. I would love to give this a try.
Sue in Ohio
slrdowney at hotmail dot com
So pretty Jamie and thanks for the tutorial with your great tips!
Beautiful and fun piece of jewelry.
Butterflies & Shinies... what could be better?!!! : ) From FL
Post a Comment