Featured Post

Privacy Policy

I'm working on a new privacy policy for my followers, but for now you should know that if you comment on my site, my site collects your ...

Wednesday, May 20, 2020

Funny Farm


Today I have a card made with the new Funny Farm stamp from Stampendous, look at those cute little faces peeking around the corner of the barn door.

Here's how my card was made-

  • Stamp Funny Farm on white cardstock with black ink, color with colored pencils, and shadow around the animals with blue decorative chalk. Layer onto a larger black panel.
  • Blend inks on a white panel in green, yellow, and blue, then stamp thinking of you in those same colors to create the background.
  • Layer this onto a larger black panel, glue to a blue card, and pop up on the card.
  • Stamp Thinking of you on a strip of white cardstock with black ink and glue to the card as shown.


Supplies
Stampendous
P354 Funny Farm
SSC 1309 Best Day Perfectly Clear Stamp Set
White Mixed Media Cardstock
Onyx Black VersaFine Ink

Plus
Prisma Color Pencils
3D Foam Squares- Scrapbook Adhesives by 3L
Zip Dry Glue- Beacon Adhesives
Cardstock- Black, Blue
Distress Ink- Shabby Shutters, Mowed Lawn,  Scattered Straw, Salty Ocean, Tumbled Glass
Decorative Chalk-Blue


Have a creative day and follow me on 

Disclaimer- I get free goodies for blogging about craft products! Today I'm sharing a card made with products from Stampendous


Monday, May 18, 2020

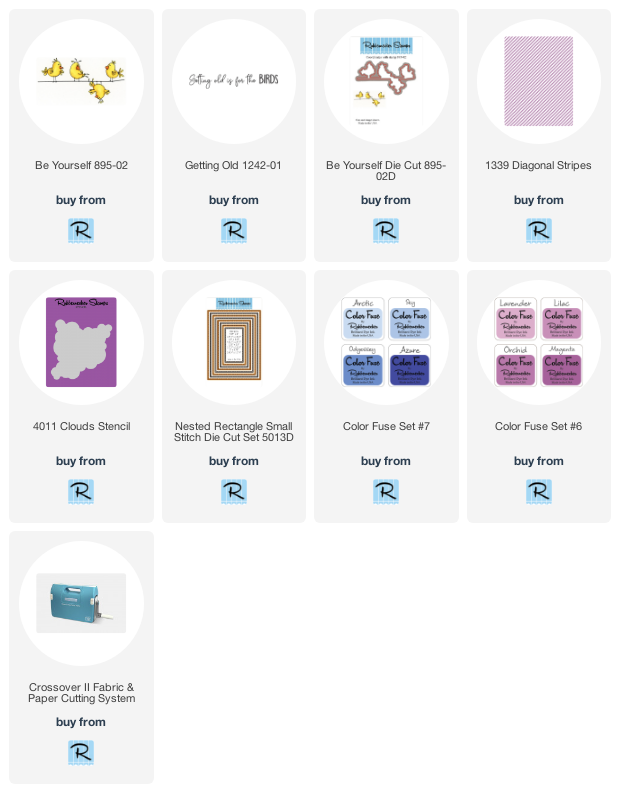
Getting Old Is For The Birds


Hi,  today I have a card that uses some of my favorite Rubbernecker Stamps products!  I just think that these birds are the cutest, they make me laugh every time I look at them and think I'm that little bird hanging upside down hahah.

Here's how my card was made-
  • Stamp Be Yourself on white cardstock with Onyx Black VersaMark Ink and color with Prisma Colored Pencils.  
  • Cut out the birds using the Be Yourself Die Cut and set aside.
  • Cut a rectangle using the Nested Rectangle Small Stitch Die Cut Set and create clouds using the Clouds Stencil Lavender, Sky, and Artic Color Fuse Inks using blending brushes.
  • Stamp Diagonal Stripes on white cardstock using the diagonal background stamp and Arctic Ink.
  • Stamp Getting Old on a strip of white cardstock using Odyssey Ink and glue to a white card.

  • Die-cut purple and green papers using the Nested Rectangle Small Stitch Die Cut Set one size larger than the cloud panel.
  • To assemble the card layer and glue the green, purple, and cloud panel as shown.  Use foam squares to pop up on the card.
  • Pop up the birds with foam squares onto the cloud panel, glue the sentiment below this, and randomly add sequins using Nuvo glue.
  • Your card is done and ready to mail!


Follow Me- Stamp This, on-
Twitter

Affiliate and Product Disclosure
I am on various Design Teams and get free goodies for blogging about craft products but only because I love their products and genuinely use them. Ultimately my opinions are my own. A list of companies is in my sidebar.
Being part of various affiliate programs – when you click on an affiliate link and then go on to make a purchase, at no cost to you, I receive a small commission.  The affiliates I use include Rubbernecker Stamps.

Friday, May 15, 2020

Hug a Friend


Hi there, today I used a super cute stamp set from Stampendous called Dog Kisses Perfectly Clear Stamp Set.  It includes different types of dogs and sentiments along with a little heart and a paw to add accents.  

Here's how I made my card-
  • I stamped the dog on white cardstock with Onyx Black VersaFine Ink and colored with Prisma Colored Pencils.
  • I used circle dies to cut  it out and layer onto a larger black circle.
  • A larger white cardstock circle was cut and the heart was stamped around the circle and colored with pencils. This was then layered onto a larger black circle.


  • A decorative paper panel was glued to a black card using Nuvo Glue.
  • The Spring Borders Cutting Dies Set was used to cut the flower border from black cardstock, it was glue just below the center of the card.
  • The heart circle was glued flat to the card and the dog circle was popped up using 3 D Foam Squares from Scrapbook Adhesives by 3L.
  • The sentiment was stamped at the bottom of the card with black ink.


Here are the Stampendous products I used for the card, you can click on the images to be taken to the Stampendous website.
  
Have a creative day and follow me on 

Disclaimer- I get free goodies for blogging about craft products! Today I'm sharing a card made with products from Stampendous


Wednesday, May 13, 2020

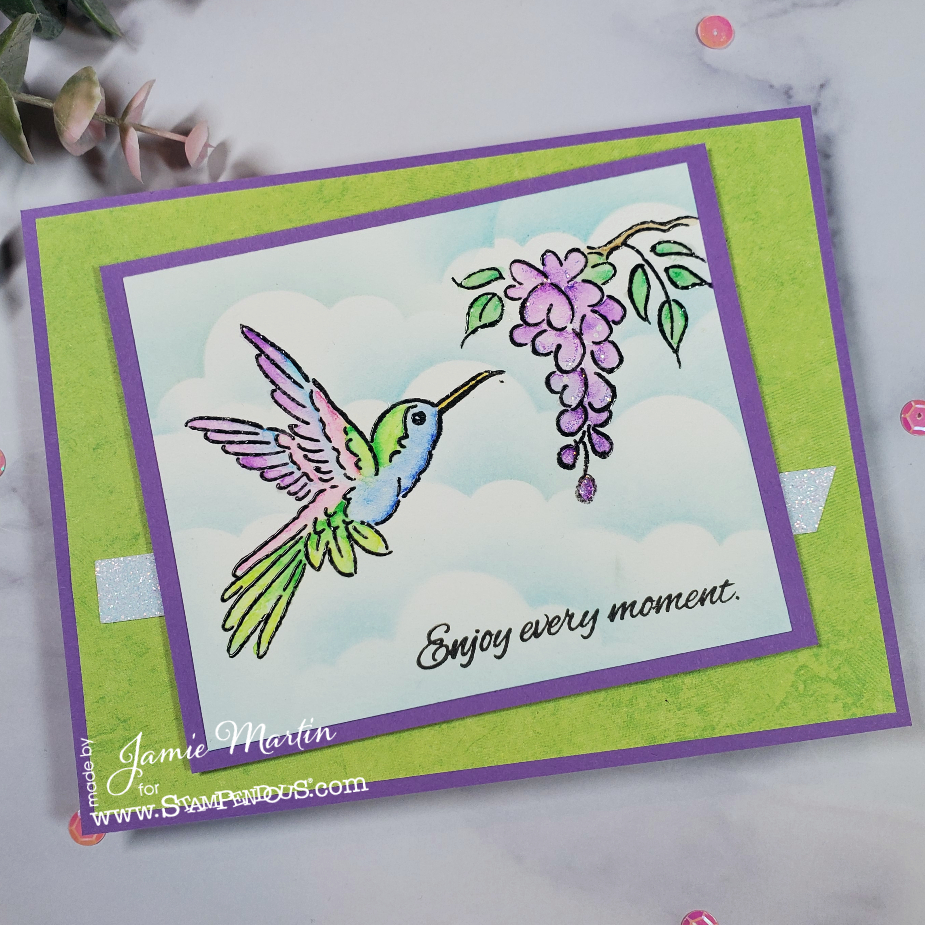
Hummingbird Hello


Hi and welcome back!  Today's card uses the new release Hummingbird Hello Perfectly Clear Set from Stampendous, look at all of the pretty flowers and leaves along with the hummingbird in this set!  I love using sets, you always know the images are sized appropriately for each other as are the sentiments, nothing worse than ordering stamps thinking they will work well together, but the sizes aren't right for each other.

Here's how my card was made-
  • Stamp the hummingbird and flowers from the Hummingbird Hello Perfectly Clear Stamp Set on watercolor paper with black ink and emboss with Clear Embossing Powder.
  • Color with watercolor pencils and add clouds using a stencil and blue ink.
  • Stamp the sentiment on the bottom right corner then layer this to a larger purple panel.
  • Glue green decorative paper to a purple card and a strip of white glitter paper on top of that.
  • Pop up the stamped piece on the card with foam squares.
  • Add Diamond Glaze to the leaves and glitter to the flowers using Diamond Glaze to adhere the glitter.
Supplies
Stampendous
SSC2007 Hummingbird Hello
MG01 Crystal Micro Glitter
EP020 Clear Embossing Powder
STF082 VersaFine Onyx Black Ink

Plus
Aquarelle Watercolor Pencils
3D Foam Squares- Scrapbook Adhesives
Zip Dry Glue- Beacon Adhesives
Cardstock- Purple
Decorative Paper- Green
Glitter Paper- White
Watercolor Paper
Distress Ink- Tumbled Glass
Heat Gun
Diamond Glaze- Judi Kins

Have a creative day and follow me on 

Disclaimer- I get free goodies for blogging about craft products! Today I'm sharing a card made with products from Stampendous


Monday, May 11, 2020

Fragrant Rose


Hi friends, I hope you all are having a good start to your week.  Today I have a card using the new Fragrant Rose Perfectly Clear Stamp Set from Stampendous, it has beautiful images that are perfect to watercolor.

Here's how my card was made-
  • Stamp Rose from the Fragrant Rose Perfectly Clear Stamp Set with black ink, emboss with Clear Embossing Powder, and color with watercolor pencils.
  • Cut out using the Fitted Frames B Die Set and also cut out a larger frame from gray cardstock.
  • Sprinkle Shabby White Embossing Enamel around the rose and use a heat gun to heat from underneath so the embossing enamel doesn't blow off. Set aside.

  • Sponge a white cardstock panel with Worn Lipstick ink and use the Cling Grunge Script Stamp Set to stamp the background with Worn Lipstick ink and grey ink. Glue to a grey card.
  • Layer the rose panel to the larger grey die-cut panel and pop up on the card using foam squares.
  • Stamp the sentiment from the set on white cardstock with black ink, cut out using the Fitted Frames B Die Set and glue to the bottom of the rose.

Products
Stampendous
SSC200 Fragrant Rose
CRS5109 Cling Grunge Script Stamp Set with Stencil
DCP1006 Fitted Frames B Die Cut Set
Shabby White Embossing Powder
Clear Embossing Powder
MPW811 Mixed Media White Paper
STF082 VersaFine Onyx Black Ink

Plus

Aquarelle Colored Pencils
3D Foam Squares- Scrapbook Adhesives by 3L
Cardstock- Grey
Watercolor Paper
VersaFine Smokey Grey Ink
Distress Ink- Worn Lipstick
Heat Gun


Have a creative day and follow me on 

Disclaimer- I get free goodies for blogging about craft products! Today I'm sharing a card made with products from Stampendous


Tuesday, May 5, 2020

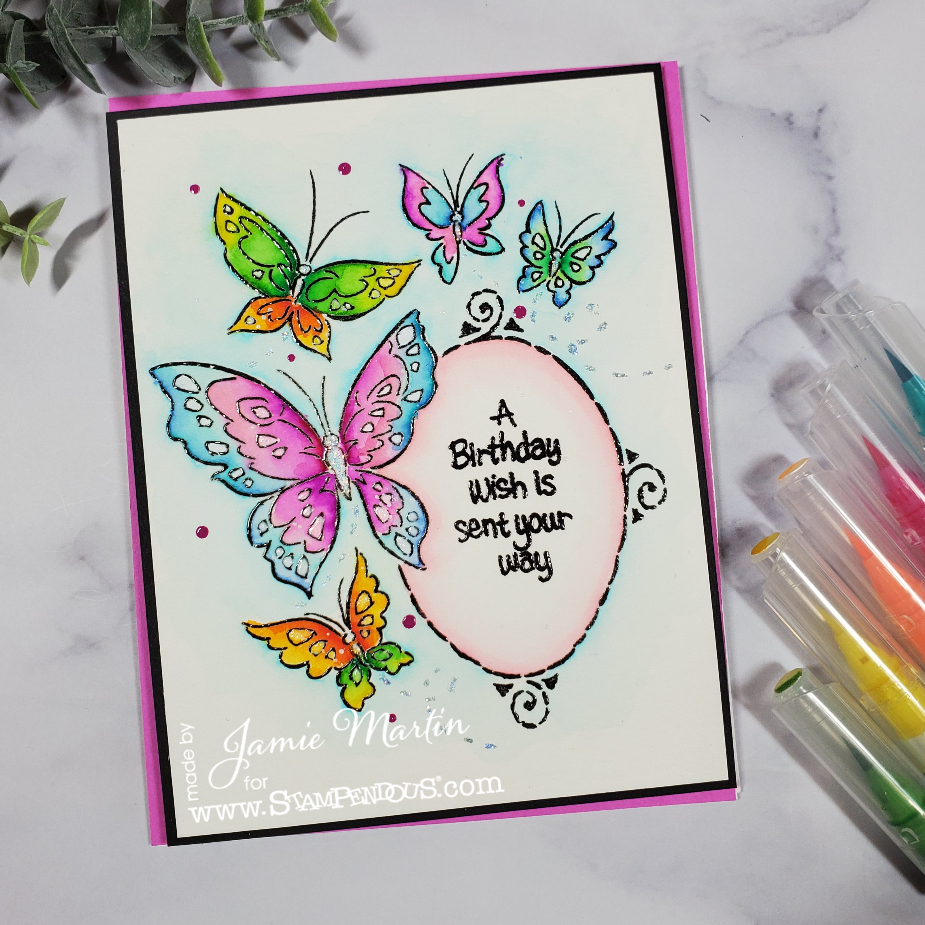
Birthday Butterflies


This week the Stampendous Design Team will be making cards using the Butterfly Frame Perfectly Clear Set.  The frame and all of the butterflies is just one stamp and you can pick your sentiment to fill the frame from the five choices.


To make my card I stamped it with Onyx Black VersaFine Ink and embossed it with Clear Embossing Powder.  I then color with Zig Clean Color Real Brush Pens and colored in the dots on the butterflies with a white gel pen. 


Have a creative day and follow me on 

Disclaimer- I get free goodies for blogging about craft products! Today I'm sharing a card made with products from Stampendous


Monday, May 4, 2020

You're the Best


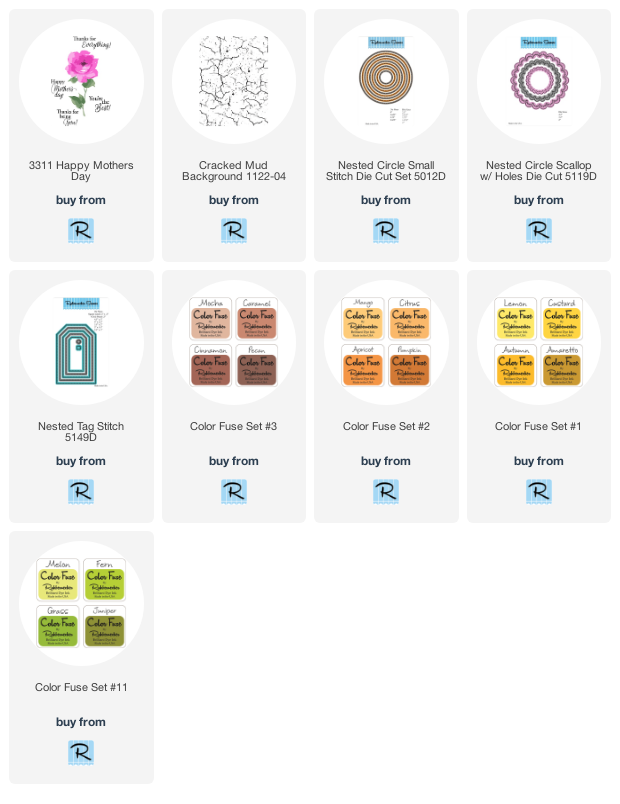
Hi everyone, Jamie here to start off your week.  The card I'm sharing today is made using the Happy Mother's Day Clear Stamp Set and the new Color Fuse Inks.  All of the colors work beautifully together so I thought I'd try some colors you wouldn't normally use for a flower and see how it would look and I'm happy with the result!

Here's how my card was made-
  • Stamp the rose using Color Fuse Ink Sets #1, #2, #3, and #11 on white cardstock.  Inside each of the layering stamp sets is a direction sheet on what part of the flower to stamp first.
  • Cut out the flower and set aside.
  • Stamp the Cracked Mud Background on tan paper with VersaMark Ink and emboss with white embossing powder and cut out using the Nested Small Stitched Die Set.
  • Die-cut decorative green paper using the Nested Circle Scallop w/ Holes Die Set and glue the circle onto this.
  • Glue the die-cut piece onto the right side of a white cardstock panel so a portion is overhanging and cut off the overhang portion.
  • Pop up the cut out rose on the die-cut circles using foam squares.
  • Die-cut a tag from white cardstock using the Nested Tag Stitch Die Set.
  • Stamp the sentiment on the tag and glue cut strips of decorative paper diagonally across the bottom of the tag.  Glue this to the flower panel.
  • Glue the flower panel to a tan card and randomly apply a few yellow enamel dots and you're done!

Click on the product to go to the Rubbernecker Stamps shop

Follow Me- Stamp This, on-
Twitter

Affiliate and Product Disclosure
I am on various Design Teams and get free goodies for blogging about craft products but only because I love their products and genuinely use them. Ultimately my opinions are my own. A list of companies is in my sidebar.
Being part of various affiliate programs – when you click on an affiliate link and then go on to make a purchase, at no cost to you, I receive a small commission.  The affiliates I use include Rubbernecker Stamps.