Featured Post

Privacy Policy

I'm working on a new privacy policy for my followers, but for now you should know that if you comment on my site, my site collects your ...

Sunday, November 13, 2016

Birthday Balloons


It's time again for my Sunday, I Brake for Stamps post and today I have a birthday card for you. It has a little shine, a little sparkle and a little dimension.

Here is how my card was made;

1.  Party Balloons were stamped on watercolor paper with Onyx Black VersaFine ink and embossed with clear embossing powder.
2.  The balloons were colored with Zig Clean Color pens, Glossy Accents was used on top of the balloons and set aside to dry.
3.  Once dry Distress Inks in Pistachio, Salty Ocean and Faded Jeans were sponged over the panel.  Use a paper towel to rub the ink off the balloons and embossed area. Glue to a black card.
4.  Stamp Dot Letter Happy Birthday on white paper with Onyx Black ink, emboss with clear.  Cut the words apart and layer onto black paper.  Add a few dots of Caribbean Ocean Nuvo and let dry.
5.  Pop up Happy at the top of the card and glue Birthday to the bottom.
6.  Add black Dot Sparklers and some sequins.

Head on over to the I Brake For Stamps website and see the wide variety of stamps they carry.  And if you place an order, be sure to use my coupon code SAVE10JAMIE to save 10%!


Wednesday, November 9, 2016

Baby's Birthday


This baby card has several fun techniques that add a little extra zing for that special occasion.  The balloons are embossed and the background is made using a stencil and glitters.  Be sure to stop by the Stampendous website to take a look at the project section for some inspriation.

Here is how my card was made;

1.  Stamp Balloon Bunny on white paper oval with black ink and color with pencils.  Using a VersaMark Pen, go over one of the colored balloons and emboss it with the embossing powder from the Shimmer Shine Embossing Kit that matches the balloon.  Continue to do this one balloon at a time. Chalk around the image with blue chalk using a flat brush.
2.  Make the background with the Mosaic Swirls stencils using the double glitter technique with Crystal and Iced Blue Micro Glitter.  Layer onto a green panel.
3.  Stamp Baby from the Animal Mobile Perfectly Clear Stamp Set in black on white paper die cut with Fitted Frames, layered onto a yellow panel diecut with a larger Fitted Frame.  Color with pencils.
4.  Glue background and oval onto card as shown and pop up Baby.

Supplies
Stampendous
V318 Balloon Bunny
SSC1242 Animal Mobile
Ek21 Shimmer Shine
MG01 Crystal Micro Glitter
MG14 Iced Blue Micro Glitter
DWLJ901 Mosaic Swirls
MPW811 Mixed Media White Paper
Double Sided Mounting Paper
Coconut Soap

Plus
Zip Dry Glue
My Colors Paper- Grasshopper, (yellow)
Prisma pencils
decorative chalk


Stay connected and don't miss a thing!

 Follow Stamp This 
(I follow crafty people back!)


https://blogger.googleusercontent.com/img/b/R29vZ2xl/AVvXsEiBIB7cl3FWcUqRpVNE2xf0uD7bSSaDv8EJChhD3TSJRrDTTqubuFddCha_Vsye2BIOBKX1yGUjGJyPJvjizD-izRFYxEG1Q0kTmLKEiANGSeoreVxGdz2kjJCF6lGrlm9fopxLmRzM6V04/s1600/Stampendous+logo.jpg


Sunday, November 6, 2016

Love and Fruit


Hi, today I'm sharing a card made with fruit and words from the I Brake For Stamps, Fruits and Flowers Sheet stamps.  

To make this card the grapes were randomly stamped on a white panel with purple ink and Love was stamped with green ink. A strip of glitter paper was glued to the left side and triangles in the left corners. This was then glued to a black panel and set aside. 

Glossy paper was used for the tag and Love, from the set, was repeatedly stamped with VersaMark ink. The tag was then sponged with green ink. The bottom was torn, layered onto black paper and Love was stamped with Tuxedo Black Memento ink.  A charm was glued on with 3 in 1 Glue. The tag was tied with purple ribbon and glued to the card.


A white card was randomly stamped with Love in green ink, the edges were sponged and the stamped panel was glued onto the card.

If you order anything from the I Brake For Stamps website, be sure to use my coupon code SAVE10JAMIE to receive 10% off your order!

I hope I have inspired you to Stamp This!


Wednesday, November 2, 2016

Fall Note Card Set


These Fall note cards were made using the new Build A Wreath Die Set from Stampendous and wow is it versatile!

It could be used for a Christmas wreath, Fall wreath, Spring wreath or like I did, not a wreath at all.

To make my cards the pine cones and leaves were die cut from colored paper and sponged with inks darker than the papers.  Ink splatters were added to white panels and yellow zigzag tape was placed at the bottom.  Circles were die cut on the edge of the white panels and layered onto goldenrod paper, then mounted to a rust card.
The sentiment was stamped with black ink inside the diecut circle and a scalloped circle border was die cut from green paper and glued to the circle of the white panel.

Stay connected and don't miss a thing!

 Follow Stamp This 
(I follow crafty people back!)


https://blogger.googleusercontent.com/img/b/R29vZ2xl/AVvXsEiBIB7cl3FWcUqRpVNE2xf0uD7bSSaDv8EJChhD3TSJRrDTTqubuFddCha_Vsye2BIOBKX1yGUjGJyPJvjizD-izRFYxEG1Q0kTmLKEiANGSeoreVxGdz2kjJCF6lGrlm9fopxLmRzM6V04/s1600/Stampendous+logo.jpg

Sunday, October 30, 2016

A Pearfect Hello


Here is the pearfect card to give to a friend. The pears are from I Brake For Stamps new Fruits and Flowers Sheet, were stamped three times with Leaf Green Wendy Vecchi Archival Ink, masked and sponged with brown ink.  Once done the masks were removed to reveal the uninked pears and it was layered onto black paper.

For the background paper, the word pear was randomly stamped on a white panel with Shabby Shutters Distress Ink, the edges were sponged and ribbon was tied around the bottom.  The panel was then glued to a black card with Zip Dry Glue. Hello was diecut from black paper and glued to the center pear.

You can see a card I made with this set a couple of weeks ago by clicking HERE.

You can get 10% off your order from the I Brake For Stamps Website by using my coupon code SAVE10JAMIE


Friday, October 28, 2016

Santa's Helpers


Are you playing along with Stampendous and Graphic 45 Blog Hop?


I sure hope so because look what you could win!!


Now for my card, the Elf Gift stamp from Stampendous, which is super cute, was colored with colored pencils. Fitted Frames Dies were used to cut out the image then a spoonful of snow was sprinkled at the bottom and heated from underneath the paper so it wouldn't blow off. It was then layered onto green paper that was diecut with Fitted Frames. Graphic 45 Paper was glued diagonally to a red card, the image was glued on then the bottom was tied with green ribbon.

Supplies
Stampendous
HMP54 Elf Gift
Fitted Frames
Spoonful of Snow
Mixed Media White Paper
Embossing Heat Tool

Plus
Graphic 45 Paper
My Colors Cardstock
Zip Dry Glue
Creative Impressions Ribbon

Be sure to stop by the Stampendous Blog, link at the bottom, for links to the other Stampendous designers blog.

Stay connected and don't miss a thing!

 Follow Stamp This 
(I follow crafty people back!)


https://blogger.googleusercontent.com/img/b/R29vZ2xl/AVvXsEiBIB7cl3FWcUqRpVNE2xf0uD7bSSaDv8EJChhD3TSJRrDTTqubuFddCha_Vsye2BIOBKX1yGUjGJyPJvjizD-izRFYxEG1Q0kTmLKEiANGSeoreVxGdz2kjJCF6lGrlm9fopxLmRzM6V04/s1600/Stampendous+logo.jpg

Wednesday, October 26, 2016

31 Days Of Halloween Day 26


Here is my last card for 31 Days of Halloween and I used the new Frame Witch Metal Stencil from Stampendous and sponged with black ink.  A stamp from the Industrial Set was used for the background and Aged Black Embossing Enamel was used in the corners.

2016_31-days-of-halloween

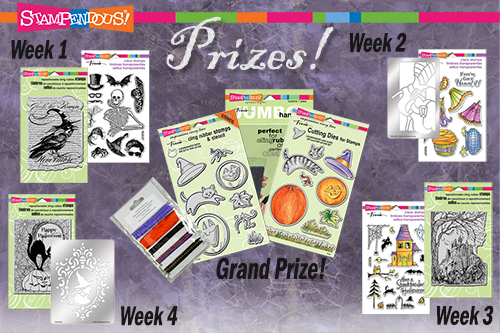
And you'll want to hop along, look what you could win, one prize pack is given away each week of October!!

31days2016_week4prize

Stay connected and don't miss a thing!

 Follow Stamp This 
(I follow crafty people back!)


https://blogger.googleusercontent.com/img/b/R29vZ2xl/AVvXsEiBIB7cl3FWcUqRpVNE2xf0uD7bSSaDv8EJChhD3TSJRrDTTqubuFddCha_Vsye2BIOBKX1yGUjGJyPJvjizD-izRFYxEG1Q0kTmLKEiANGSeoreVxGdz2kjJCF6lGrlm9fopxLmRzM6V04/s1600/Stampendous+logo.jpg