Featured Post

Privacy Policy

I'm working on a new privacy policy for my followers, but for now you should know that if you comment on my site, my site collects your ...

Monday, March 22, 2021

I'd Share With You


I'm popping in today with a card featuring Maxwell wearing a mask and sharing his last bottle of hand sanitizer, such a thoughtful little mouse.  I hope that all of my crafty friends are staying healthy!

Here's how my card was made-
  1. Stamp Masked Maxwell and the hand sanitizer on Mixed Media White Paper and color with colored pencils, then cut out and set aside.
  2. Splatter an orange card using white and orange inks.
  3. Place a piece of decorative paper on the right side of your card with one of the corners as shown and cut off any overhang from the card.  Glue this down.
  4. Line the edge of the decorative paper with black glitter washi tape.
  5. Stamp sentiment with black ink on a die-cut banner and glue to the left side of the card.
  6. Apply a strip of washi tape to the bottom portion of the decorative paper, pop up Masked Maxwell using foam squares and glue down the hand sanitizer bottle.
Supplies
Stampendous
HMCV41 Masked Maxwell
SSC1365 Survived 2020
MPW811Mixed Media White Paper
STF082 VersaFine Ink- Onyx Black
EP020  Clear Embossing Powder

Plus
Prisma Colored Pencils
Decorative Paper
Cardstock- Orange, Black 
Black and White Check Washi Tape
White Pigment Ink
Abandon Coral- Distress Ink
3D Foam Squares- Scrapbook Adhesives by 3L
Zip Dry Glue- Beacon Adhesives
Scissors
Paper Cutter
Heat Gun
Have a creative day!

Let's connect!


Disclaimer- I get free goodies for blogging about craft products! Today I'm sharing a card made with products from Stampendous

Here are some places that you can find Stampendous Products-
First off check out your local Stamp Store, if they don't have it they can order it.
Online Stores

Friday, March 19, 2021

A Cup Of... Coffee Lover's Blog Hop


Today starts the Coffee Lovers Blog Hop and it will run all week long with a lot of prizes to be won! So check out the Stampendous! Blog and Coffee Loving Cardmakers Blog for all of the details on how to play along.


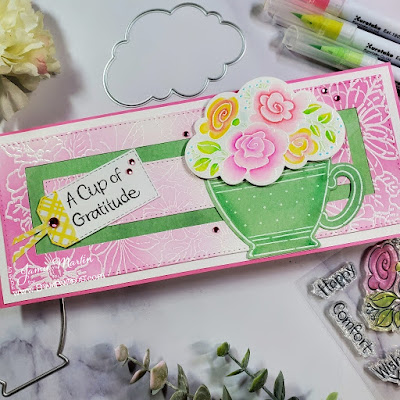
My card uses the POP Rose Teacup stamp set and the POP Shapes Die Set from Stampendous.  The images were stamped with VersaMark Ink and embossed with White Embossing Powder then colored with Zig Clean Color Real Brush Pens.  The flowers were stamped on Strathmore Bristol Smooth paper (this is the best paper I have found to use with Zigs)  and the background was stamped on Mixed Media White Paper.


The background was stamped with the Slim Cling Floral Wings also from Stampendous.  It was stamped with VersaMark Ink, embossed with White Embossing Powder and sponged with pink inks.  The teacup was glued flat and the flowers were die-cut and popped up. 
Adhesives that were used are from Scrapbook Adhesives by 3L and are 3D Foam Circles White Mixed, EZ Runner Grand Tape Runner and Dual Tip Glue Pen.


Have a creative day!

Let's connect!


Disclaimer- I get free goodies for blogging about craft products! Today I'm sharing a card made with products from Stampendous

Here are some places that you can find Stampendous Products-
First off check out your local Stamp Store, if they don't have it they can order it.
Online Stores


Coffee Lover's Blog Hop


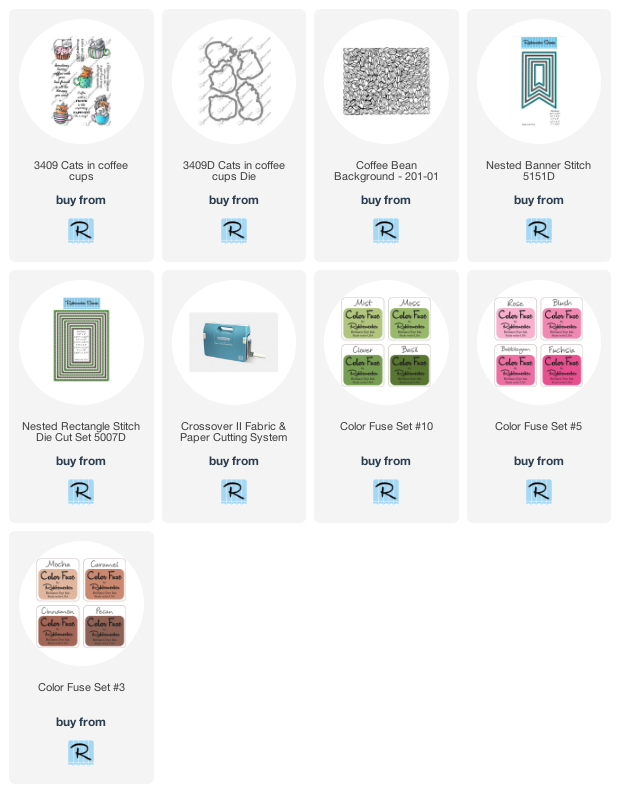
Today starts off the Spring/Summer Coffee Lovers Hop and it lasts for a week, so you have plenty of time to play along and win one of the wonderful prizes that are offered!!  Be sure to visit the Rubbernecker Stamps Blog and the Coffee Loving Card Makers Blog for details on how to play along and what prizes will be available.


To make the clouds a cloud stencil was used, Rubbernecker Stamps is out of stock but will get them back in the end of Apri.


The Nested Banner Stitch Die Set was used to make a shaker.


Images from Cats in Coffee Cups were colored with Zig Clean Color Real Brush Pens after being stamped on Strathmore Bristol Smooth Paper.


Foam tape, tape runners and glue from Scrapbook Adhesive by 3L were used.


Have a crafty day!

Let's Connect!

Affiliate and Product Disclosure
I am on various Design Teams and get free goodies for blogging about craft products but only because I love their products and genuinely use them. Ultimately my opinions are my own. A list of companies is in my sidebar.
Being part of various affiliate programs – when you click on an affiliate link and then go on to make a purchase, at no cost to you, I receive a small commission.  The affiliates I use include Rubbernecker Stamps.

Wednesday, March 17, 2021

Be Brave


Today I have a card made with the new Be Wild Rubbernecker Stamp Set.  I thought that this would be a nice card to give to someone who needs encouragement.  It would also be perfect for a child who may be going through a hard time like starting a new school, having a medical procedure just to name a few.

Here's how my card was made-

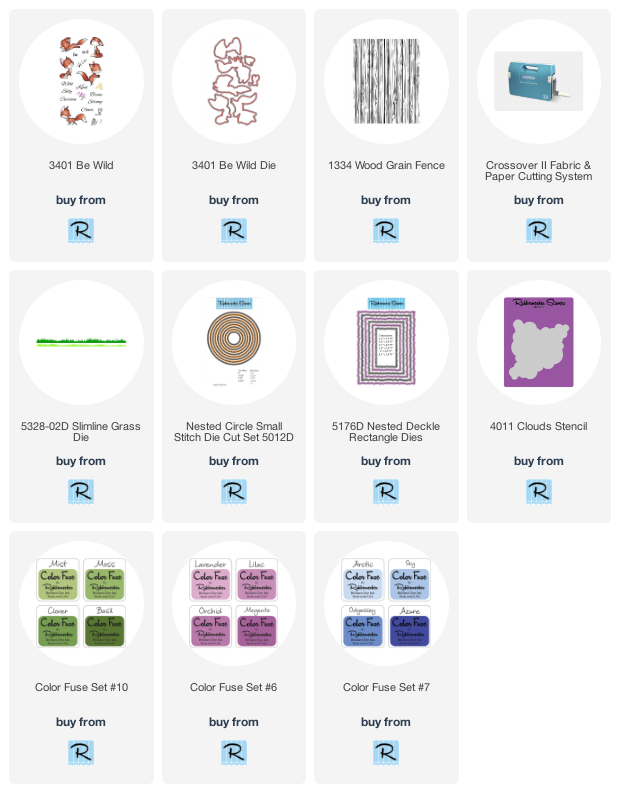
  • Die-cut white cardstock using the Nested Circle Small Stitch Die Cut Set and the Slimline Grass Die.
  • Use Mist, Moss, and Clover Color Fuse Inks to color the grass strip of cardstock with a blending brush.
  • Die-cut the strip of grass with the same circle used previously and glue the die-cut grass to the circle after you stamp the flowers with Moss and Lavender Color Fuse Inks.


  • Place this on your STAY-tion, place the Clouds Stencil towards the top of the circle and place the magnets on the stencil and circle so they don't move.
  • Use Artic Color Fuse Ink and a brush to apply the ink over the stencil, move the stencil down and repeat until done.  Set aside.


  • Stamp a kraft color panel with the Wood Grain Fence stamp and VersaMark Ink and emboss with Iced Blue Embossing Enamel from Stampendous.
  • Die-cut this panel with the Nested Deckle Rectangles Dies.
  • Glue this with a E-Z Runner Strips from Scrapbook Adhesives by 3L to a white panel that has been stamped with the little speckle stamp from the set using Artic Color Fuse Ink. 
  • Then glue this to a top folding blue card that has also been stamped with the speckle stamp but with Unicorn Pigment Ink from Hero Arts.


  • Stamp Be Brave on the die-cut circle with black ink and pop it up on the card using 3D Foam Adhesive Squares by 3L, set aside.
  • Stamp the fox on Strathmore Bristol Smooth paper with VersaFine Onyx Black Ink and emboss with clear embossing powder.
  • Color with Zig Clean Color Real Brush Pens and use a water brush to watercolor it.
  • Use the matching die from the Be Wild Die set to cut out the fox and pop up on the circle with 3D Foam Squares.


  • Tie white and brown twine around the card at the bottom of the circle, that's why the card needs to be top folding. 
  • Apply Mermaid Tail Stickles to the dots on the flowers and let dry.

  • Stamp Be Brave on the die-cut circle with black ink and pop it up on the card using 3D Foam Adhesive Squares by 3L, set aside.
  • Stamp the fox on Strathmore Bristol Smooth paper with VersaFine Onyx Black Ink and emboss with clear embossing powder.
  • Color with Zig Clean Color Real Brush Pens and use a water brush to watercolor it.
  • Use the matching die from the Be Wild Die set to cut out the fox and pop up on the circle with 3D Foam Squares.
  • Tie white and brown twine around the card at the bottom of the circle, that's why the card needs to be top folding. 
  • Apply Mermaid Tail Stickles to the dots on the flowers and let dry.


Have a crafty day!

Let's Connect!

Affiliate and Product Disclosure
I am on various Design Teams and get free goodies for blogging about craft products but only because I love their products and genuinely use them. Ultimately my opinions are my own. A list of companies is in my sidebar.
Being part of various affiliate programs – when you click on an affiliate link and then go on to make a purchase, at no cost to you, I receive a small commission.  The affiliates I use include Rubbernecker Stamps.


Saturday, March 6, 2021

Cool Birthday


I'm whipping up a few birthday cards to have on hand, using the POP Ice Cream Perfectly Clear Set from Stampenoudous, doesn't the ice cream look yummy?!

Here's how my card was made-
  1. Stamp ice cream and cone on Mixed Media White Paper with black ink, color with pencils, and cut it out.
  2. Stamp the sentiment with black ink on a strip of white paper and layer it onto slightly larger decorative paper.
  3. Make a mini slimline card by cutting tan cardstock to 6" x 7", fold the 7" side in half so that the final card measures 6" x 3 1/2".
  4. Cut two pieces of different decorative paper to 5 3/4" x 3 1/4".
  5. Glue one piece of decorative paper to the top of the card.
  6. Cut the second piece diagonally and glue the bottom portion onto the bottom of the card.
  7. Pop up the ice cream and cone using foam squares.
  8. Glue the sentiment flat to the top of the card.
Supplies
Stampendous

Plus
Prisma Colored Pencils
Decorative Paper
Cardstock-Tan
3D Foams Squares, Scrapbook Adhesives by 3L
Zip Dry Glue, Beacon Adhesives
Paper Cutter


Have a creative day!

Let's connect!


Disclaimer- I get free goodies for blogging about craft products! Today I'm sharing a card made with products from Stampendous

Here are some places that you can find Stampendous Products-
First off check out your local Stamp Store, if they don't have it they can order it.
Online Stores


Wednesday, March 3, 2021

Easter Tags


Happy March and Easter is just a month away so I thought I would get started on some Easter projects.  I made these tags with the new Bunnies Set from Rubbernecker Stamps and thought that they could be used to clip on Easter baskets, treat bags or popped up on a card.
Here's how they were made-


  • Using the Nested Tag Stitch Die-Cut set, die-cut decorative paper from three different patterns with the largest die and the second-largest three times from white cardstock. 


  • Die-cut a strip of cardstock (doesn't matter what color) using the Tabbed Grass Die Set to use as a stencil to add grass to the bottom of the white tags with Grass and Juniper Color Fuse Inks
  • Stamp the sentiments from the Bunnies Set on the top of the white tags and glue the white tags to the larger patterned paper tags using E-Z Runner Strips from Scrapbook Adhesives by 3L.
  • Stamp the cute bunnies from the Bunnies Set on Strathmore Bristol Smooth paper with VersaFine Onyx Black Ink and color with Zig Clean Color Real Brush Pens and a watercolor brush to spread the color.


  • Stamp the cute bunnies from the Bunnies Set on Strathmore Bristol Smooth paper with VersaFine Onyx Black Ink and color with Zig Clean Color Real Brush Pens and a watercolor brush to spread the color.
  • Die-cut the images using the matching Bunnies Die Set and apply 3D Foam Squares from Scrapbook Adhesives by 3L.
  • Pop up the bunnies on the bottom of the tags.
  • Randomly add Star Dust, Hibiscus and Mermaid Tail Stickles around the sentiments, one color per tag.
  • Use a small clothespin to clip the tags to bags or baskets.


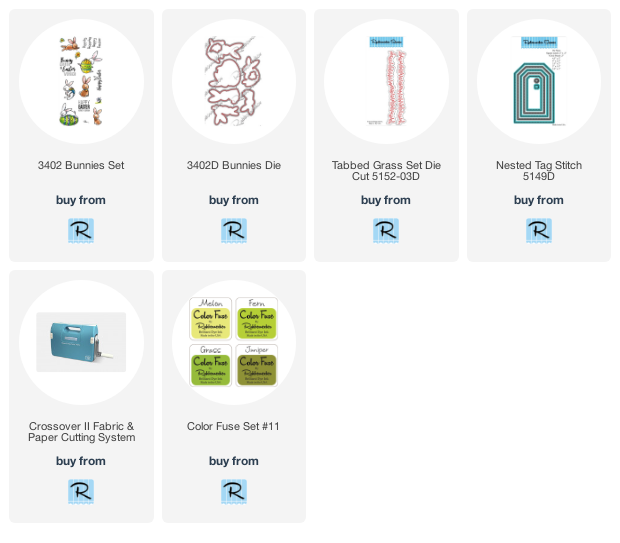
These are the Rubbernecker products that were used to make the Easter tags.

Have a crafty day!

Let's Connect!

Affiliate and Product Disclosure
I am on various Design Teams and get free goodies for blogging about craft products but only because I love their products and genuinely use them. Ultimately my opinions are my own. A list of companies is in my sidebar.
Being part of various affiliate programs – when you click on an affiliate link and then go on to make a purchase, at no cost to you, I receive a small commission.  The affiliates I use include Rubbernecker Stamps.

Monday, March 1, 2021

Bumble Bee Fun


Here's a little House-Mouse cuteness to start off your week, along with a wonderful inspirational saying that we should make a priority every day.  The image is all one stamp called Bumble Bee Fun and the sentiment is from the Amazing Woman Perfectly Clear Set, both are new from Stampendous!

Here's how my card was made-
  1. Stamp Bumble Bee Fun on Mixed Media White Cardstock with black ink and color with colored pencils.
  2. Stencil the clouds using blue ink.
  3. Randomly apply small clear rhinestones.
  4. Stamp the sentiment from the Amazing Woman Perfectly Clear Set with black ink on a strip of white cardstock and layer onto slightly larger orange cardstock, pop up on the left side to the card.
  5. Glue image to an orange card.

Supplies
Stampendous

Plus
Prisma Colored Pencils
Cardstock- Orange
3D Foam Squares- Scrapbook Adhesives by 3L
Zip Dry Glue, Beacon Adhesives
Distress Ink- Tumbled Glass

Have a creative day!

Let's connect!


Disclaimer- I get free goodies for blogging about craft products! Today I'm sharing a card made with products from Stampendous

Here are some places that you can find Stampendous Products-
First off check out your local Stamp Store, if they don't have it, you can order it directly from Stampendous or the places listed below.
Online Stores