Featured Post

Privacy Policy

I'm working on a new privacy policy for my followers, but for now you should know that if you comment on my site, my site collects your ...

Showing posts with label Summer. Show all posts

Wednesday, May 17, 2023

Summer Fun Card


Who's ready for some fun in the summer sun? I used papers stamps and dies from Rubbernecker Stamps to make my summer card, here's how it was made-

Cut a piece of decorative paper from the Off The Grid Paper Pad, to 4" x 5 1/4".
Using a paper cutter, a 1 1/2" slight was cut half way down the paper on the right side.
Each of the cut pieces were folded, you want the fold to go both, the top and bottom corners.
Place a 3D Foam Circle behind each fold, so that it will stay up a bit.
Glue this to a green card.


Stamp the sentiment on a white cardstock paper strip with Serene Color Fuse Ink and layer it onto green and yellow papers.


Place Foam Strips to the back of the sentiment panel, leaving a space where it will go over the folded center of the decorative paper.


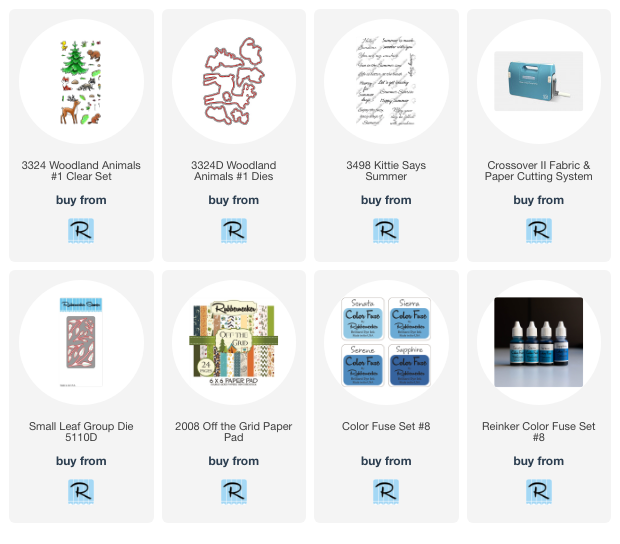
Die-cut leaves using the Small Leaf Group Die from white cardstock, vellum and green cardstock.


Pop up the sentiment in the center of the card and glue the leave under the strip.
Stamp the duck from the Woodland Animals #1 Clear Set on white cardstock with black ink, color with colored pencils and cut it out using the matching die from the Woodland Animals #1 Dies and glue it to the right side of the card as shown.


Click on the product to go to the Rubbernecker Stamps online shop.
Have a crafty day!

Let's Connect!

Affiliate and Product Disclosure
I am on various Design Teams and get free goodies for blogging about craft products but only because I love their products and genuinely use them. Ultimately my opinions are my own. A list of companies is in my sidebar.

Saturday, January 7, 2023

Watercolor Fish Friendship Card


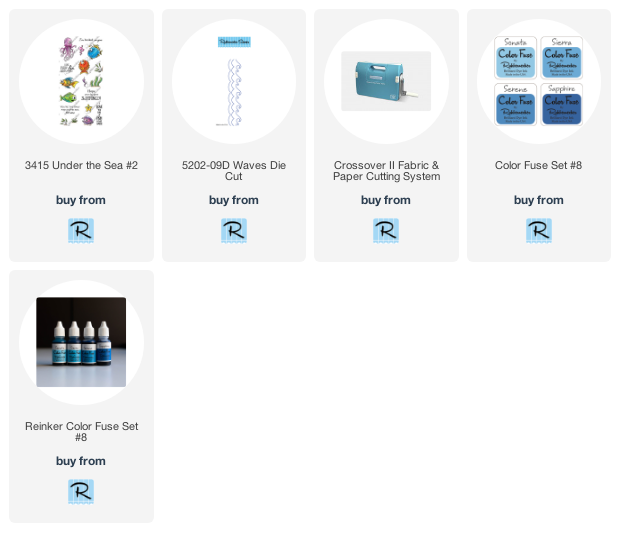
Today's card uses the new release Under the Sea Set #2 from Rubbernecker Stamps to make this fun summer card.  Be sure to read on to see how the waves were made!

Here's how my card was made-
  • Die-cut blue cardstock 4" x 5 1/4" with the Waves Die Cut about 1/3 from the top.
  • Use the top portion that was cut off like a stencil and leaving the top of the wave panel un-inked, start applying blue inks from the Color Fuse Inks #8 Set starting with the lightest color and move the "stencil" down each time you go darker.

  • Glue the waves to a white cardstock panel 4" x 5 1/4" using the Dual Tip Glue Pen from Home and Hobby by Scrapbook Adhesives by 3L.
  • Stamp the sentiment from the Under the Sea #2 with Onyx Black Ink and emboss with clear embossing powder from Stampendous.


  • Glue this to a light blue card using the same adhesive.
  • Stamp the fish from the Under the Sea #2 Set with black ink on watercolor paper and emboss with clear embossing powder. 
  • Watercolor the fish and cut them out.
  • Pop up the fish with 3D Foam Adhesive Squares as shown.
  • Glue on blue and clear Dew Drops for the bubbles above the fish.
  • Add a seashell sequin near the sentiment.


Have a crafty day!

Let's Connect!

Affiliate and Product Disclosure
I am on various Design Teams and get free goodies for blogging about craft products but only because I love their products and genuinely use them. Ultimately my opinions are my own. A list of companies is in my sidebar.
Being part of various affiliate programs – when you click on an affiliate link and then go on to make a purchase, at no cost to you, I receive a small commission.  The affiliates I use include Rubbernecker Stamps.

Wednesday, June 22, 2022

Life is Better at the Beach


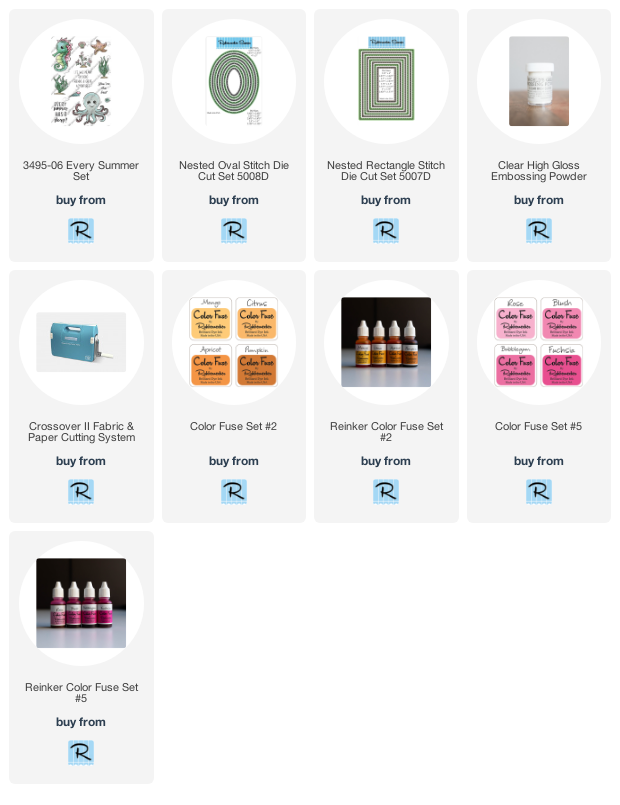
I have this card up on the Rubbernecker Stamps Blog, it's using the new Every Summer Set for a clean and simple design.

  • Stamp images from the Every Summer Set onto watercolor paper with VersaFine Onyx Black Ink and emboss with clear embossing powder.
  • Watercolor the images using Inktense Pencils, cut out and set aside.


  • Glue strips of Printworks Specialty Paper diagonally on a white cardstock panel.
  • Die-cut the panel using the Nested Rectangle Stitch Die Set.

  • Die-cut the center of this panel using the Nested Oval Die Set.


  • Pop the panel up on a larger white cardstock panel using foam squares then glue to an orange card.


  • Ink the sentiment with Bubblegum and Apricot Color Fuse Inks on a strip of white cardstock and glue it to the top of the colored strips.
  • Pop up the octopus also using foam squares and glue the starfish down below the oval.


Click on the items below to go to the Rubbernecker Stamps online shop.

Have a crafty day!

Let's Connect!

Affiliate and Product Disclosure
I am on various Design Teams and get free goodies for blogging about craft products but only because I love their products and genuinely use them. Ultimately my opinions are my own. A list of companies is in my sidebar.

Sunday, May 1, 2022

Summer Memories


Today I have this summer memories card up on the Scrapbook Adhesives Blog
Stamp the image on white cardstock with black ink and color with Prisma colored pencils.
Layer onto slightly larger black and red cardstock using E-Z Squares.


Place 3D Foam Squares on the back of the red panel and set it aside.


Wrap blue buffalo plaid paper with gold and white twine using Premium Double-Sided Tape 1/2" to attach the twine to the back.


Apply 3D Foam Squares to the back of the decorative paper and pop it up on a red card.


Die-cut "memories" from gold glitter paper and glue it to a banner die-cut from white cardstock using the Dual Tip Glue Pen.


Die-cut a helm from blue cardstock and place Micro 3D Foam Squares on the back.


Pop up the stamped image on the right side of the card and pop up the helm on the twine as shown. Glue down the sentiment below the stamped image using the Dual Tip Glue Pen.


Scrapbook Adhesives by 3L has all of the adhesives you need for your crafty projects.


Skill Level: Intermediate

Creative Time: 35 minutes


Materials Needed:

Scrapbook Adhesives by 3L® 3D Foam Squares White Mix 3D Foam Micro Squares White

Home Hobby by 3L® Dual Tip Glue Pen Premium Double-Sided Tape 1/2" 

Plus
Whimsy Stamps- Stamp and Banner Die
Momenta- Helm and Word Dies
PrintWorks Specialty Paper- Cardstock- Gold Glitter, White, Red


Monday, May 31, 2021

Say Hello With a Cool Treat!


What a fun way to cool off on a hot day with this cute stamp, Cool Treat from Stampendous. 

The image was stamped with Onyx Black VersaFine Ink and colored with Prisma Colored Pencils.  The POP Frame Die Set was used to die-cut the image and Shabby Blue Embossing Enamel was sprinkled on the top of the panel for the sky and heat embossed from underneath so that the embossing enamel wouldn't blow off.
The POP Frame Die Set was also used to die-cut the Hello and the bottom of the green and yellow papers.  Be sure to check out this die set, it has a line of POP Frame Stamp Sets that work with it, just one die set for a bunch of different sets, such a great deal.


Let's connect!


Disclaimer- I get free goodies for blogging about craft products! Today I'm sharing a card made with products from Stampendous


Friday, August 4, 2017

Sunblock Squirt


Here in Oklahoma school has started in some areas and others will start in a couple of weeks, well I'm not ready for summer to end.  To celebrate summer before it's officially over, I'm sharing this card made with the House Mouse "Sunblock Squirt" from Stampendous.

Here's how my card was made;
1.  Stamp Sunblock Squirt on white paper with black ink.  Color with colored pencils and watercolor pencils.
2.  Shadow around the image with blue chalk.
3.  Stamp saying in the top left corner with black ink.
4.  Add glitter to the sunscreen that is being squeezed out using a Quickie Glue Pen to adhere it.
5.  Layer onto orange paper and mount to a blue card.

Supplies
Stampendous
HMR91 Sunblock Squirt
SSC1239 Spring Sentiments
MG01 Crystal Micro Glitter
EP020 Clear Embossing Powder
EPA50 Heat Tool
MPW811 Mixed Media White Paper

Plus
Zip Dry Glue Beacon Adhesives
My Colors Cardstock
Decorative Chalk
Watercolor Pencils
Prisma Colored Pencils
Quickie Glue Pen

Stay connected and don't miss a thing!

 Follow Stamp This 
(I follow crafty people back!)


https://blogger.googleusercontent.com/img/b/R29vZ2xl/AVvXsEiBIB7cl3FWcUqRpVNE2xf0uD7bSSaDv8EJChhD3TSJRrDTTqubuFddCha_Vsye2BIOBKX1yGUjGJyPJvjizD-izRFYxEG1Q0kTmLKEiANGSeoreVxGdz2kjJCF6lGrlm9fopxLmRzM6V04/s1600/Stampendous+logo.jpg

Monday, June 19, 2017

Have Sweet Day


We’re Keeping Cool this week on the Stampendous Blog and on the Design Team Blogs, which is nice, because even in temperate Anaheim, California where Stampendous is home, it's NOT cool! Hopefully our inspirations will help you stay cool this week. Comment on our blogs this week, and tell us what the weather is doing in your neck of the woods. One commenter will win a Cling Rubber Dessert Dive stamp and get to cool off with our favorite mice.
Disclaimer- You guys know I get free goodies for blogging about craft products! Today I'm sharing some fun new products sent to me from Stampendous! 

*** Stampendous is offering Free Shipping on their website on orders over $50 from now through August 31.

Here is how my card was made;
1.  Stamp Ice Pop Treat onto a white panel with black ink.  Color with watercolor pencils and shade with Prisma Pencils.
2.  Use the Picasso Tool to to make clouds, sponging with Tumbled Glass ink.
3.  Emboss the ground with Golden Sand Embossing Powder by sprinkling it on, wiping any powder off the image, then heat from underneath so the powder doesn't blow off.  Glue to a green slightly larger green panel and set aside.
4.  Stamp senitment from the Mice Wishes Perfectly Clear Set with black ink on Graphic 45 paper.  Use Fitted Frames to diecut and glue to the left side of the image.
5.  Glue a panel of Graphic 45 paper to a Goldenrod card and glue the image to the card diagonally.  Add Dot Sparklers to the framed sentiment.

Supplies
Stampendous
HMP76 Ice Pop Treat
SSCM5000 Mice Wishes Perfectly Clear Set
DCP1005 Fitted Frames A
DWLL332 Picasso
EP211 Golden Sand Embossing Powder
HT400 Heat Tool
AC672HSN Dot Sparklers Class A Peel Stickers Green
STF082 Onyx Black VersaFine Ink

Plus
My Colors Cardstock- Parrot, Goldenrod
Graphic 45- Voyage Beneath The Sea Collection
Beacon Adhesives Zip Dry Glue
Staedtler Watercolor Pencils
Distress Ink- Tumbled Glass
Diecut Machine

Here are the other Stampendous Designers that are keeping cool today.

Alison Heikkila

Jamie Martin

Kristine Reynolds


Stay connected and don't miss a thing!

 Follow Stamp This 
(I follow crafty people back!)


https://blogger.googleusercontent.com/img/b/R29vZ2xl/AVvXsEiBIB7cl3FWcUqRpVNE2xf0uD7bSSaDv8EJChhD3TSJRrDTTqubuFddCha_Vsye2BIOBKX1yGUjGJyPJvjizD-izRFYxEG1Q0kTmLKEiANGSeoreVxGdz2kjJCF6lGrlm9fopxLmRzM6V04/s1600/Stampendous+logo.jpg

Wednesday, May 24, 2017

To The Beach


This week Stampendous is celebrating life at the beach.  For my card I used the new Whisper Friends Beach Day Perfectly Clear set, the Picasso Tool to make clouds and Golden Sand Embossing Powder for the sand.  Below are the step by step instructions.

(You guys know I get free goodies for blogging about craft products!  Today I'm sharing some fun new products sent to me from Stampendous, Beacon Adhesives and My Mind's Eye.)

1.  Stamp girl, sign, flipflops, sand and starfish on a white panel with Onyx Black VersaFine Ink and emboss with clear embossing powder. Color with Zig Clean Color Real Brush Pens.  Layer onto orange paper and set aside.
2.  Stamp two seashells on on watercolor paper with black VersaMark ink, emboss with clear, cut out and set aside.
3.  Watercolor a white panel with Salty Ocean and Tea Dye inks, let dry, wrap the bottom with orange ribbon, glue stamped panel to the top. Glue to a blue card.
4.  Stamp Scrolled Sunshine on white cardstock with black ink.  Diecut using Fitted Frames A and pop up over the orange ribbon.
5.  Glue cut out seashells to card as shown.

Supplies
Stampendous
SSCP110 Whisper Friends Beach Day
L271 Scrolled Sunshine
DCP1005 Fitted Frames A
Golden Sand Embossing Powder
EP0202 Clear Embossing Powder
DWLL332 Picasso Tool
HT400 Heat Tool
STF082 VersaFine Onyx Black Ink

Plus
My Colors Cardstock- Winter Lake
Cardstock- orange, white
Beacon Adhesives Zip Dry Glue
May Arts Ribbon
Zig Clean Color Real Brush Pens
Prisma Colored Pencils
Distress Ink- Salty Ocean, Tea Dye

Stop by the other Design Team Members Blogs to see what they have for you today!

Stampendous Blog

Louise Healy

Kristine Reynolds

Jamie Martin (that's me!)


Stay connected and don't miss a thing!

 Follow Stamp This 
(I follow crafty people back!)


https://blogger.googleusercontent.com/img/b/R29vZ2xl/AVvXsEiBIB7cl3FWcUqRpVNE2xf0uD7bSSaDv8EJChhD3TSJRrDTTqubuFddCha_Vsye2BIOBKX1yGUjGJyPJvjizD-izRFYxEG1Q0kTmLKEiANGSeoreVxGdz2kjJCF6lGrlm9fopxLmRzM6V04/s1600/Stampendous+logo.jpg

Wednesday, March 29, 2017

Small Sand Piper


Stampendous is excited about the release of their new April 2017 Catalog products for Summer! There are terrific new stamp images from Fran Seiford, Laurel Burch, Pink Your Life’s Nicoletta Zanella, and House-Mouse Designs® Ellen Jareckie!

These stamps are now shipping to wholesale customers who are busily stocking their stores for you and Friday, April 1st you can order these images on the Stampendous website. Remember that Stampendous website orders are shipped to you from a local, independent retailer when they have them in stock.  

Here is my sneak peek using Small Sand Piper, Scroll Thinking and the Nautical Anchor Perfectly Clear Set.  Be sure to take a look at how the sand look was done, it adds a nice touch of texture.


1.  Stamp Small Sand Piper on a white diecut circle, color with watercolor pencils and shadow with Prisma Pencils.  Don't forget the sand!  Sprinkle the bottom with Golden Sand Embossing Powder and heat from underneath so it doesn't blow off. Layer onto a slightly larger kraft color circle.
2.  Stamp anchor from the Nautical Anchor Perfectly Clear Set on the left side of a white panel that has been splattered with Tea Dye and Burlap Inks.  Color with Prisma Pencils.  
3.  Stamp the compass rose at the bottom right of the panel with Tea Dye Ink and stamp over it with Scrolled Thinking with black ink.
4.  Layer panel onto a Winterlake panel and glue to a craft color card.
5.  Pop up Sand Piper with foam tape.

Supplies
Stampendous
H329 Small Sand Piper
SSC1261 Nautical Anchor Perfectly Clear Set
E284 Scrolled Thinking
EP211 Golden Sand Embossing Powder
HT400 Heat Tool
STF082 Onyx Black VersaFine Ink

Plus
My Colors Cardstock- Winter Lake
Kraft Color Cardstock
White Cardstock
Beacon Adhesives Zip Dry Glue
Prisma Pencils 
Staedtler Watercolor Pencils
Distress Ink- Tumbled Glass, Tea Dye, Burlap
Foam Tape

Be sure to stop the the Stampendous Blog to see what sneak peeks the other Stampendous Designer's are sharing this week!  Link is below.


Stay connected and don't miss a thing!

 Follow Stamp This 
(I follow crafty people back!)


https://blogger.googleusercontent.com/img/b/R29vZ2xl/AVvXsEiBIB7cl3FWcUqRpVNE2xf0uD7bSSaDv8EJChhD3TSJRrDTTqubuFddCha_Vsye2BIOBKX1yGUjGJyPJvjizD-izRFYxEG1Q0kTmLKEiANGSeoreVxGdz2kjJCF6lGrlm9fopxLmRzM6V04/s1600/Stampendous+logo.jpg