Featured Post

Privacy Policy

I'm working on a new privacy policy for my followers, but for now you should know that if you comment on my site, my site collects your ...

Thursday, April 30, 2015

April Showers Bring May Flowers


It's the Dream Teams's last post for the month of April with our interpretation of "Showers to Showers."  It is also our last post together under the direction of Dreamweaver's founder, Lynell Harlow. Some VERY excitig news that many of you already know, Stampendous now owns Dreamweaver Stencils so you will continue to see beautiful creative samples made by the Stampendous Design Team that will be sure to inspire you!

April showers bring May flowers and that is the inspiration I used for my card today.  I had a pile of background papers on my desk that I made a while back and I chose one I made using the Creative Palette and pink, orange and white acrylic paints.  Here is what I did with it.
1.  Lay LJ902 Black Eyed Susan stencil on the painted paper and stencil with Dreamweaver Stencils Embossing paste. Let Dry.
2.  Layer stenciled piece onto a black panel, tie with orange sheer ribbon and glue to an orange card.
3.  Stencil LS56 Dragonfly with Radiant Neon Electric Pink ink, outline with a Gelly Roll Sparkle pen and stamp Flower Path in black VersaFine ink.
4.  Sprinkle Shabby Pink Embossing Enamel in the upper left corner and heat from underneath so the powder doesn't blow off.  Layer onto orange paper and glue to card.

Jamie Martin (that's me)

Stay connected and don't miss a thing!
Follow my blog (in the right column)


Tuesday, April 28, 2015

Stampendous Is KLIKing


STM_klik banner
Klik Interchangeable Jewelry from Metal Complex is a fantastic new line of DIY accessory options. Whether you are new to jewelry crafting like I am or experienced, this is a fun product to be creative with.  There are two snap sizes and many snap settings, so you can interchange your pieces to suit your mood.
Metal Works logoYou can see all the wonderful Klik products and tons of ideas for creating with this super fun product in their flippy catalog HERE and you can find a retailer HERE. We’d like to recommend www.resinobsession.com because they carry Stampendous products as well!
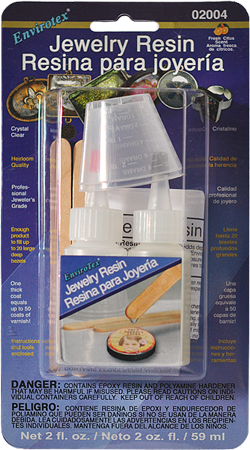
JewelryResinPack1We used products by Environmental Technology, Inc. (ETI) who generously sent our design team some of their wonderful Jewelry Resin to make our Klik jewelry pieces . This two part resin is incredibly easy to use and creates professional results. This is my first time using resin to make jewelry and I have to say I did it kicking and screaming because it is out of my comfort zone and I thought it sounded really hard to do.  To my surprise, it was REALLY easy and I love the results. This easy to use resin is sold at Resin Obsession, but you can also find it at Michael's and other fine craft stores. You can get thousands of ideas for using resin to create your own pieces on the resincrafts blog or on the I Love Resin blog.

Prizes
There are 3 prize packages from Stampendous that include Klik jewelry, resin and Eclectic Perfectly Clear™Stamp Set.  Visit the Stampendous blog for details.
So hop around with us this week and leave comments for your chance to win, as we play with Klik© jewelry and two-part resin to create some of our best work ever!!

Here is my project for today.

1.  Stamp butterfly from the Butterfly Charms Perfectly Clear Set with Tuxedo Black Memento and color the butterfly with Chameleon Pens.
2.  Cut out to fit the bezel, apply Zig 2 Way Glue Pen around the edges and sprinkle with China Blue Micro Glitter.
3.  Place butterfly in Bezel and fill with Environmental Technology, Inc. (ETI) resin.  Be sure to read and follow the directions. Don't worry if there are some bubbles, mine disappeared on their own.  Set aside to dry.
4.  Apply Glossy Accents in the small snaps and sprinkle one with fuchsia Crushed Glass Glitter and one with Bronze Glass Glitter.  Let dry.

5.  When dry snap pieces in as desired.  Here is a picture of it on.

Here’s who is sharing today:
Jamie Martin (that's me)
Stay connected and don't miss a thing!

Wednesday, April 22, 2015

Purrfect


Are you ready for some bright-eyed, mousers! Stampendous! has some new ones to share! OurCling Pop Up Kitties Rubber Stamp Set and coordinating Pop Up Kitties Die Cut Set  are part of the April 2015 Catalog release, now available at your favorite local or online store.
You’ll see how many different ways to color a kitty from our design team this week and to start off the inspiration here is illustrator and owner of Stampendous, Fran Seiford, with a video about the new Pop Up products coming out!


1.  Stamp Pop Up Kitties on white paper, color with pencils and use the matching Pop Up Kitties Dies to cut out.
2.  Use the edge die from the Build A Pop Up Die Set to cut white and teal papers. Stamp paws in purple and layer the white and teal papers. Set Aside.
3.  Randomly stamp a purple card with saying from the Cat Sayings Perfectly Clear set in purple.
4.  Sprinkle with Silver Tinsel embossing powder and heat from underneath.
5.  Use oval dies from the Build a Pop Up Die Set to cut white and teal papers.
6.  Stamp paws on the white oval with teal ink and stamp saying from the Cat Sayings set in black.  Layer papers and add ribbon.
7.  Glue pieces to the purple card as shown, the head is mounted to a AW Wobble so it is raised and it moves.  Tie with ribbon.

Supplies
Stampendous-
CRS5075 Pop Up Kitties, DCS5075 Pop Up Kitties Dies, SSC1222 Cat Sayings, DCP1001 Build A Pop Up Die Set, TP101 Silver Tinsel emobssing powder, Memento Tuxedo Black Ink
Plus- AW Wobbles, May Arts Ribbon, Zip Dry Beacon Adhesives, purple and teal dye inks.

Stay connected and don't miss a thing!


Thursday, April 16, 2015

Bridal Shower


Welcome to the Stampendous-Dreamweaver Stencils April challenge of "Showers to Showers!" Our designers have so many choices with this theme, baby, wedding, rain...You'll definitely want to see what we come up with each week of April! Today I have a Bridal Shower card to share with you that is beautifully glittery and because of all of this wonderful glitter, I could only get a good picture of it outside.  Here is how it was made;

1. Use the double glitter technique (click HERE for video tutorial)  to glitter the LJ924 Bride stencil using Crystal Micro Glitter on the bride and Sea Green Ultra Fine Jewel Glitter for the background on Double Sided Mounting Paper.
2.  Mount this piece to a white card along with two strips of glittered paper to the right side.
3.  Stamp sentiment from the Loving Memories Perfectly Clear Set in London Fog Memento ink on white paper, pop up on card and add rhinestones.
4.  Glue flowers on the bouquet and you're done.

Now see what the "A" team has for you today.


 Stay connected and don't miss a thing!
Follow my blog (in the right column)

Tuesday, April 14, 2015

Stencils and Stamps


I'm so happy that Stampendous! is now the proud owner of Dreamweaver Stencils because they work perfectly together.  Here is how my card was made.
1.  The background paper was made using the Creative Palette Rectangles (click to view product and video tutorial available) and acrylic paints in pink, white and copper.  While you have all your supplies out, be sure to make extra bacgrounds for future use! I primarily make cards and the Creative Palette Rectangles is my favorite Creative Palette out of the three because it is small and in my mind easier to use for my smaller panels.
2.  Once dry the circles are painted with white acrylic paint and stamped randomly. Let dry.
3.  Using Dreamweaver Stencils Matte Black Embossing Paste, paste emboss Open Butterfly Stencil, remove stencil and while wet sprinkle with Black Micro Glitter and let dry.
4.  Randomly stamp Carte Postale on panel with Tuxedo Black Memento ink.
5.  Stamp Penned Thank You with Versamark ink and emboss with Twilight embossing powder.
3.  Add pink rhinestones to the center of the butterfly and you are done!

Thank you for stopping by :)

Stay connected and don't miss a thing!
Follow my blog (in the right column)

 https://blogger.googleusercontent.com/img/b/R29vZ2xl/AVvXsEh51wyTO6jT5VTdYnB6w_G_m5HpVcLHg74CtPgP_LxPEKzn_V-OoKqGG2xT1wqb9akJ4WnFtjyWN2v_w0oXJVDqSV3SyVI_lnvmji1y88Z-8_yaN4exn-xXopYtjiwAjsF2De1Y9Uh9R-yQ/s1600/Dreamweaver+logo.jpg

Tuesday, April 7, 2015

Rain Dance


Today's card, uses the Creative Palette from Stampendous! to make the background, using Radiant Neon re-inkers.  This process was so much fun and the possibilities are endless!!  Here is how it was made.

1.  The background paper was made using the Creative Palette Rectangles.  Radiant Neon reinkers in Electric Pink and Electric Purple were squeezed onto the Palette and brayered.  The squares were stamped into it without ink to remove the ink from the Palette to get the lighter shade.  Then white cardstock was placed on the Palette and rubbed before removed to dry.
2.  Stamp Rain Dance from Stampendous onto paper with Memento ink and apply Dot Sparklers to the umbrella.
3.  Sprinkle the upper left corner with Spoonful of Gold Dust from Stampendous, and heat from underneath so it doesn't blow away.
4.  Layer onto black paper and mount to a gold card.

Stay connected and don't miss a thing!

Friday, April 3, 2015

Stampendous Colors With Spectrum Nior


SN_STM Banner
We have the pleasure this week of joining the Spectrum Noir team “Making Art” with great coloring tools and our stamps.
Spectrum Noir is a range of professional coloring tools. The range includes alcohol markers, blendable colored pencils, inks, Spectrum Aqua watercolor markers, and marker storage, and is perfect for crafters everywhere.
There are a total of 168 alcohol-based, acid-free and fast-drying markers. There are 120 wax-based blendable pencils that are great for using on their own or combined with Spectrum Noir alcohol markers. AquaTint inks are intense, concentrated liquid water paints (not currently available in the US). The newest addition to our coloring family, Spectrum Aqua, are 48 watercolor markers with high quality dyes, giving flawless, even coverage.

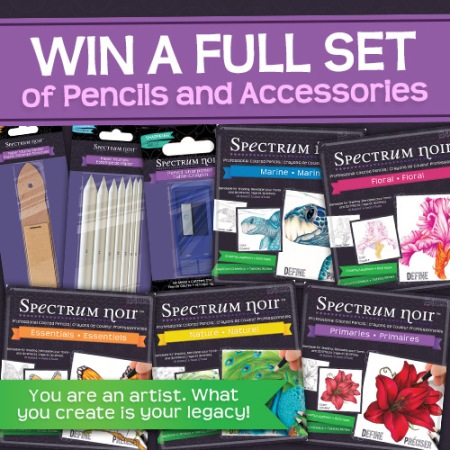
There are prizes!!  First, we’ll be giving away a full set of Spectrum Noir Pencils plus accessories to one participant who completes our Rafflecopter giveaway. Click on the Stampendous blog link below to enter!

Spectrum-Noir-PENCILS-Giveaway-Square-V2
But, of course, we want you to comment on our Design Team Blogs as always, so we’ll have three prize packages consisting of House-Mouse Designs® Painting Pals, Painted Posies and Making Prints Cling Rubber Stamps by Stampendous PLUS a $30/£30 gift certificate to the Spectrum Noir website. This is open even to our international friends!!


1.  Stamp Painting Pals on white card stock with Tuxedo Black Memento Ink and color with Spectrum Noir markers.  Layer onto pink paper and set aside.
2.  Use Dreamweaver Stencils LJ896 Large Flourish stencil on a green card with Deco Art Acrylic Gesso, let dry and mount stamped image.
3.  Add Dot Sparklers for a touch of bling.
Now take a look at what the other Designers have for you today.

 Stay connected and don't miss a thing!
Follow my blog (in the right column)


https://blogger.googleusercontent.com/img/b/R29vZ2xl/AVvXsEiBIB7cl3FWcUqRpVNE2xf0uD7bSSaDv8EJChhD3TSJRrDTTqubuFddCha_Vsye2BIOBKX1yGUjGJyPJvjizD-izRFYxEG1Q0kTmLKEiANGSeoreVxGdz2kjJCF6lGrlm9fopxLmRzM6V04/s1600/Stampendous+logo.jpgWebsite: http://www.stampendous.com – using the  Shopatron Order Management system so our independent retailers can fill your  orders!

Pinterest:  http://www.pinterest.com/stampendous/     @stampendous #stampendous

Twitter:  https://twitter.com/Stampendous  @stampendous #stampendous

Tumblr:  http://www.stampendous.tumblr.com @stampendous #stampendous

Stay connected to Spectrum Noir

Facebook: facebook.com/SpectrumNoir
Twitter:@SpectrumNoir
Pinterest: @SpectrumNoir #spectrumnoir #spectrumaqua
Instagram: @SpectrumNoir #spectrumnoir #spectrumaqua
Website: www.spectrumnoir.com

Thursday, April 2, 2015

Baby Blocks


Welcome to the Stampendous-Dreamweaver Stencils April challenge of "Showers to Showers!" Our designers have so many choices with this theme, baby, wedding, rain...You'll definitely want to see what we come up with each week of April!

Here is how my card was made.
1.  The background was made using the double glitter technique by rubbing the back of LX7026 Chevron Stencil with Coconut Soap then placing it on Double Sided Mounting Paper.  Sprinkle with China Blue Micro Glitter, rub in with your finger, turn it upside down to shake the glitter off on scratch paper so you can pour it back into the jar.   Remove the stencil while holding it upside down then sprinkle with Crystal Micro Glitter, shake off and mount to a green panel. Set aside.  Here is a video to show how to do this technique, Double Glitter Technique.
2.  Stamp Baby Blocks on white with Tuxedo Black Memento and color with pencils.  Layer onto green and blue papers.  Set aside.
3.  Die cut letters with Dreamweaver Stencils DD005 Duo Alphabet Dies from green paper.
4.  Tie May Arts blue ribbon around the top of the background paper and glue to a white card and add button.
5.  Glue pieces to card as shown.

Our "A" Team wants to "shower" you with lots more ideas, so be sure to stop over and leave them a "shower" of comments!

Louise Healy