Featured Post

Privacy Policy

I'm working on a new privacy policy for my followers, but for now you should know that if you comment on my site, my site collects your ...

Showing posts with label Paste Emboss. Show all posts

Wednesday, February 19, 2020

Say It Elegantly


Hi my friends, today I have an elegant Congratulations card that uses a little bit of everything such as stamps, dies, stencils, embossing paste and embossing powder.  But don't let all of those things scare you because this really is an easy card to make.

Here's how my card was made;
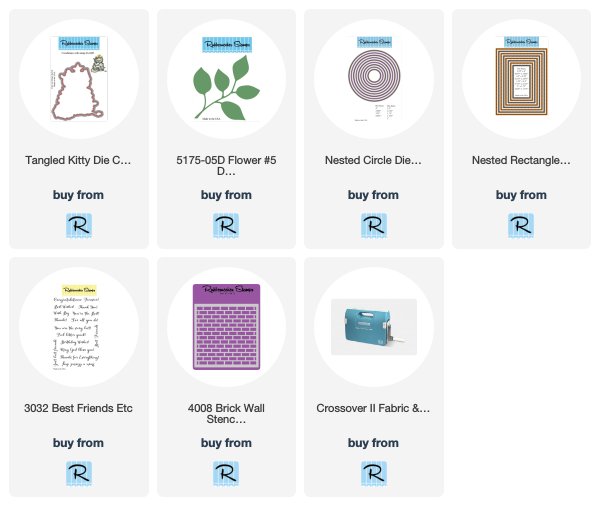
  • Die-cut white cardstock using the Nested Rectangle Small Stitch Die Cut.
  • Place the Brick Wall Stencil on top of the die-cut panel and paste emboss using gold glitter embossing paste.  Set aside to dry.
  • Die-cut a circle frame using the Nested Circle Die Cut Set and pop up on the brick panel once it's dry.
  • Use the Flower #5 Die-Cut to cut leaves from silver glitter paper and pop up over the circle frame.
  • Stamp Congratulations on a strip of black cardstock with VersaMark Ink and emboss with silver embossing powder and pop up over the circle frame.
  • Layer onto a slightly larger silver panel and pop up on a white card.

Have a creative day!


Follow Me- Stamp This, on-
Twitter

Affiliate and Product Disclosure
I am on various Design Teams and get free goodies for blogging about craft products but only because I love their products and genuinely use them. Ultimately my opinions are my own. A list of companies is in my sidebar.
Being part of various affiliate programs – when you click on an affiliate link and then go on to make a purchase, at no cost to you, I receive a small commission.  The affiliates I use include Rubbernecker Stamps and Whimsy Stamps.

Friday, October 25, 2019

Winter Wonderland


Hi there, today I have a snowman card made with the new Snowman with Lantern stamp from Rubbernecker Stamps.  I colored him with Prisma Colored Pencils and added Crystal Stickles to the trim of the hat and to the ball, then on the scarf Silver Stickles was added.  
To make the glitter background, I used the Mixed Squares Stencil and applied BoBunny Silver Glitter Paste to a light blue cardstock panel and wow in person it's so sparkly!! Once it was dry I die cut a circle using The Nested Circle Stitch Die Set and layered it onto a gray circle scallop cut with the Nested Cir Scallop w/ Holes Die.


The circles were popped up on a strip of the paste embossed piece and it's all layered on a panel of  Kaisercraft Let It Snow decorative paper.
The sentiment is Magic of the Season and it was embossed with white embossing powder.


I hope you have a creative day!

Follow Me- Stamp This, on-
Twitter

Affiliate and Product Disclosure
I am on various Design Teams and get free goodies for blogging about craft products but only because I love their products and genuinely use them. Ultimately my opinions are my own. A list of companies is in my sidebar.
Being part of various affiliate programs – when you click on an affiliate link and then go on to make a purchase, at no cost to you, I receive a small commission.  The affiliates I use include Rubbernecker Stamps and Whimsy Stamps.


Wednesday, March 1, 2017

Dragonfly Swirl


Welcome back to a week of stencils, Monday I shared a card where I sponged through the metal stencil.  My card today uses two metal stencils from Stampendous, one was sprayed and the other paste embossed.  Here is how it was made.

1.  Place the Diamond Grid Stencil on a white panel and spray with Crushed Olive Distress Spray and let dry.
2.  Place the Dragonfly Swirl Stencil on top of the dried piece and used removable tape to tape it in place and insure it doesn't slip.  Then paste emboss through the stencil with Glossy Black Embossing Paste using a Palette Knife.  Carefully remove the stencil and place in warm soapy water and lightly scrub with a fingernail brush.  Set embossed piece aside to dry.
3.  Once dry, randomly stamp script lines with Tea Dye ink and sponge edges.
4.  Stamp the words Live, Love and Laugh as shown with black ink.
5.  Glue a key charm under the left wing with Zip Dry Glue.
6.  Layer onto a larger black panel and glue to a green card.


Supplies
Stampendous
FMS4065 Dragonfly Swirl Stencil
SSC1252 Tweet Chirps
P297 Script Lines
DWLJ882 Diamond Grid Stencil
DWDGKP Glossy Black Embossing Paste
DWLM2010 Palette Knife
MPW811 Mixed Media White Paper
STF082 Onyx Black VersaMark

Plus
My Colors Cardstock
Zip Dry Glue Beacon Adhesives
Key Charm
Tea Dye Distress Ink
Crushed Olive Distress Spray

Stay connected and don't miss a thing!

 Follow Stamp This 
(I follow crafty people back!)


https://blogger.googleusercontent.com/img/b/R29vZ2xl/AVvXsEiBIB7cl3FWcUqRpVNE2xf0uD7bSSaDv8EJChhD3TSJRrDTTqubuFddCha_Vsye2BIOBKX1yGUjGJyPJvjizD-izRFYxEG1Q0kTmLKEiANGSeoreVxGdz2kjJCF6lGrlm9fopxLmRzM6V04/s1600/Stampendous+logo.jpg


Tuesday, July 5, 2016

Mushroom Smile


Look What Stampendous is now carrying, Pink Your Life! Artist Nicoletta Zanella from the Pink Your Life Design Team has created some wonderful, whimsical characters. We're so excited to welcome the Whisper Friends to our lineup and have a chance to play with these darling images. Our July Catalog will introduce this line and we know you'll be as excited as we are.

These will be available soon, right now they are only wholesale customers can get these teriffic images, but they will be in stamping and scrapbooking stores soon.  You can find one on the Stampendous Store Locator here-  http://www.stampendous.com/store-locator/

Stay tuned to win some of these great stamps after they are released to the public!! Keep checking back here or follow my Facebook page Stamp This for details.

My sneak peek card uses the Mushrooms stamp. I colored it in fall colors to go along with the fall and Christmas theme of the July catalog, but it would look wonderful in pastels or brights too!  Here is how my card was made;

1.  Stamp Mushrooms on Mixed Media White Paper with black ink, color with watercolor pencils and shade around mushrooms with blue chalk.
2.  Place Bricks stencil on dark brown paper and paste emboss with copper paste using a palette knife.  Set aside to dry.
3.  Layer mushrooms and bricks panels onto orange paper.
4.  Attach hardware with ribbon to the bricks piece and glue to brown card.
5.  Stamp "Smile" on goldenrod paper with black ink, cut to fit oval frame and mount to card as shown.

Supplies
Stampendous
PLP03 Mushrooms
SSC1239 Spring Sentiments Perfectly Clear Stamps
MPW811 Mixed Media White Paper
DWLG610 Bricks Stencil
DWDCP Dreamweaver Stencils Metallic Copper Embossing Paste
DWDPK Palette Knife 

Plus
Creative Impressions- hardware, ribbon
My Colors Cardstock- Brown Eyes, Harvest Orange, Mandarine, Goldenrod
Zip Dry Glue, Beacon Adhesives
Watercolor Pencils

Stay connected and don't miss a thing!

Thursday, June 30, 2016

Plumeria Inspiration


Here is my last flower card for the week.  This one uses a couple of stencils, paste and embossing powders to create a beautiful dimensional affect. Be sure to go to the Stampendous Blog to see what the other designers have for you today, link is at the bottom.
Here is how my card was made;

1.  Randomly paste emboss Stone Background Stencil on Spearmint paper with Dreamweaver Stencil Embossing Paste.  Set aside to dry.
2.  Paste emboss Plumeria Stencil on acetate, remove the stencil and while the paste is still wet sprinkle embossing powders from the Gemstone Embossing Kit onto the image using a straw cut on the diagonal as a spoon. After all of the image is covered with embossing powders of different colors, shake off excess and heat until it bubbles.  Once it has cooled, cut out around the image and glue to the brick stenciled paper.
3.  Stamp Faith Possible in upper left corner with Onyx Black ink and emboss with clear embossing powder.
4.  Place self adhesive pearls in the center of the flowers and randomly place clear rhinestones.  Mount to a Topical Bay colored card.

Supplies
Stampendous
D191 Faith Possible
DWLG611 Stone Background Stencil
DWLM193 Plumeria Stencil
DWDEP Dreamweaver Stencils Regular Embossing Paste
DWDPK Palette Knife
PK03 Gemstone Embossing Kit
EPA50 Heat Tool
STF082 Onyx Black VersaFine Ink Tsukineko

Plus
My Colors- Spearmint, Tropical Bay
3 in 1 Glue Beacon Adhesives
acetate
self adhesive pearls
clear rhinestones

Stay connected and don't miss a thing!


Thursday, January 21, 2016

Key To My Heart


Valentine's Day cards don't have to be just pink or red, we are artists and can make them any color we want!  My card today envolves NO stamping, it is all made using Dreamweaver Stencils.  I dry embossed, paste embossed and stippled through the stencil.  You can use stencils in sooooo many ways, I love them!
Here is how my card was made:
1.  Dry emboss the back ground with the Design I Beam Stencil on white paper, wrap with May Arts Ribbon and glue to a light blue card.
2.  Place the Heart Lock Stencil on white paper that has been die cut using the Fitted Frames A Die Cut Set and stipple with Sky Blue Brilliance ink.
3.  Then the key portion of the stencil was placed over the heart and paste embossed with Dreamweaver Stencils Metallic Sliver Embossing Paste.
4.  Once the key was dry the panel was layered onto a larger Fitted Frame in light blue and popped up on the card using foam tape.

Stop by the Stampendous Blog to see what the other Design Team members have for you today, the link is below.

Stay connected and don't miss a thing!

Friday, October 30, 2015

Stampendous Is Hopping With Glue Dots


STM_GD_prize
Welcome to the last day of the Stampendous and Glue Dots Blog Hop! Enjoy looking at what the designers have for you today and be sure to comment for your chance to win (see rules below).
As our fans know we love a contest while we hop so three lucky commenters will win a prize package that includes:
Glue Dots® Craft Dots 3/8”
Glue Dots® Mini Dots 3/16”
Glue Dots® Removable Dots 3/8”
CRS5080 Cling Create Christmas Stamp Set by Stampendous®
DCS5080 Create Christmas Die Set by Stampendous®
MGK02 Christmas Micro Glitter Kit by Stampendous®
Just comment on both company blogs and all the design team posts for our hop with Glue Dots. Commenting is open until Sunday, November 1st at 11:59 pm and winners will be announced sometime on Monday, November 2nd. See Official Contest Rules.

Today I have a Christmas canvas to share using stamps, stencils, stencil paste and Glue Dots.  To start the canvas was painted with acrylic paints and set aside to dry.  Create a Poinsettia  was stamped on tissue paper with Tuxedo Black Memento Ink and painted with Twinkling H2O's.  Once dry, glue to canvas using Fast Finish Decoupage.

Once dry it was glued to the canvas with Fast Finish.  Create a Poinsettia was stamped 3 more times on Mixed Media White Paper with Tuxedo Black Memento ink and painted with Twinkling H2O's, then die cut with the matching Create a Poinsettia Die Set.  Attach the full die cut over the Poinsettia tissue paper using Glue Dots and layer the remaining pieces using foam tape.

Music Score was stamped on white computer paper with black ink, torn out and glued to the canvas using Fast Finish Decoupage.

Graduated Dot Stencil was randomly stenciled using Dreamweaver Stencils Metallic Gold Embossing Past.

Once dry, apply Glue Dots to the canvas and sprinkle dots with Red, Green and Gold Micro Glitter.

Stay connected and don't miss a thing!

Friday, September 18, 2015

Stampendous-Tombow Hop Time!


Welcome to the first day of the Stampendous and Tombow Blog Hop!!  The Stampendous Design Team was sent a bunch of goodies to play with, and today I'm using their new Recycled Color Pencils to color my project.  I used the Mixed Media White Paper from Stampendous, layered my colors of colored pencil and blended with a blender pencil.  The colors blended wonderfully and are nice and vibrant.  You can win a set of your own, read on and good luck!!
There will be 2 prize packages that include:
  • Tombow Recycled Color Pencils 24 pack tin
  • A roll of Tombow Foam Tape
  • A Jumbo Perfectly Clear Handle
  • Your choice from Stampendous Create Fall, Create Christmas, Create Winter or Create a Poinsettia Cling Stamp set and Matching Dies
To win:
  • Have a US Mailing Address
  • “Like” TombowUSA on Facebook and Stampendous on Facebook
  • Follow @tombowusa and @stampendous on Instagram
  • Follow @tombowusa and @Stampendous
  • Follow Tombow USA and Stampendous on Pinterest
  • And comment on all the blog posts from both teams all week. Including our pre-game posts Mon-Thurs and our Weekend hop Fri-Sun.
  • We’ll give you until Tuesday, September 22 to get all those great comments in, then we’ll choose 2 winners on Sept 23rd.
Now here is my card:


1.  Stamp large pumpkin and hat from Create Fall set on Mixed Media White Paper and color withk Recycled Color Pencils from Tombow.  Use the matching dies from Create Fall Die set.
DCS5078_Create_Fall_Die_SetCling Create Fall Set
2.  Apply Quickie Glue to the hat trim and the eyes.  Sprinkle the hat trim with Crystal Micro Glitter and the eyes with Sunflower Micro Glitter.  Set aside.
3.   Cut burlap paper into a flag shape.  Lay Graduated Dot stencil on top of the burlap, I sprayed it with a mix I made using a little spoonful of DecoArt Metallic Luster Black Shimmer in a spray bottle of water.  You need to shake it real well to get it to dissolve, keep adding the Metallic Lustre until you get the color desired.  Good new is I haven't had any clogging of the spray bottle!
4.   Layer onto a slightly larger black flag and glue on the pumpkin and hat.
5.  Paste emboss Dreamweaver Stencils Spider Web with Dreamweaver Stencils Glossy Black Embossing Paste.
6.  Punch holes in the top of the flag, add ribbon, pop up on card and add a brad at the top of the ribbon so it looks like the flag is hanging.  Glue a little plastic spider on top of the brad.
7.  Stamp sentiment from Tricky Words Perfectly Clear Set on white cardstock with black in, cut into a flag shape, add a purple brad to the left and pop up with foam squares.

Stay connected and don't miss a thing!


Friday, June 26, 2015

Colorful Cosmos

Time to break out the stencils and paste to make your background.  Really you don't ever need to buy decorative paper, you can make almost anything you need.  Here is what I did today.

1. Using the Graduated Dot stencil, paste emboss half a white panel using Dreamweaver Stencils Embossing Paste and let dry.
2. Spray with Mustard Distress Spray Stain and wipe off the embossed areas with a paper towel. Layer onto a red card and set aside.
3. Stamp Cosmos Spray on a white panel with black ink, color with colored pencils and use blue chalk around the image to shadow.
4. Layer onto a red panel tie with jute and add a tiny tag stamped with sentiment from Bouquet For You Set.
5. Glue burlap diagonally across card and glue stamped piece.

Stampendous:
P263 Cosmos Spray
SSC1221 Bouquet for You Perfectly Clear™ Stamps
SSH38 Small Perfectly Clear™ Acrylic Handle
MEM01 Memento™ Tuxedo Black Ink by Tsukineko®

Dreamweaver: 
DWLX7029  Graduated Dot
Dreamweaver Stencils Glossy White Embossing Paste

Plus:Cardstock by Bazzill Basics Paper®
Zip Dry™ Paper Glue by Beacon Adhesives
Prisma Pencils
Tag
Mustard Distress Spray Stain
Jute
Burlap

Stay connected and don't miss a thing!
Follow my blog (in the right column)


Thursday, June 25, 2015

Whimsical Fairy


Finally here is my fairy card for the week, a nice break from all of the floral cards that I've been posting.  I usually link the products to the Stampendous website, but at the time of writing this the website is down.  If I don't get back to link up the items, please copy and paste the items with the item number that is provided in the Stampendous search bar and it will take you right to the product.

1.  Paste emboss Fairy Stencil with Glossy Black Embossing Paste on pink paper.  When dry apply 2 Way glue to the wings, let dry and apply gold leaf to the wings.  
2.  Place Screen on the pink paper around the Fairy and sponge with Moonlight White Brilliance. Layer onto black paper and set aside.
3.  Sponge a white panel with yellow and pink inks then place the I Beam Stencil on the panel and sponge with Lightning Black Brilliance.  Layer onto a pink card.
4.  Glue Fairy on a yellow feather and on the card.
5.  Stamp sentiment on white paper in black, sponge with pink ink and layer onto black paper.  Glue to the card and add Dot Sparklers.


Stampendous:
SSC1201 Angel Wings Quotes Perfectly Clear™ Stamps
SSH38 Small Perfectly Clear™ Acrylic Handle
MEM01 Memento™ Tuxedo Black Ink by Tsukineko®
AC672HSS Dot Sparklers


Dreamweaver:
DWLX7028 Design I Beam Stencil
DWLG762 Fairy Stencil
Dreamweaver Stencils Glossy Black Embossing Paste
SC Screen

Plus:Cardstock by Bazzill Basics Paper®
Zip Dry™ Paper Glue by Beacon Adhesives
Radiant Neon by Tsukineko in Electric Yellow and Electric Pink
Gold Leaf Mardigras color
Zig 2 Way Glue
Yellow Feather

Stay connected and don't miss a thing!
