Featured Post

Privacy Policy

I'm working on a new privacy policy for my followers, but for now you should know that if you comment on my site, my site collects your ...

Showing posts with label Kids Birthday. Show all posts

Monday, May 15, 2023

Animal Train Birthday Slimline Card


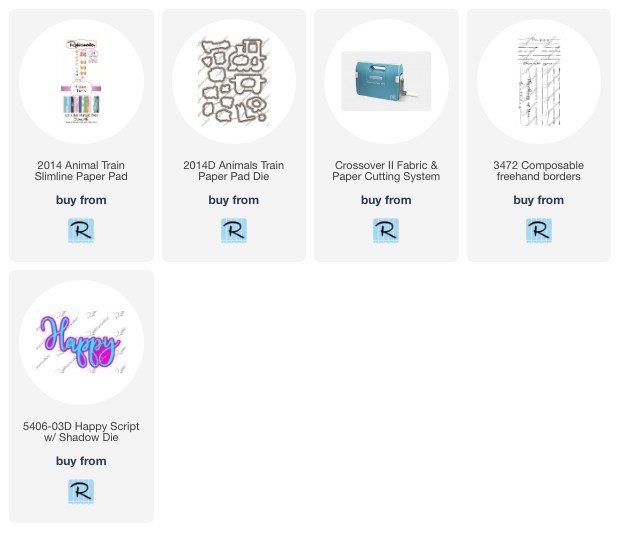
Today I have this slimline Birthday card up on Scrapbook Adhesives Blog with a tutorial. I used cute paper and dies from Rubbernecker Stamps, a list of products is at the end of the post.
This is the perfect card to make if you need a last minute card because the images are die-cut from a slimline paper pad. The only stamping done is the birthday.

Have a crafty day!

Let's Connect!

Affiliate and Product Disclosure
I am on various Design Teams and get free goodies for blogging about craft products but only because I love their products and genuinely use them. Ultimately my opinions are my own. A list of companies is in my sidebar.

Thursday, January 7, 2021

Have a Ball


Have you seen the new release from Stampendous?  They have come out with a new POP Frame Die Set and a bunch of stamp sets that work with it, one is the Sports Frame Perfectly Clear Set that I used to make this Birthday shaker card.
Here's how my card was made;
  1. Stamp Sports Frame on watercolor paper with black ink and emboss with clear embossing powder and watercolor with Inktense Pencils.
  2. Die-cut the Sports Frame using the           Die Set.
  3. Die-cut white cardstock with the largest of the frames and trim the two edges with scissors.
  4. Lay the frame on top of the last die-cut piece and stamp the sentiment in the center of the frame so that it's stamped on the panel behind the frame.
  5. Glue the acetate to the back of the Sports Frame.
  6. Place foam tape around the backside of the frame being sure not to leave any gaps.
  7. Place a small amount of Glitter Glass on top of the sentiment and adhere the frame over it.
  8. Cut red and white striped decorative paper slightly smaller than a blue card and glue it on.
  9. Glue the frame diagonally to the card.
        

 Supplies
Stampendous
SSC1376 Sports Frame
MPW811Mixed Media White Paper
FRG01C Silver Crushed Glitter Glass
STF082 VersaFine Ink- Onyx Black
EP020  Clear Embossing Powder

Plus
Inktense Pencils
Decorative Paper
Cardstock- Blue
Acetate 
Foam Tape
Zip Dry Glue, Beacon Adhesives
Scissors
Paper Cutter
Heat Gun
Let's connect!


Disclaimer- I get free goodies for blogging about craft products! Today I'm sharing a card made with products from Stampendous

Here are some places that you can find Stampendous Products-
First off check out your local Stamp Store, if they don't have it they can order it.
Online Stores


Sunday, February 24, 2019

A Pirates Life


Hi my friends, today's card uses new stamps and dies from Whimsy Stamps.  This cute pirate set is "Arrgg Pirates" and it's colored with Prisma Colored Pencils, the sand mound is sponged with Tea Dye Ink and I sponged it off of torn paper to give it the uneven 
look.  (Sorry about the small font on the first couple of lines, I'm not able to change it...hmmm)


Click on the pictures below to be taken to the Whimsy Stamps site.

Have a creative day!

    Hand Stitched Nested Rectangles    Stitched Cloud Die Set


Follow me, Stamp This


Affiliate and Product Disclosure
I am on various Design Teams and get free goodies for blogging about craft products but only because I love their products and genuinely use them. Ultimately my opinions are my own. A list of companies is in my sidebar.
I am also part of various affiliate programs – when you click on an affiliate link and then go on to make a purchase, at no cost to you, I receive a small commission.  The affiliates I use include Rubbernecker Stamps and Whimsy Stamps.
I hope if you like the content of my blog you will support me by clicking through these links to make your purchases.

Wednesday, February 6, 2019

Pirate Shaker Card- Whimsy Wednesday


Hi friends, for today's Whimsy Wednesday I have a birthday shaker card made with this months new release set "Arrgg Pirates" from Whimsy Stamps.  The dragon was colored with Zig Clean Color Real 
Brush Markers and cut out.  The set has two different skulls, one is a little larger than the other, the smaller one was stamped three times, cut out and used inside the shaker, isn't it cute?!


The background paper is from the Summer Breeze 6 x 6 Designer Paper Pad and glued onto the front of a white card.


Click on the product below 

      *NEW Summer Breeze 6x6 Designer Paper  

Follow me, Stamp This


Affiliate and Product Disclosure
I am on various Design Teams and get free goodies for blogging about craft products but only because I love their products and genuinely use them. Ultimately my opinions are my own. A list of companies is in my sidebar.
I am also part of various affiliate programs – when you click on an affiliate link and then go on to make a purchase, at no cost to you, I receive a small commission.  The affiliates I use include Rubbernecker Stamps and Whimsy Stamps.
I hope if you like the content of my blog you will support me by clicking through these links to make your purchases.

Monday, January 21, 2019

Birthday Kids


I have fallen in love with the Birthday Kids Perfectly Clear Set, it is so cute with its sweet images.  I'm especially fond of it because I became a grandma yesterday to a wonderful baby girl!!!!  She is our first grandchild and I am looking forward to making her a bunch of birthday and holiday cards for her.  Now on to how my card was made;

1.  Stamp images from the Birthday Kids Perfectly Clear Set on watercolor paper with black ink and emboss with Clear Embossing Powder.  Color with Zig Markers and cut out.
2.  Use the Meadow Edgers Die Set to die cut white and kraft color cardstock and glue to a panel of decorative paper as shown.
3.  Glue presents to the bottom left of the card and pop up girl and balloons on the right side.
4.  Stamp sentiment from the set onto decorative paper, die cut using the Fitted Frames B Die Set and layer onto a larger kraft color frame.  Pop up on the card using foam squares.
5.  Tie the top of the card with twine.

Supplies
Stampendous
SSC1307 Birthday Kids
DCP1013 Meadow Edgers Die Set
DCP1006 Fitted Frames B Die Set
EP020 Clear Embossing Powder
STF082 Onyx Black VersFine Ink

Plus
My Colors Cardstock
Decorative Paper- The Paper Studio
Watercolor Paper- Strathmore
3D Foam Squares- Scrapbook Adhesives by 3L
Zip Dry Glue- Beacon Adhesives
3D Foam Squares- Scrapbook Adhesives
Zig Clean Color Real Brush Markers
Twine- Offray


Disclaimer- I get free goodies for blogging about craft products! Today I'm sharing a card made with products from Stampendous.



Thursday, March 22, 2018

Hip Hip Horay!


I'm up on the Rubbernecker Blog today, with a Sneak Peek of the new Hippo Set and Hippo Die Set which will be available soon.  The set is filled with hippos, party items and sayings, they're all so, so cute!
I stamped my images on Stathmore Bristol Smooth paper and colored with Zig Clean Color Real Brush Pens.  The Nested Circle Stitch Die Set was used to make the layered half circles at the top of the card.  The sentiment was stamped and die cut with the Nested Square Stitch Die set. Be sure to stop by the Rubberneck Blog this week to see all of the different cards the Design Team has for you this week!

You can follow me, Stamp This on


Disclaimer- I get free goodies for blogging about craft products!  Today I'm sharing some fun new products sent to me from Rubbernecker Stamps.


Wednesday, March 30, 2016

Birthday Bear


Today I made a quick fun card using Stampendous stamps to play along with two challenges, Color Throwdown #386 and CAS(E) this Sketch #165.  In case you don't know what CAS and CAS(E) are, here is the definition from the CAS(E) this Sketch blog;
The acronym CAS stands for Clean and Simple.

1. Usually only one layer but can include a simple layer or two.

2. A lot of open space sometimes called "white space" can include subtle color, texture or pattern.

4. Usually no embellishments but can include something minimal. (1 or 2 embellishments)

3. Only one focal point. Embellishments should only support not dominate your card.
(Exception to this rule is that you've made the focal point an embellishment and not an image.)

5. Minimal color palette. (up to 3 colors in general)

6. Simple, uncluttered, quick and easy to create.


The acronym CASE stands for Copy and Share Everything.

Here is what I used to make my card;
From Stampendous
Spring Short Stack Perfectly Clear Set
Brush Strokes- available at Simonsays Stamp
Celebrate Birthday
Onyx Black VersaFine-Imagine Crafts
Plus
My Colors Cardstock-Waterside Fern, Poolside
3 in 1 Glue
balloon punch
embellishments
stream and citrus inks

Stay connected and don't miss a thing!
