Featured Post

Privacy Policy

I'm working on a new privacy policy for my followers, but for now you should know that if you comment on my site, my site collects your ...

Showing posts with label Easter. Show all posts

Friday, March 17, 2023

Best Bunny Wishes


I'm just having a little fun in my craft room today and this happened, an Easter card. It was made using Egg Dies from Sizzix, Bunny Die from Eco Park, Word Stamps from Whimsy Stamps, Random Dots Background from Rubbernecker Stamps , Cardstock and White Glitter Paper from PrintWorks Specialty Ppaer and White Embossing Powder from Stampendous.

All of these mixed and matched nicely.

Have a crafty day!


Wednesday, March 3, 2021

Easter Tags


Happy March and Easter is just a month away so I thought I would get started on some Easter projects.  I made these tags with the new Bunnies Set from Rubbernecker Stamps and thought that they could be used to clip on Easter baskets, treat bags or popped up on a card.
Here's how they were made-


  • Using the Nested Tag Stitch Die-Cut set, die-cut decorative paper from three different patterns with the largest die and the second-largest three times from white cardstock. 


  • Die-cut a strip of cardstock (doesn't matter what color) using the Tabbed Grass Die Set to use as a stencil to add grass to the bottom of the white tags with Grass and Juniper Color Fuse Inks
  • Stamp the sentiments from the Bunnies Set on the top of the white tags and glue the white tags to the larger patterned paper tags using E-Z Runner Strips from Scrapbook Adhesives by 3L.
  • Stamp the cute bunnies from the Bunnies Set on Strathmore Bristol Smooth paper with VersaFine Onyx Black Ink and color with Zig Clean Color Real Brush Pens and a watercolor brush to spread the color.


  • Stamp the cute bunnies from the Bunnies Set on Strathmore Bristol Smooth paper with VersaFine Onyx Black Ink and color with Zig Clean Color Real Brush Pens and a watercolor brush to spread the color.
  • Die-cut the images using the matching Bunnies Die Set and apply 3D Foam Squares from Scrapbook Adhesives by 3L.
  • Pop up the bunnies on the bottom of the tags.
  • Randomly add Star Dust, Hibiscus and Mermaid Tail Stickles around the sentiments, one color per tag.
  • Use a small clothespin to clip the tags to bags or baskets.


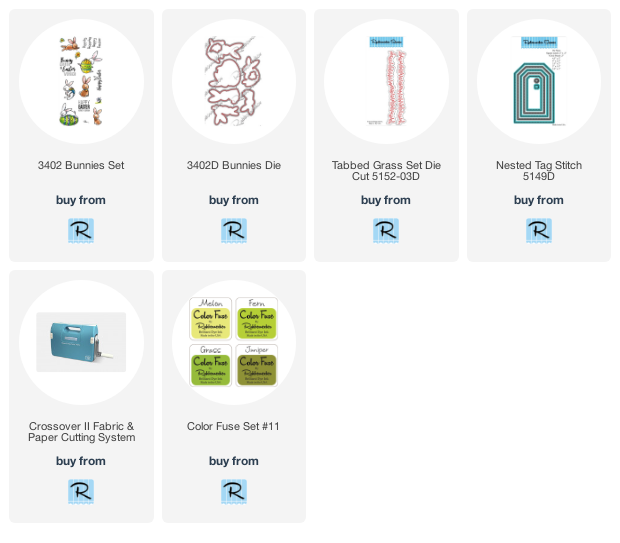
These are the Rubbernecker products that were used to make the Easter tags.

Have a crafty day!

Let's Connect!

Affiliate and Product Disclosure
I am on various Design Teams and get free goodies for blogging about craft products but only because I love their products and genuinely use them. Ultimately my opinions are my own. A list of companies is in my sidebar.
Being part of various affiliate programs – when you click on an affiliate link and then go on to make a purchase, at no cost to you, I receive a small commission.  The affiliates I use include Rubbernecker Stamps.

Wednesday, April 1, 2020

Happy Easter Card


Happy April!  With Easter fast approaching you'll want to snatch up these new items from Whimsy Stamps, they are the adorable Spring Bunnies Clear Set, the Spring Bunnies Outline Die Set, the Nested Pierced Die Set and the 6 x 6 Paper Pack- Eggstra Bunnies. 

These were last month's Paper Door Kit (a card kit from Whimsy Stamps), but since this kit sold out in a matter of hours, Whimsy Stamps is releasing them separately!!  To make it eggstra special, they are offering a 25% discount on the 5 items that were in the kit for the first seven days in April, which is April 1-7th, just use the coupon code SpringPD25.  
In case you're wondering, this is NO April Fools Joke hahaha.


Here's the card I shared last month using the Eggstra Special Clear Stamp Set.


Have a creative day and go get these before they're gone!

*NEW Spring Bunnies Clear Stamps - Whimsy Stamps    *NEW Spring Bunnies Outline Die Set - Whimsy Stamps   *NEW Nested Pierced Egg Die Set - Whimsy Stamps   *NEW 6x6 Paper Pack - Eggstra Bunnies - Whimsy Stamps
*NEW Eggstra Special Clear Stamps - Whimsy Stamps   3D Foam Squares - White - Whimsy Stamps

Have a creative day and follow me on 
Instagram

Affiliate and Product Disclosure
I am on various Design Teams and get free goodies for blogging about craft products but only because I love their products and genuinely use them. Ultimately my opinions are my own. A list of companies is in my sidebar.
Being part of various affiliate programs – when you click on an affiliate link and then go on to make a purchase, at no cost to you, I receive a small commission.  The affiliates I use include Whimsy Stamps.

Tuesday, March 10, 2020

Eggstra Special- Paper Door Kit


**Sold Out**
Hey everyone, guess what day it is, it's Whimsy Stamps Paper Door Kit release day for March!!  And it's another super cute Card Kit for Easter and Spring, take a look at what you get, two stamp sets, two die sets and a 6 x 6 paper pack.  It's a $50 retail value for only $29.95 plus shipping.  This Kit will be available until March 25th or until it's sold out, the last two months Kits sold out in a few days!!  Keep stopping by, I'll be sharing more cards made with this Kit until it sells out.


Step by Step Instructions:
  • Pick two sheets of decorative paper from the 6 x 6 paper pack and cut two strips from each piece measuring 1 ¼” x 3 ¾” and glue to a 5 ¼” x 4” white cardstock panel.
  • Glue this to a pink card.
  • Stamp words on a white cardstock piece with black ink, emboss with clear embossing powder and glue to a slightly larger pink panel.
  • Use a flat brush to apply pink and green decorative chalks over the words and randomly apply Apple Green Nuvo drops.  Set aside to dry.
  • Stamp the striped egg and bunny ears on white cardstock with black ink and color with colored pencils.
  • Cut out the egg and ears then glue the ears to the back of the egg.
  • Pop up the sentiment panel using foam circles and glue the egg to the right corner.


Paper Door Supplies: 
6 x 6 paper pack
Stamp Set

Whimsy Stamps Supplies:
Nuvo Deluxe Adhesive
VersaFine Onyx Black Ink
Clear Embossing Powder
3D Foam Circles

Other: 
Prisma Colored Pencils
Nuvo Crystal Drops- Apple Green
Decorative Chalk- Jane Davenport

Cardstock Measurements:
5 ½” x 4 ¼” pink card base
5 ¼” x 4” white cardstock panel
1 ¼” x 3 ¾” decorative paper strips
3 ½” x 1 ¾” white cardstock
3 ¾” x 2” pink cardstock 

Here's how the Paper Door Kits work and what a great value it is.
Whimsy Stamps PAPER DOOR kits for 2020, now your monthly crafty goodness delivered right to your front door is even more affordable, and includes even more exclusive Whimsy Stamps products!
• BRAND NEW kit debuting on the 10th of each month
• Each kit is a $50+ retail value for only $29.95 plus shipping
• You get PRIVATE access to PDF files with step-by-step instructions for at least 4 different projects
We’ve made PAPER DOOR an easy and affordable way for you to enjoy a monthly card making kit:
NO minimums
NO subscriptions to commit to
NO wait lists to sweat out
NO multi-tier pricing
Each kit is a LIMITED EDITION and individual items may or may not be released at a later date. Supplies are limited so order yours today, and unlock your creativity with Whimsy Stamps PAPER DOOR kits!


Have a creative day and follow me on 
Instagram

Affiliate and Product Disclosure
I am on various Design Teams and get free goodies for blogging about craft products but only because I love their products and genuinely use them. Ultimately my opinions are my own. A list of companies is in my sidebar.
Being part of various affiliate programs – when you click on an affiliate link and then go on to make a purchase, at no cost to you, I receive a small commission.  The affiliates I use include Whimsy Stamps.

Friday, March 1, 2019

Sweet Treats- Whimsy Stamps


It's March 1st, that means it's new release day for Whimsy Stamps!  I'm using the new Build a Basket Die Set and I thought I would use it on a basket.  I die cut a bunch of different pieces from decorative paper and glitter papers. 

The little die cut basket is layered on circles using the Stitched Circles Die Set. 

The tag was made using the Tombstone Die Set.

Click on product to be taken to the Whimsy Stamps site.
*NEW Build-a-Basket Die SetTombstone Tag Die Set


Follow me, Stamp This


Affiliate and Product Disclosure
I am on various Design Teams and get free goodies for blogging about craft products but only because I love their products and genuinely use them. Ultimately my opinions are my own. A list of companies is in my sidebar.
I am also part of various affiliate programs – when you click on an affiliate link and then go on to make a purchase, at no cost to you, I receive a small commission.  The affiliates I use include Rubbernecker Stamps and Whimsy Stamps.
I hope if you like the content of my blog you will support me by clicking through these links to make your purchases.

Here is how to make the the Origami basket from one piece of 12 x 12 paper
The Origami Box requires no adhesive: You will need a sheet of 12 x 12”  paper. Place paper with decorative side down (side of paper that will be on outside of box). Fold the paper in the following order:
1. Fold in half horizontally, turn 90 degrees and fold again.
2. Open and fold corner inwards to center of paper.
3. With corners folded in, fold left and right sides into center and open out. Turn paper 90 degrees and repeat folding left and right sides into center.
4. Open folds, leaving two diagonal corners folded in. Lift two sides of box up. While holding two sides up, fold corner folds inwards, creating the third side. Fold flap into box with corner lining up in the center of bottom of box. Fold in last edge to create fourth side of box. Optional: adhere a decorative strip along top edge of box.
The handle-
Cut two pieces of corrugated paper 3” x 12” with corrugated lines running horizontally. Score and fold 2¼” from bottom edges on both pieces. Cut two pieces of patterned paper 2½“ x 12“.  Adhere centered onto corrugated strip. Punch a handle using a 2” circle punch at top of strips, about ½“ from top edges. Adhere top edges together. Punch a smaller circle or a bracket shape from a contrasting paper. Fold in half horizontally (like a tab) and adhere over top edge of handle edge. Place and adhere origami box onto one bottom flap. Fold and adhere second flap onto other side of box. Tie ribbon around caddy and through handle. Tie a bow and attach decorative tags and ticket. Add sticker letters or a monogram onto one tag. Add a Flair on top of ribbon about ½“ from bottom edge.

I got the directions from the Fancy Pants Designs page.


Monday, March 16, 2015

Peep Peep


It's time to get ready for Easter and Stampendous has some super cute Easter stamps to help with that.  Isn't this Just Hatched image adorable? It's sure to put a smile on anyone's face that receives it.  Here is how the card was made.

1. Stamp Just Hatched with Tuxedo Black Memento.
2. Color with Prisma pencils, shade with blue chalk and layer onto gray paper.
3. Layer Just Hatched onto a piece of Authentique 6x6 Bundle Classique: Pretty that has been layered onto a gray panel.
4. Glue yellow ribbon around ribbon  and layer onto a pink card.
5. Stamp Peep Peep using Tiny Alphabet set, tie with green ribbon, glue this and flowers to card using Beacon Adhesives 3 in 1 Glue.

Supplies
Stamps- Just Hatched V303, SSC222 Tiny Alphabet
Plus- Mica Yellow Fragments FRM08
Ink- Tuxedo Black Memento
Paper-Authentique 6x6 Bundle Classique: Pretty, pink and gray cardstock.
Other- May Arts ribbon, flowers from Michael's, Beacon Adhesive 3 in 1 glue, Prisma colored pencils, chalk, Zig glue marker

Click on the link above ^^  to enter to win these Cowlik stamps the last Wednesday of March!!

Stay connected and don't miss a thing!
Follow my blog (in the right column)