Featured Post

Privacy Policy

I'm working on a new privacy policy for my followers, but for now you should know that if you comment on my site, my site collects your ...

Showing posts with label die. Show all posts

Tuesday, September 6, 2022

Halloween Card


Rubbernecker Blog RN-9-2022-Halloween-a-JM

Today I have a card using the new Spook-Tacular 6x6 paper pad from Rubbernecker Stamps. Here's how my card was made.

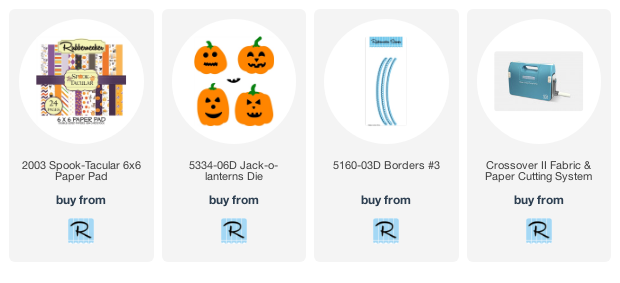
I started by using the die with the circular detail holes from our Borders #3 to cut the bottom of a card sized panel of one of the sheets from the Spook-Tacular Paper Pad, a scrap of black card stock and a scrap of purple card stock. I layered these together with the black piece peeking out from under the patterned paper and then the purple under the black. This is a super easy way to build a detailed edge on any element.

Then I took a white piece of card panel sized card stock and splattered it with some gray Color Fuse Ink from Set #12. When it was dry, she adhered her layered component over it. She added that assembly over a layer of black card stock and then popped the whole “stack” onto a purple card base.
 
Using paper snips, cut out the words “Halloween” and “Boo”from the leftover paper as well as fussy cut some of the little elements from the scraps to save for a future project. I then layered “Halloween” onto black and purple card stock and added it to her card with some dimensional adhesive.

Rubbernecker Blog RN-9-2022-Halloween-b-JM-500x500

The Jack-O-Lanterns die to cut some orange, green and black scraps and made a couple of cute accents, adhering them to the card in the lower right corner.  Then I adhered “Boo”, added a few black Nuvo Drops and Crystal Stickles and this card was ready.

Rubbernecker Blog RN-9-2022-Halloween-e-JM-500x500

Here’s what you will want to have on hand to make this card. 

Have a crafty day!

Let's Connect!

Affiliate and Product Disclosure
I am on various Design Teams and get free goodies for blogging about craft products but only because I love their products and genuinely use them. Ultimately my opinions are my own. A list of companies is in my sidebar.


Wednesday, April 21, 2021

Chickens Cross the Road


Everyone just needs to stop questioning these poor chickens' motives and let them cross the street in peace hahaha.

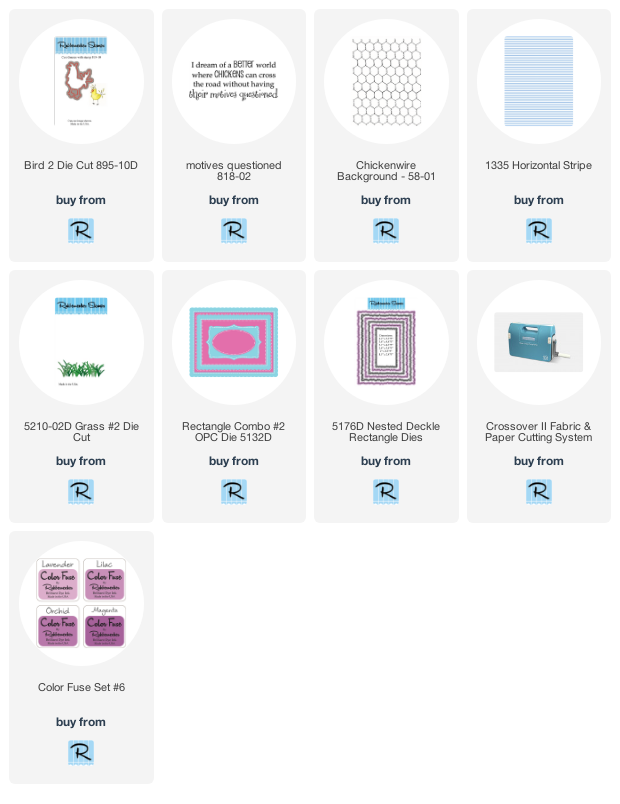
Here's how my card was made-
  • Stamp the Chicken Wire Background on purple decorative paper with VersaMark Ink and Emboss with Silver Embossing Powder, set aside.
  • Die-cut purple cardstock and decorative paper with the Rectangle Combo #2 OPC Die.
  • Glue one of the purple frames on top of the Chicken Wire Background

  • Then die-cut two shades of green cardstock with the Grass #2 Die and glue pieces to the back of the decorative paper frame, glue this inside of the purple frame.
  • Stamp Bird 2 on Strathmore Bristol Smooth Paper with Onyx Black VersaFine Ink and emboss with Clear Embossing Powder.  Color with Zig Clean Color Real Brush Pens.
  • Die-cut the Bird 2 with the Bird 2 Die Cut and pop up on the Chicken Wire using 3D Foam Squares by Scrapbook Adhesives by 3L.

  • Layer this panel onto a slightly larger black cardstock.
  • Stamp white cardstock with the Horizontal Stripe stamp and Lilac Color Fuse Ink on white cardstock.
  • Die-cut this with the Nested Deckle Rectangle Die Set.
  • Glue black cardstock 4" x 5 1/4" to a white card, then glue the Horizontal Stripe panel diagonally to this. 
  • Pop up the chicken panel diagonally on the card.
  • Stamp Motives Questions on white cardstock with Onyx Black VersaFine Ink, layer it onto decorative paper and pop up on the card.

  • Randomly add white Enamel Dots to the black panel and orange Enamel dots to the sentiment.


Have a crafty day!

Let's Connect!

Affiliate and Product Disclosure
I am on various Design Teams and get free goodies for blogging about craft products but only because I love their products and genuinely use them. Ultimately my opinions are my own. A list of companies is in my sidebar.
Being part of various affiliate programs – when you click on an affiliate link and then go on to make a purchase, at no cost to you, I receive a small commission.  The affiliates I use include Rubbernecker Stamps.

Friday, February 28, 2020

It's Your Birthday


Today's card is a birthday card made with the cute Cupcake Sprinkles from Stampendous.
The image is colored with colored pencils and shadowed with decorative chalks.
The patterned frame was die-cut using the Fitted Frames B Die Set and popped up using 3D Foam Squares from Scrapbook Adhesives by 3L.


Glossy Accents was added to the jar to give it a shiny look the and the sentiment popped up.

Have a creative day and follow me on 

Disclaimer- I get free goodies for blogging about craft products! Today I'm sharing a card made with products from Stampendous


Thursday, October 2, 2014

Get Ready for the 31st


Can you tell that sometimes Dream Team's "Fearless Leader", Pam Hornschu, has a hard time deciding on monthly challenges? Since the team will be taking turns all month with the Smeared and Smudged 31 Days of Halloween, and we are doing a Christmas collaboration with Stampendous and Core'dinations the 13th - 17th (there will be prizes!!), the confusion should be understandable. Therefore...happy HallowThanksMas! As usual, we'd love for you to play along with the challenge and link your creations to the Inlinkz tool on the Dream It Up! blog. Just in case you are wondering...NO, YOU DO NOT NEED TO POST SOMETHING WITH ALL THREE HOLIDAYS ON IT! However, you get bonus points for actually using Dreamweaver stencils and product on your creations! And bonus points might actually earn you an extra stencil as our monthly winner...just sayin'!

Here's how my card was made.


1.  Stencil LJ816 Spider web on decorative paper with Lightning Black Brilliance ink.
2.  Paste emboss the LS63 Dangling spider on top of the web using DGKP Dreamweaver Stencils Glossy Black Embossing Paste, remove the stencil and sprinkle with Black Micro Glitter from Stampendous.  Set aside to dry.
3.  Sprinkle the edges of a black card with Aged Copper Embossing Enamel and heat from underneath so it doesn't blow off.
4.  Wrap ribbon from May Arts around the edge of the webbed paper and glue to the black card.
5.  Die cut a 3 and 1 from glitter paper, using the new DD005 Dual Alphabet Dies.  Glue to the ribbon.
6.  Stamp sentiment from Tricky Words from Stampendous on white paper with black ink, sponge edges with orange and cut into a tag shape.  Tie with ribbon and pop up.
7.  Apply Zip Dry Glue to the bottom edge of the web paper and in the upper corner.  Sprinkle with Spoonful of Midnight.
I'm also playing along with the Mixed Media Mojo, October Challenge which is a Halloween or Fall theme that has material on it.


Remember to visit the rest of the team, as well as our guest designer, as confusion takes rein...could be interesting!

An InLinkz Link-up


Stay connected and don't miss a thing!
Follow my blog (in the right column)

https://blogger.googleusercontent.com/img/b/R29vZ2xl/AVvXsEh51wyTO6jT5VTdYnB6w_G_m5HpVcLHg74CtPgP_LxPEKzn_V-OoKqGG2xT1wqb9akJ4WnFtjyWN2v_w0oXJVDqSV3SyVI_lnvmji1y88Z-8_yaN4exn-xXopYtjiwAjsF2De1Y9Uh9R-yQ/s1600/Dreamweaver+logo.jpg