Featured Post

Privacy Policy

I'm working on a new privacy policy for my followers, but for now you should know that if you comment on my site, my site collects your ...

Showing posts with label Snowman. Show all posts

Sunday, November 26, 2023

A Winter Hello


Today I have an all-occasion winter card that can be for Christmas, birthday, thank you, or a card just to say hi.

To make my card, I used the Snowman Etched Dies from Spellbinders. 

The small snowman, scarf and hat band were die cut three times from white glitter cardstock from Printworks Specialty paper. The scarves and hat bands were sponged with different colors of Distress Inks.
Since this glitter paper is smooth, it can be stamped on and run through your printer. The faces were stamped using Onyx Black VersaFine Ink and the nose was colored using an orange alcohol marker, I used the ones from Spectrum Noir. 
The hats were die cut from black glitter paper.

SPELLBINDERS HUGE SALE

Spellbinders is having a huge sale going on now!
Hear are the links, you'll want to be sure to check it out the prices are amazing!!


Spellbinders Black Friday Sale- https://shrsl.com/4bnw6
Spellbinders Clearance- https://shrsl.com/4bnwb


Have a crafty day!

Let's Connect!

Affiliate and Product Disclosure
I am on various Design Teams and get free goodies for blogging about craft products but only because I love their products and genuinely use them. Ultimately my opinions are my own. A list of companies is in my sidebar.


Monday, July 19, 2021

Frosty Fun!


It's been fun making and sharing Christmas cards for Christmas in July with Rubbernecker Stamps. It really is a great way to get a head start and not be rushed at the last minute.

Here's how my card was made-
  • Stamp the snowman on watercolor paper with black ink and watercolor with Inktense Pencils.
  • Use the Snowman with Present Die Cut to cut out and add glitter to the fur on the hat and the ribbon on the gift. Set aside.

  • Die-cut decorative paper with the rectangle die and mount to white cardstock cut with the deckle die then mount to a top folding red card.
  • Use oval dies to cut white and red cardstock, cutting the red one size larger than the white.

  • Use oval dies to cut white and red cardstock, cutting the red one size larger than the white.
  • Stamp the Snow Flake Frame at the top of the white oval with VersaMark Ink and emboss with white embossing powder.
  •  Use a brush to add blue inks to the top of the white oval.

  • Pop up the Santa on the oval with foam squares.  Layer this onto the red oval and pop up on the center of the card with foam squares.
  • Stamp the sentiment from the Snowmen with Presents Set on a red strip of cardstock with VersaMark Ink and emboss with white embossing powder.
  • Pop up on the top left corner of the card with foam squares.
  • Finally, tie the bottom of the card with red and white twine.

  • Pop up on the top left corner of the card with foam squares.
  • Finally, tie the bottom of the card with red and white twine.

Have a crafty day!

Let's Connect!

Affiliate and Product Disclosure
I am on various Design Teams and get free goodies for blogging about craft products but only because I love their products and genuinely use them. Ultimately my opinions are my own. A list of companies is in my sidebar.
Being part of various affiliate programs – when you click on an affiliate link and then go on to make a purchase, at no cost to you, I receive a small commission.  The affiliates I use include Rubbernecker Stamps.

Saturday, November 7, 2020

Five Minute Christmas Card


Hi my friends, did you know that we're a little more than a month away from Christmas, how can that be?!  If you haven't started on your Christmas cards, now's the time to do it and my card today will make your Christmas card making easy as can be.

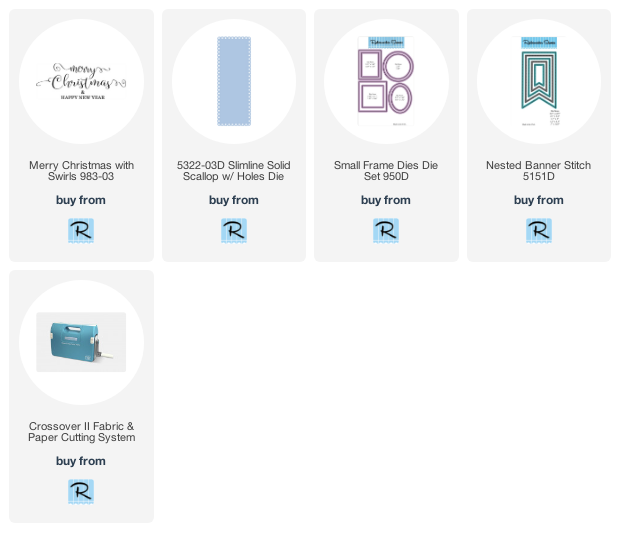
Now I know I've said before that I'm a huge paper hoarder so of course I have pretty paper that I haven't used because then I won't have it anymore.  I'm guessing most of you can relate to this.  When I buy 12 x 12 paper pads a lot of times there are pages with large images that I've never used because I'm not a scrapbooker.  Well, gues what, slimline dies are the perfect size to use with these large paper images and Rubbernecker Stamps has a full line of pretty slimline dies to choose from.
 

What I did was take a sheet of decorative paper and placed the die over an image, once I liked how the image fit in the frame, removable tape was place on the die and I ran it through my Crossover ll to cut it out.
Art Glitter Glue was applied to the areas of snow and it was then sprinkled with Ultra Fine Glitter.
Once dry, it was layered onto a slightly larger craft colored panel and mounted to a red slimline card.
The sentiment was stamped with black ink on white cardstock, the die-cut.


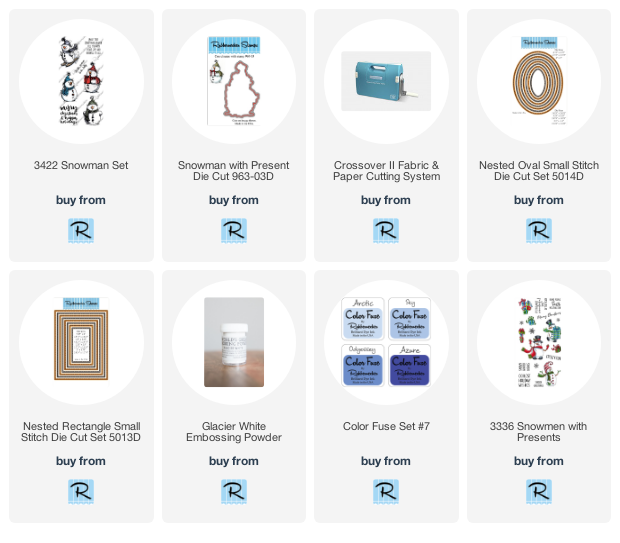
 Here's a list of Rubbernecker Stamps products that were used to make my card.

Follow Me- Stamp This, on-

Affiliate and Product Disclosure
I am on various Design Teams and get free goodies for blogging about craft products but only because I love their products and genuinely use them. Ultimately my opinions are my own. A list of companies is in my sidebar.
Being part of various affiliate programs – when you click on an affiliate link and then go on to make a purchase, at no cost to you, I receive a small commission.  The affiliates I use include Rubbernecker Stamps.

Friday, October 23, 2020

Christmas Card Collection for Flash Back Friday


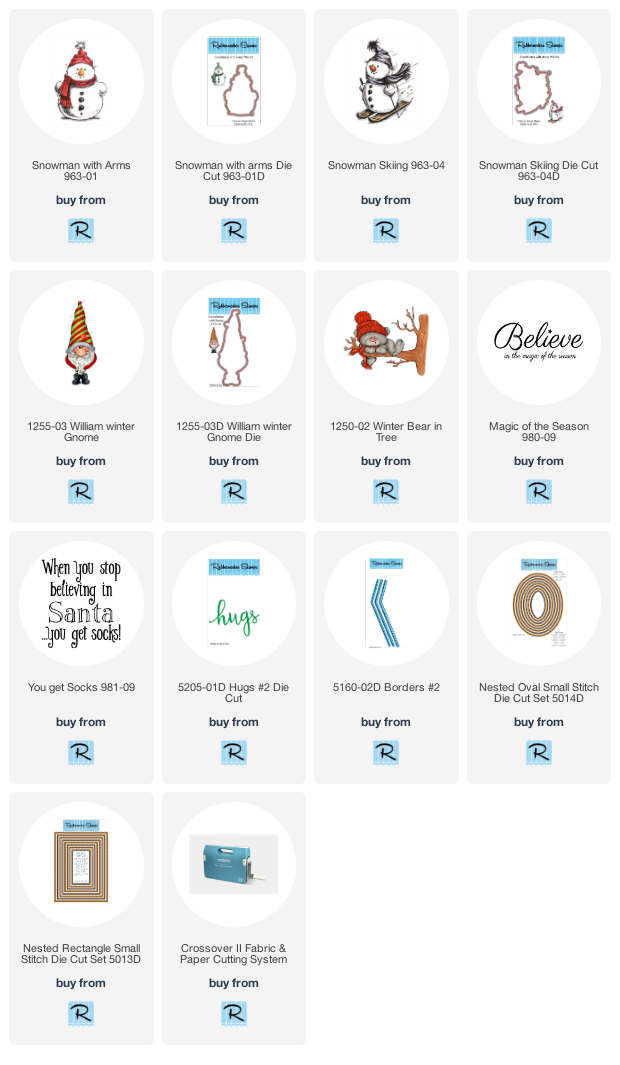
It's Flash Back Friday and I thought it would be fun to share cards and the directions that I have made using Rubbernecker Stamps from last year and the year before.  All of the Rubbernecker products used are still available, I hope this will give you a bunch of inspiration all in one Post.

Next up is Snowman with Arms-
  • This cute Snowman With Arms was stamped on white paper, colored with Prisma Pencils and blended with gamsol.  
  • After the snowman was die cut,  the bottom was embossed with Shabby White Embossing Powder and heated from underneath so the powder doesn't blow off. 
  •  Decorative chalk was applied around the snowman with a flat brush. 
  • Tis The Season was stamped with blue, layered on blue and popped up.

2nd Snowman with Arms-

  • This card is using the cute Snowman With Arms from Rubbernecker Stamps.  He's colored with Prisma Colored Pencils and can be cut out with the matching Snowman With Arms Die.
  •  The decorative paper is by The Paper Studio and the snow behind the snowman is Shabby White Embossing Powder from Stampendous.  
  • The circle cut out was made with the Rubbernecker Stamps Nested Circle Stitched Die Set.
Santa with Present-

This is one you can mass-produce pretty quickly, there is coloring involved but not much.  

1.  The Santa with Present was stamped with Onyx Black VersaFine Ink on white cardstock, heat set and colored with Prisma pencils.  
2.  The Nested Oval Stitch Die Set was used to cut the oval.  Set aside. (A matching Santa with Present Die is also available.)
3.  Decorative Christmas paper was layered onto larger white cardstock and glued to a red card.  The Santa with Present was popped up on the right side of the card with 3D Foam Squares from Scrapbook Adhesives by 3L.
4.  Magic of the Season was stamped on a strip of red cardstock with VersaMark ink and embossed with White Embossing Powder. It was then glued to the upper left side of the card.
5.  Three rhinestones were adhered to the left side of the card and you're done!

Snowman Skiing-

  •  He was stamped in black ink, colored with Prisma Pencils and die cut with the Snowman Skiing Die.  
  • The ovals he's layered on were die cut using the Nested Oval Stitch Die with the white oval being embossed with a clear embossing powder with glitter.  
  • The sentiment, Magic of the Season was stamped with Sepia VersaFine Ink and embossed with clear. 
Santa with Presents-


The Santa was stamped in black, colored with Prisma Pencils and die cut using the Santa with Present Die.  For the rectangles, the Nested Rectangle Die Set was used and this is layered onto a panel of decorative paper strips.  If you've been following me you know I've been trying to use up some of my decorative paper because I have a TON!!!!!
Have a creative day :)

William Winter Gnome-

  • William Winter Gnome is colored with Prisma Colored Pencils and glitter was applied to the trim of the hat.


  • He was cut out and popped up on a white panel.  
  • The plaid paper edge was die cut using the Borders #2 die set, isn't that cute!!  
  • Once the papers were glued to a red top folding card, the sentiment Magic of the Season was stamped in black and a twine bow was tied on the top.


Winter Bear in Tree-

  • Winter Bear in Tree is colored with Prisma Colored Pencils and to add a bit of shading around the image,  I used blue decorative chalk and applied it with a flat edged brush.


  • After coloring the image it was die cut using the Nested Rectangle Stitch Die Cut Set and add the "snow" using Shabby White Embossing Enamel.  
  • Layer this onto a kraft colored panel, then onto a striped decorative paper panel.  
  • Glue this to a kraft colored card and pop up a white frame that was cut using the same die set using 3D Foam Squares from Scrapbook Adhesives by 3L.
  • Hugs was die cut using Hugs #2 Die Cut, cut from pink and kraft colored cardstocks and glued together slightly offset.    

I hope that this helps with your Christmas creativity, have a crafty weekend!!


Santa with Present 

Friday, October 25, 2019

Winter Wonderland


Hi there, today I have a snowman card made with the new Snowman with Lantern stamp from Rubbernecker Stamps.  I colored him with Prisma Colored Pencils and added Crystal Stickles to the trim of the hat and to the ball, then on the scarf Silver Stickles was added.  
To make the glitter background, I used the Mixed Squares Stencil and applied BoBunny Silver Glitter Paste to a light blue cardstock panel and wow in person it's so sparkly!! Once it was dry I die cut a circle using The Nested Circle Stitch Die Set and layered it onto a gray circle scallop cut with the Nested Cir Scallop w/ Holes Die.


The circles were popped up on a strip of the paste embossed piece and it's all layered on a panel of  Kaisercraft Let It Snow decorative paper.
The sentiment is Magic of the Season and it was embossed with white embossing powder.


I hope you have a creative day!

Follow Me- Stamp This, on-
Twitter

Affiliate and Product Disclosure
I am on various Design Teams and get free goodies for blogging about craft products but only because I love their products and genuinely use them. Ultimately my opinions are my own. A list of companies is in my sidebar.
Being part of various affiliate programs – when you click on an affiliate link and then go on to make a purchase, at no cost to you, I receive a small commission.  The affiliates I use include Rubbernecker Stamps and Whimsy Stamps.


Tuesday, August 13, 2019

Snowman Scarf


This adorable Snowman Scarf from Stampendous is the perfect size to frame with pretty decorative paper and turn into a shaker card.  It's hard to believe that we'll be sending these out in just four short months, so if you haven't started, you'd better get to it!

Here's how my card was made.
1.  Stamp Snowman Scarf on Mixed Media White Paper and color with colored pencils.
2.  Layer Snowman Scarf onto thick decorative paper and set aside
3.  Die-cut a frame using a rectangle die from thick decorative paper.
4.  Glue a sheet of acetate underneath the frame and apply foam tape around the backside of the frame.
5.  Sprinkle the shaker bits on the snowman and place frame over it.


6.  Stamp a snowflake from the Winter Chickadee Set with blue ink.  Once dry stamp sentiment from the same set with black ink and emboss with Clear Embossing Powder.  Layer onto blue paper and pop up on the card.


Stampendous
W213 Snowman Scarf
QS5044 Winter Chickadee Set
EP020 Clear Embossing Powder
MPW811 Mixed Media White Paper
STF082 VersaFine Onyx Black Ink

Plus 
3D Foam Square from Scrapbook Adhesives by 3L
Zip Dry Glue
Prisma Colored Pencils
Acetate Sheet
Decorative Paper- Authentique Alpine Paper Pad
Peacock Feathers Distress Ink
Rectangle Die
Shaker Bits From Michael's


Disclaimer- I get free goodies for blogging about craft products! Today I'm sharing a card made with products from Stampendous.


Sunday, November 4, 2018

Quick and Easy Christmas Card


I shared this card back in July for Christmas in July but thought I would post it again since it is super quick and easy for those of you who haven't started on your Christmas cards yet.  It uses the cute Snowman With Arms from Rubbernecker Stamps.  He's colored with Prisma Colored Pencils and can be cut out with the matching Snowman With Arms Die.  The decorative paper is by The Paper Studio from Hobby Lobby and the snow behind the snowman is Shabby White Embossing Powder from Stampendous.  The circle cut out was made with the Nested Circle Stitched Die Set.
So if you haven't already, get started on those Christmas cards!
Have a creative day.


Stay connected and don't miss a thing!

 Follow Stamp This 


Disclaimer- I get free goodies for blogging about craft products!  Today I'm sharing some fun new products sent to me from Rubbernecker Stamps and Stampendous.

Sunday, July 29, 2018

Christmas in July


I'm squeezing in another Christmas in July card, this card is using the cute Snowman With Arms from Rubbernecker Stamps.  He's colored with Prisma Colored Pencils and can be cut out with the matching Snowman With Arms Die.  The decorative paper is by The Paper Studio and the snow behind the snowman is Shabby White Embossing Powder from Stampendous.  The circle cut out was made with the Nested Circle Stitched Die Set.


Stay connected and don't miss a thing!

 Follow Stamp This 


Disclaimer- I get free goodies for blogging about craft products!  Today I'm sharing some fun new products sent to me from Rubbernecker Stamps and Stampendous.


Monday, December 25, 2017

Merry Christmas!!


Merry Christmas to all my crafty friends, hope you have a warm and joyous day!!  My last Christmas card of the year is using the cute Snowman With Arms from Rubbernecker Stamps.  He's colored with Prisma Colored Pencils and can be cut out with the matching Snowman With Arms Die, the decorative paper is by The Paper Studio and the snow behind the snowman is Shabby White Embossing Powder from Stampendous.  The circle cut out was made with the Nested Circle Stitched Die Set.

Take a look at what the other Designers from Rubbernecker Stamps have for you today, just click HERE.

Stay connected and don't miss a thing!

 Follow Stamp This 


Disclaimer- I get free goodies for blogging about craft products!  Today I'm sharing some fun new products sent to me from Rubbernecker Stamps.


Tuesday, December 19, 2017

Snowman Trio


Here's a card for my snowman loving friends, they're so plump and happy looking! The Snowman Trio Set from Stampendous comes with the matching snowman dies, so you really save time making cards! 

Here's how my card was made;
1.  Stamp Snowman Trio on Strathmore Bristol paper, color with Zig pens and use matching dies to cut out.
2.  Add Crystal Micro Glitter to the fur parts of the hats using Art Glitter Glue.
3.  Add pink, blue and turquoise Dot Sparklers as buttons.
4.  Glue them to a panel that has been watercolored with different shades of blue and stamped with the snowflake in blue.
5.  Layer onto a Velvet Night panel and mount to a Caribbean Sea colored card.
6.  Stamp sentiment on white cardstock with blue ink and emboss with clear.
7.  Diecut using Fitted Frames B and over stamp with snowflakes using Tumbled Glass Ink. Layer onto a Caribbean Sea panel.
8.  Pop up on card using foam squares and add Blue Dot Sparklers.


Disclaimer- I get free goodies for blogging about craft products! 

Supplies
Stampendous
CLD08 Snowman Trio
DCP1006 Fitted Frames B
EP020 Clear Embossing Powder
EPA50 Embossing Heat Tool
AC672HSB Blue Dot Sparklers
AC672HSQ Turquoise Dot Sparklers
AC672HSP Pink Dot Sparklers
MG01 Crystal Micro Glitter

Plus
My Colors Cardstock- Velvet Night, Caribbean Sea
Zip Dry Glue Beacon Adhesives
Zig Clean Color Real Brush Pens
Art Glitter Glue
3D Foam Squares Scrapbook Adhesives by 3L
Distress Ink- Faded Jeans, Tumbled Glass

Stay connected and don't miss a thing!


Friday, November 17, 2017

Snowman Season


Another week has flown by, like Santa in his sleigh! He’ll be here before you know it, only 38 more sleeps until he comes sliding down the chimney! Are you ready?? Have you been naughty or nice?
Stampendous is going to be nice this week and give away one of their new Santa On His Way stamps to a lucky commenter who leaves a comment on the Stampendous Blog for the week or on those of the Design Team. In case you need to find those spots, here are the links for MONDAY, WEDNESDAY and Friday.
Here's how my card was made.
1.  Stamp Snowman Season on Mixed Media White Cardstock with black ink and color with pencils.
2.  Apply Art Glitter Glue to the fur parts of the hats and sprinkle with Crystal Micro Glitter, let dry.
3.  Cut out using a circle die and set aside.
4.  Cut a strip of Double Sided Mounting Paper and use a ruler to draw line on the top carrier paper.  Using a craft knife, carefully cut through the carrier only not the sticky mounting paper. Remove every other strip.
5.  Sprinkle Red Micro Fine Glitter, rub in and shake off excess.
Remove the remaining carrier strips and sprinkle with Crystal Micro Glitter, shake off excess and stick to a panel of decorative paper.
6.  Cut a strip of Double Sided Mounting paper, adhere to the left edge of the decorative paper and sprinkle with Crystal Micro Glitter.
7.  Glue to a red card and pop up Snowman Season with foam squares.


Supplies
Stampendous
W190 Snowman Season
CLD05 Winter White
MG01 Crystal Micro Glitter
DWMPDS Double Sided Mounting Paper
STF082 Onyx Black VersaFine Tsukineko

Plus
Zip Dry Glue Beacon Adhesives
Bo Bunny
My Colors Cardstock by My Minds Eye
Prisma Colored Pencils
Art Glitter Glue
Circle Die Sizzix
Mowed Lawn Distress Ink
3D Foam Squares Scrapbook Adhesives by 3L


You guys know I get free goodies for blogging about craft products!  Today I'm sharing some fun new products sent to me from Stampendous!


Stay connected and don't miss a thing!

 Follow Stamp This 
(I follow crafty people back!)


https://blogger.googleusercontent.com/img/b/R29vZ2xl/AVvXsEiBIB7cl3FWcUqRpVNE2xf0uD7bSSaDv8EJChhD3TSJRrDTTqubuFddCha_Vsye2BIOBKX1yGUjGJyPJvjizD-izRFYxEG1Q0kTmLKEiANGSeoreVxGdz2kjJCF6lGrlm9fopxLmRzM6V04/s1600/Stampendous+logo.jpg