Featured Post

Privacy Policy

I'm working on a new privacy policy for my followers, but for now you should know that if you comment on my site, my site collects your ...

Saturday, December 30, 2023

House Mouse Thinking of You Card


House-Mouse stamps are the cutest. I used this "We Heart You" stamp that comes with the sentiment to make a thinking of you card. I'm thinking of switching out the sentiment to make this a Valentine's Day card too.

This is a simple card to make since it fills up the card and you don't have to worry about the layout. The image was stamped with Onyx Black VersaFine ink and colored with Prisma Colored Pencils. Adhesives from Scrapbook Adhesives were used to stick things down and to pop them up.

You can see the House-Mouse collection at Spellbinders HERE

SALE
PLUS SPELLBINDERS IS HAVING A HUGH NEW YEAR SALE WITH GREAT DEALS! CHECK IT OUT HERE

Have a creative day :)

 Have a crafty day!


Let's Connect!

Affiliate and Product Disclosure
I am on various Design Teams and get free goodies for blogging about craft products but only because I love their products and genuinely use them. Ultimately my opinions are my own. A list of companies is in my sidebar.

Friday, December 29, 2023

Warm Birthday Wishes Card


 I'm making a few winter birthday cards using this Knit One, you can see it here https://shrsl.com/4d048 on the Spellbinders site.


Knit One, House-Mouse Designs from Spellbinders


To make my card, the image was stamped with Onyx Black VersaFine Ink and colored with Prisma Colored Pencils. It was then layered onto pink cardstock and glued to a card that was covered with decorative paper.
The sentiment from the set was stamped on the same decorative paper and layered onto silver glitter paper, the adhesives I used are from Scrapbook Adhesives BY 3L.

Have a creative day and stay warm! :)

Have a crafty day!

Let's Connect!

Affiliate and Product Disclosure
I am on various Design Teams and get free goodies for blogging about craft products but only because I love their products and genuinely use them. Ultimately my opinions are my own. A list of companies is in my sidebar.


Wednesday, December 27, 2023

Coffee Lover Card


Stamp a brown cardstock panel using the Wood Grain Fence stamp with VersaMark ink and emboss using white embossing powder. Glue this to a pink top folding card.


Stamp the owl from the Words Can't Espresso Set and the heart from the Coffee Lovers Set on white cardstock using Onyx Black VersaFine Ink. Color with Prisma Colored Pencils.
Use the coordinating dies to cut out the images and set aside.


Die cut an oval frame using two dies from the Nested Oval Stitch Die Cut Set and pop this up in the center of your card.
Pop up the owl in the center of the die and the heart at the top left of the card.
Die cut leaves from green cardstock using the Branches and Leaves Die Set and glue them below the oval.


Have a crafty day!

Let's Connect!

Affiliate and Product Disclosure
I am on various Design Teams and get free goodies for blogging about craft products but only because I love their products and genuinely use them. Ultimately my opinions are my own. A list of companies is in my sidebar.

Wednesday, December 6, 2023

Christmas Card Gift Card Holder


Cut cardstock to 5 1/2" x 8 1/2" and fold in half to a 5 12" x 4 1/2" card.
Score the left side of the card at 1 14". 
Place double sided tape on each end of the 1 1/4" scored piece and fold to seal the edges. This will be for the gift card.
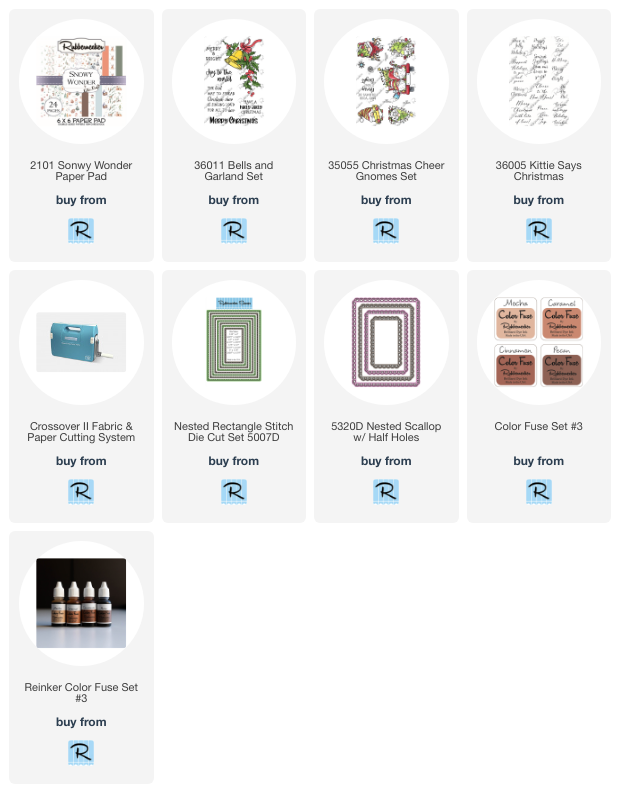
Cut the house decorative paper from the Snowy Wonder Paper Pad to 2 3/4" x 5 1/4" and glue it to a slightly larger brown panel from the same paper pad. Glue this to the top card panel.
Cut brown decorative paper from the same pad to 1 1/4" x 5 1/4".
Stamp this panel using snowflakes from the Christmas Cheer Gnomes Set using white ink and glue to the left side of the open card.
Die cut blue and white cardstock using the Nested Scallop w/ Half Holes and just white cardstock from the Nested Rectangle Stitch Die Cut Set.
Stamp the white Nested Rectangle Stitch panel with the sentiment from the Bells and Garland Set with Pecan Color Fuse Ink using a stamping apparatus such as a Misti, clean your stamp without removing it, then ink it with VersaMark Ink and restamp.
Emboss this with clear glitter embossing powder and glue it to the top of the blue die cut piece.
Randomly stamp this with snowflakes using a blue ink and add small rhinestones to the center of the snowflakes.
Stamp the white Nested Scallop w/ Half Holes with the sentiment from the Kittie Says Christmas with Pecan Color Fuse Ink and glue to the inside of the card and add a gift card.


Place double sided tape on each end of the 1 1/4" scored piece and fold to seal the edges. This will be for the gift card.


Cut the house decorative paper from the Snowy Wonder Paper Pad to 2 3/4" x 5 1/4" and glue it to a slightly larger brown panel from the same paper pad. Glue this to the top card panel.


Die cut blue and white cardstock using the Nested Scallop w/ Half Holes and just white cardstock from the Nested Rectangle Stitch Die Cut Set.


Stamp the white Nested Rectangle Stitch panel with the sentiment from the Bells and Garland Set with Pecan Color Fuse Ink using a stamping apparatus such as a Misti, clean your stamp without removing it, then ink it with VersaMark Ink and restamp.
Emboss this with clear glitter embossing powder and glue it to the top of the blue die cut piece.
Randomly stamp this with snowflakes using a blue ink and add small rhinestones to the center of the snowflakes.


Cut brown decorative paper from the same pad to 1 1/4" x 5 1/4".
Stamp this panel using snowflakes from the Christmas Cheer Gnomes Set using white ink and glue to the left side of the open card.
Stamp the white Nested Scallop w/ Half Holes with the sentiment from the Kittie Says Christmas with Pecan Color Fuse Ink and glue to the inside of the card and add a gift card.


Click on the product below to go to the Rubbernecker Stamps online store.
 
Have a crafty day!

Let's Connect!

Affiliate and Product Disclosure
I am on various Design Teams and get free goodies for blogging about craft products but only because I love their products and genuinely use them. Ultimately my opinions are my own. A list of companies is in my sidebar.

Wednesday, November 29, 2023

You Can Do It! Encouragement Card


You can do it!! Today I have a cute encouragement card with the Flying to See You Stamp Set from Spellbinders.
The image is colored with Prisma Colored Pencils and layered onto a cloud background that was made by sponging on pink, purple and blue shades of Distress Oxides.
The white frame was made using rectangle dies and the mouse body was glued to the center of the frame and the wings were pulled up to look like he's flying.


Have a crafty day!

Let's Connect!

Affiliate and Product Disclosure
I am on various Design Teams and get free goodies for blogging about craft products but only because I love their products and genuinely use them. Ultimately my opinions are my own. A list of companies is in my sidebar.


Sunday, November 26, 2023

A Winter Hello


Today I have an all-occasion winter card that can be for Christmas, birthday, thank you, or a card just to say hi.

To make my card, I used the Snowman Etched Dies from Spellbinders. 

The small snowman, scarf and hat band were die cut three times from white glitter cardstock from Printworks Specialty paper. The scarves and hat bands were sponged with different colors of Distress Inks.
Since this glitter paper is smooth, it can be stamped on and run through your printer. The faces were stamped using Onyx Black VersaFine Ink and the nose was colored using an orange alcohol marker, I used the ones from Spectrum Noir. 
The hats were die cut from black glitter paper.

SPELLBINDERS HUGE SALE

Spellbinders is having a huge sale going on now!
Hear are the links, you'll want to be sure to check it out the prices are amazing!!


Spellbinders Black Friday Sale- https://shrsl.com/4bnw6
Spellbinders Clearance- https://shrsl.com/4bnwb


Have a crafty day!

Let's Connect!

Affiliate and Product Disclosure
I am on various Design Teams and get free goodies for blogging about craft products but only because I love their products and genuinely use them. Ultimately my opinions are my own. A list of companies is in my sidebar.


Wednesday, November 22, 2023

Fun Fold Thank You Card


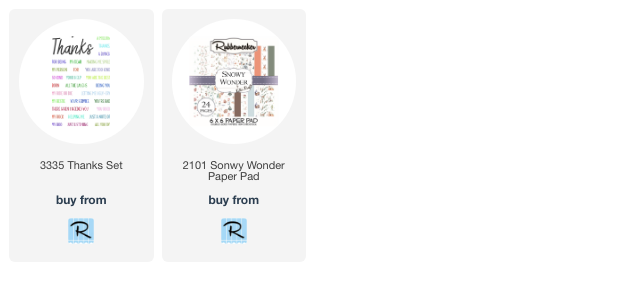
Today I have a fun fold thank you card make with pretty papers and stamps from Rubbernecker Stamps.
Here's how my card was made.

Cut a sheet of rust colored cardstock to 4 1/4" x 11" and fold in half.
Fold the top of the card in half so that the flap can be pulled open from the left side.
Pick two patterns from the Snowy Wonders Paper Pad and glue one sheet to the inside of the card and half to the top of the folded side.


Stamp a white cardstock panel with Thanks in rust ink and the rest of the sentiment below Thanks in a dusty blue ink.
The pinecone was cut from the paper pad and glued to the bottom left corner of the panel.
Randomly add blue Stickles to the panel.