Featured Post

Privacy Policy

I'm working on a new privacy policy for my followers, but for now you should know that if you comment on my site, my site collects your ...

Friday, January 11, 2019

Carefree Day


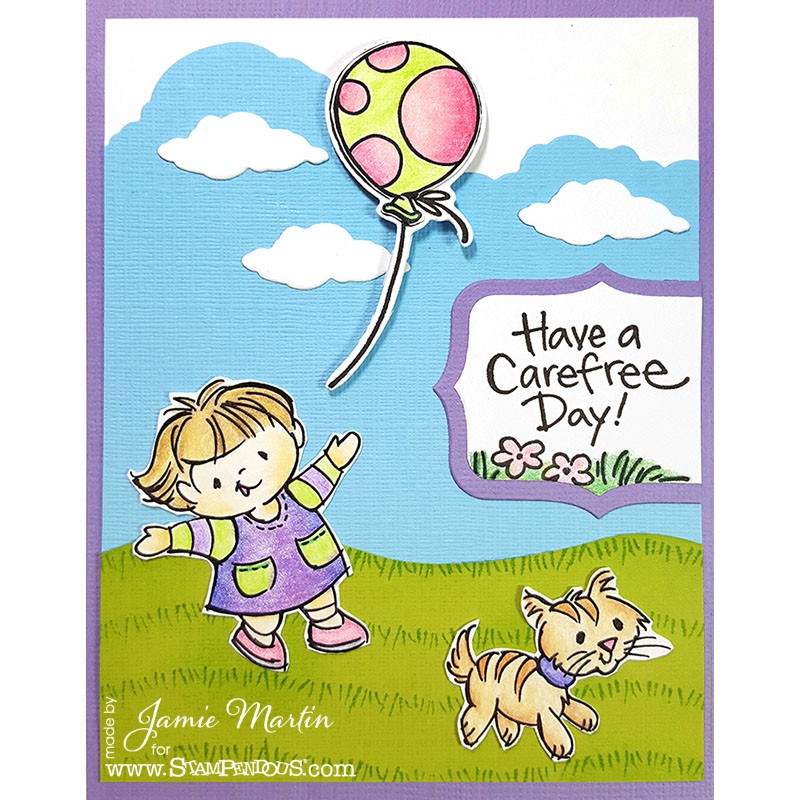
This week the Stampendous Design Team is sharing projects made with the new Meadow Edgers Die Set.  With this set, you can make a variety of sky backgrounds and landscapes very easily.

Here's how my card was made;
1.  Stamp images from the Kitty Girl Cling Set, color with colored pencils and die cut using the matching Kitty Girl Die Set. Set aside.
2.  Use the Meadow Edgers Die Set to die cut the green grass, blue sky, and white clouds.
3.  Use the Meadows Edge Perfectly Clear Set to stamp the grass in green.
4.  Glue all of the pieces to a white cardstock panel but pop up the balloon with a foam square.
5.  The sentiment was was die cut using the Fitted Frames A set.

Supplies
Stampendous
QS5017 Kitty Girl Cling Set
QD5017 Kitty Girl Die Set
SSC1294 Meadows Edge Perfectly Clear Set
DCP1013 Meadow Edgers
DCP1005 Fitted Frames A Set
STF082 Onyx Black VersaFine Ink

Plus
My Colors Cardstock- My Minds Eye
3D Foam Squares- Scrapbook Adhesives by 3L
Prisma Colored Pencils
Mowed Lawn Ink- Distress Ink

Product Links


Disclaimer- I get free goodies for blogging about craft products! Today I'm sharing a card made with products from Stampendous.


Wednesday, January 9, 2019

Whimsy Wednesday- Flippin Over You


Welcome to Whimsy Wednesday, I have a card using the new Whale Of A Time Stamp Set from Whimsy Stamps.  The dolphin is colored with Prisma Colored Pencils, then a VersaMark pad was tapped on top and embossed with clear embossing powder to give it a shiny wet look.


The sentiment was stamped in black, the splashes were stamped in blue and Stickles Glitter was applied over the top of the splashes.  The sentiment circle was glued on top of a background that was stenciled with the Making Waves Stencil by sponging with blue ink.  Both rectangle panels were die cut the Hand Stitched Nested Rectangles.


     Making Waves Stencil     Hand Stitched Nested Rectangles  Distress Ink Mini Pad - Salty Ocean          VersaMark Full-Size Ink Pad - Original (Clear)   

Follow me, Stamp This


Affiliate and Product Disclosure
I am on various Design Teams and get free goodies for blogging about craft products but only because I love their products and genuinely use them. Ultimately my opinions are my own. A list of companies is in my sidebar.
I am also part of various affiliate programs – when you click on an affiliate link and then go on to make a purchase, at no cost to you, I receive a small commission.  The affiliates I use include Rubbernecker Stamps and Whimsy Stamps.
I hope if you like the content of my blog you will support me by clicking through these links to make your purchases.


Monday, January 7, 2019

Happy Birthday-You Old Goat


I have another card using the new WindowRama Die Set from Stampendous.  This time I combined it with the Old Goat Stamp Set and Meadow Edgers Die Set to form the multiple layers of background (links to the products are at the bottom).

You can see the other WindowRama card I made by clicking HERE and see how different you can make them look.

Here's how my card was made;
1.  Stamp images from the Old Goat Stamp Set on white cardstock with black ink.  Color with colored pencils and cut out.
2.  Die cut Windowrama from decorative paper and die cut the background scene using the Meadow Edgers Die Set from green, blue and white paper.
3.  Assemble the Windowrama with the background scene inside.
4.  Glue image onto Windowrama as shown.
5.  Stamp sentiment from set onto white cardstock with black ink, emboss with Clear Embossing Powder, layer onto green cardstock and glue to Windowrama.

Supplies
Stampendous
QS5013 Old Goat
QD Old Goat Die Set
DCP1013 Meadow Edgers Die Set
DCP1012 Windowrama Die Set
EP020 Clear Embossing Powder
STF082 Onyx Black VersFine Ink

Plus
My Colors Cardstock- My Minds Eye
Zip Dry Glue- Beacon Adhesives
Prisma Colored Pencils

Product Links


Disclaimer- I get free goodies for blogging about craft products! Today I'm sharing a card made with products from Stampendous.

Wednesday, January 2, 2019

Windowrama Card


I'm so excited to share the new Windowrama Die Set from Stampendous! It's an easy way to make a 3D card and it folds flat to fit into a standard size envelope.  If you're like me, this is a great way to use up some of the decorative paper you've been hoarding haha.

Here's how my card was made;

1.  Stamp Small Hellebore on watercolor paper with black ink and emboss with Clear Embossing powder.  Color with Zig Markers and cut out.
2.  Die cut the Windorama from decorative paper, stamp the sentiment from the Script Sayings Perfectly Clear Set as shown with black ink and emboss with Clear Embossing Powder.
3.  Stamp the hearts from the same set onto pink paper with VersaMark Ink, emboss with White Embossing Powder and cut out.
4.  Glue flowers, hearts, and sequins as shown.


Supplies
Stampendous
CRQ241 Small Hellebore
SSC1308 Script Saying
DCP1012 WindowRama Die Set
EP100 White Embossing Powder
EP020 Clear Embossing Powder
STF082 Onyx Black VersFine Ink
VM001 VersaMark Watermark Ink

Plus
My Colors Cardstock- My Minds Eye
Watercolor Paper- Strathmore
Decorative Paper- The Paper Studio
Zip Dry Glue- Beacon Adhesives
3D Foam Squares- Scrapbook Adhesives
Zig Clean Color Real Brush Pens


Disclaimer- I get free goodies for blogging about craft products! Today I'm sharing a card made with products from Stampendous.

Tuesday, January 1, 2019

Whimsy New Release- Old Fart


Happy New Year!! Are you ready to have a crafty year?  I sure am and it's time to share a card made with new release stamps and dies from Whimsy Stamps.

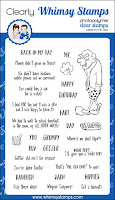
The Old Geezer Clear Stamp Set comes with a bunch of funny sayings but today I used the new Old Fart Large Word Die to go with this Old Geezer who's colored with Prisma Colored Pencils.  His background was stenciled with the Formal Lattice Stencil, which was sponged with Tea Dye Ink.

The image is layered against a panel stamped with the new Buffalo Plaid Background Stamp using blue ink.  And to make it just a little extra funny I added glitter to the gas plume, hehe.


Product Links

                                    Formal Lattice Stencil             Distress Ink Mini Pad - Tea Dye    


Follow me, Stamp This


Affiliate and Product Disclosure
I am on various Design Teams and get free goodies for blogging about craft products but only because I love their products and genuinely use them. Ultimately my opinions are my own. A list of companies is in my sidebar.
I am also part of various affiliate programs – when you click on an affiliate link and then go on to make a purchase, at no cost to you, I receive a small commission.  The affiliates I use include Rubbernecker Stamps and Whimsy Stamps.
I hope if you like the content of my blog you will support me by clicking through these links to make your purchases.


Monday, December 31, 2018

Happy New Year!


Happy New Year's Eve to all you crafty fanatics, you've made it through another year of creativity!  My last card of the year is a bright floral card using Honey Doo Crafts Cherry Blossom Stamps and matching Die Set.  The purple flowers were stamped on a long rectangle watercolor panel with VersaMark Ink and embossed with clear embossing powder.  Color the two flowers with Zig Clean Color Clear Brush Markers.

Stamp the flower one more time and the leaves the same as above on a separate piece of watercolor paper.  Color this one with pink Zigs, the leaves with green and use the matching dies to die cut.  Pop these up on the flower panel, layer onto black then onto decorative paper and glue to a black card. 

Stamp sentiment from the Mini Sentiments Stamp Set on a white strip of paper with black ink and emboss with clear embossing powder. Glue to card and add a pink rhinestone.

Have a fun and safe New Year's Eve and I'll see you back here tomorrow!!!!!

Follow me, Stamp This


Thursday, December 20, 2018

Let It Snow


Here's my last Christmas card for the year, one made using the Snow Flurry Stamp Set from Whimsy Stamps.  The snowflakes are stamped on different colors of paper with VersaMark Ink and embossed with white embossing powder.  The kraft colored paper was randomly stamped with snowflakes using White Picket Fence Distress Ink. 


I even stamped the pink striped background using Get In Line Clear Stamps, it makes it easy to create a striped background in any color!


Thank you for stopping by, Merry Christmas and have a creative day!

Follow me, Stamp This


Affiliate and Product Disclosure
I am on various Design Teams and get free goodies for blogging about craft products but only because I love their products and genuinely use them. Ultimately my opinions are my own. A list of companies is in my sidebar.
I am also part of various affiliate programs – when you click on an affiliate link and then go on to make a purchase, at no cost to you, I receive a small commission.  The affiliates I use include Rubbernecker Stamps and Whimsy Stamps.
I hope if you like the content of my blog you will support me by clicking through these links to make your purchases.