I'm so excited to share this card today, I'm Guest Designing for The Stamps of Life this month and will be posting lots of cards to show all that you can do with the March Card Kit!
Why should you join the club to get the Card Kit each month? To start you know that everything inside coordinates and goes together, there's no guessing and struggling trying to decide what papers and embellishments go together or if the sizes of the stamps and dies work together...it's all done for you! It's also a GREAT value! Look to the bottom of the post to see all that you get when you join.
Look at the cute box the March Card Kit was shipped in!!
When you open it, it's filled with beautiful bright papers, ribbon, embellishments, stamps and dies.
Here's a better look at everything.
 | New Card Kit (retail value over $50) automatically sent each month, charged on the 15th and shipped the next business day. |
 | $39.98 per month / $34.88 per month for current Stamp or Die Hard Club Members |
 | FREE shipping in the USA on your club shipments |
 | FREE stamp set from The Stamps of Life as a welcome gift! |
 | Yearly $25 Gift Certificate on your anniversary |
 | 15% Off every purchase (excludes Big Shots and classes) |
 | 24 hour Early Access to LIMITED EDITION products |
 | Minimum 3 month commitment |
 | Card Kits include various supplies to create 12+ cards, including an exclusive stamp set, die set, paper pad, embellishments, storage folder, envelopes and more. Also includes an idea post card, a video on our site, and an idea gallery. Okay now let's talk about how easy it was to make my card, the papers are all from the Card Kit. 
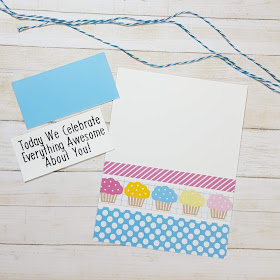
All I did was cut strips of three different sheets of decorative paper and glue them to the bottom of a white panel. The blue and white twine was tied around the top then the panel was glued to a blue card. The Sentiment from the stamp set was stamped with Onyx Black VersaFine Ink and embossed with Clear embossing powder. This was glued to a light blue panel and popped up diagonally on the card.
Look at this cute little two-piece balloon die, I love how small it is and you can use them together or separate. I used them separately, the solid one was used to cut out three balloons from decorative paper. It was then glued on top of the twine and the string part was tucked under the popped up sentiment panel and you're done! Wasn't that quick and easy?!
Be sure to keep stopping by to see the other four cards I'll be sharing and have a crafty day!
Product Disclosure
I am on various Design Teams and get free goodies for blogging about craft products but only because I love their products and genuinely use them. Ultimately my opinions are my own. A list of companies is in my sidebar.
|


No comments:
Post a Comment