Sunday, July 26, 2020

Time For Drinks


Here's a cool and refreshing card for a hot summer day made with the new Fruity Drinks Perfectly Clear Set from Stampendous.  This is such a fun set to use and it comes with a bunch of cute stamps.

To make the card, I stamped the glasses, fruit, and umbrella on watercolor paper with Onyx Black VersaFine Ink and colored them with Derwent Inktense pencils to give them a vibrant look.  To make the background, I die-cut a  circle in the center of a panel of cardstock and laid it over the same size white cardstock panel and blended yellow, green, and blue inks.  Then stamped over the colors with the same color of ink.


Look at all that comes in the set, super cute right?!

Have a creative day and follow me on 

Disclaimer- I get free goodies for blogging about craft products! Today I'm sharing a card made with products from Stampendous

Other places that you can find Stampendous Products-
First off check out your local Stamp Store, if they don't have it they can order it.
Online Stores

Tuesday, July 21, 2020

Gift Card Wallets


Stampendous! is celebrating the July Catalog with a Virtual Catalog Party for their retailers! Each day a new product will be featured and there will be a video and other artwork spotlighting it. Be sure to check Stampendous!' blog throughout the week so you don't miss anything!


Today I have a few gift card holders made with the new Gift Card Wallet Die from Stampendous.  I wanted to show a few different ideas so you could get an idea of the different looks that you could get.

The first one use just the dies that come in the set except for one sentiment stamp.  The Wallet is cut from decorative paper.  


The baby Gift Card Wallet is cut from decorative paper and the Baby Gift Perfectly Clear Set was used to stamp the sweet images.  This stamp set is made to be used with the Wallet but it can also be used on a card or other things.


This last Wallet was cut from watercolor paper, the hearts from the Wedding Gifts Perfectly Clear Stamps Set were white embossed and colored with Zig Clean Color Real Brush Pens.


Have a creative day!!

Have a creative day and follow me on 

Disclaimer- I get free goodies for blogging about craft products! Today I'm sharing a card made with products from Stampendous


Monday, July 20, 2020

Behind You 100%


Happy Monday my friends, Jamie here with you today with a card to give to the guys in our lives.  I know for me the guys get a bit neglected because it's so much fun making cards with flowers, butterflies, teddy bears, and the like.  But this card was fun too!

Here's how my card was made-
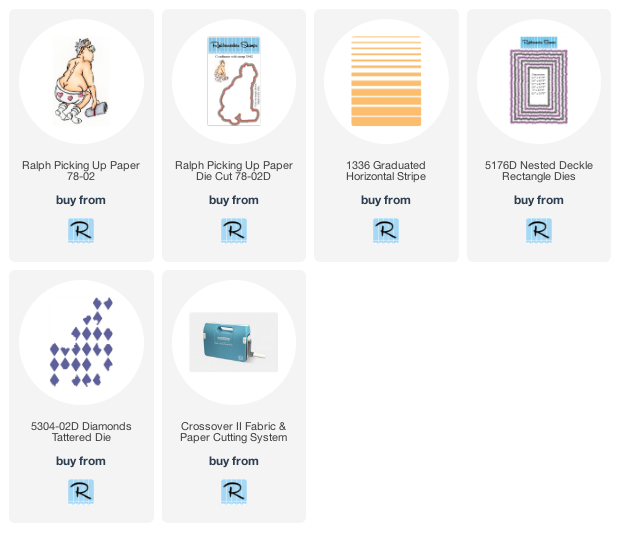
  • Stamp the Graduated Horizontal Stripe Stamp on white cardstock with VersaMark Ink and emboss with Vintage Blue Embossing Enamel.
  • Die-cut using the largest die from the Nested Deckle Rectangle Dies Set.
  • Use the Diamonds Tattered Die and cut the center of the stamped panel, glue this to a red card.

 
  • Stamp Ralph Picking Up Paper on watercolor paper and color with Inktense Pencils.
  • Use the cordinating Ralph die to cut him out and pop him up on the card using 3D Foam Squares from Scrapbook Adhesives by 3L. 
 

  • Stamp Behind You on white cardstock square with Onyx Black VersaFine Ink and layer onto slightly larger black cardstock as shown.
  • Apply two round red rhinestones on the right side of the black panel and a red rhinestone heart in between the round ones.  Pop this up with 3D Foam Squares.
  • When I made this I thought I was done but it seemed visually off balance so I added a strip of black and white decorative paper to the left side to tie in the black.  That pleased my eyes and balanced it out.

  • When I made this I thought I was done but it seemed visually off balance so I added a strip of black and white decorative paper to the left side to tie in the black.  That pleased my eyes and balanced it out.


Follow Me- Stamp This, on-
Twitter

Affiliate and Product Disclosure
I am on various Design Teams and get free goodies for blogging about craft products but only because I love their products and genuinely use them. Ultimately my opinions are my own. A list of companies is in my sidebar.
Being part of various affiliate programs – when you click on an affiliate link and then go on to make a purchase, at no cost to you, I receive a small commission.  The affiliates I use include Rubbernecker Stamps.


Thursday, July 16, 2020

Miss You


Hi there!  Today I have a "Miss You" card made with the new Soul Sisters Stamp Set, Soul Sisters Outline Die Set, and the Quilted Rainbow Inlaid Die from Whimsy Stamps.

The images were colored with Inktense Pencils then cut out using the matching dies.


The background was made by using the Quilted Rainbow Inlaid Die to cut white paper.  
The hearts were stamped with red ink and cut out with matching dies.


Have a creative day!

**NEW Soul Sisters Clear Stamps - Whimsy Stamps   **NEW Soul Sisters Outline Die Set - Whimsy Stamps  **NEW Quilted Rainbow Inlaid Die - Whimsy Stamps

Instagram

Affiliate and Product Disclosure
I am on various Design Teams and get free goodies for blogging about craft products but only because I love their products and genuinely use them. Ultimately my opinions are my own. A list of companies is in my sidebar.
Being part of various affiliate programs – when you click on an affiliate link and then go on to make a purchase, at no cost to you, I receive a small commission.  The affiliates I use include Whimsy Stamps.


Monday, July 13, 2020

Daisies Smile


Hi everyone, today I have a shaker that I made after I stamped and colored up a daisies panel.  I usually have a scene within the shaker or on the frame of the shaker but I really like how this turned out and think I'll be doing this again.

Here's how my card was made-
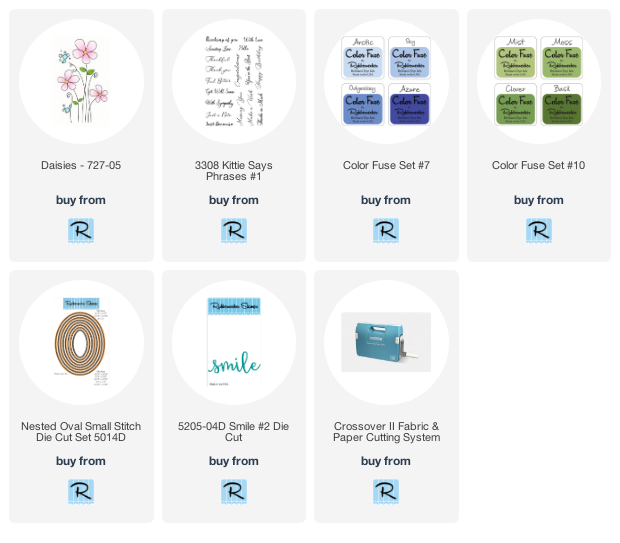
  • Stamp Daisies on a 5 1/4" x 4" white watercolor panel repeatedly with VersaFine Onyx Black Ink.
  • Use the second largest Oval Nested Small Stitched Die Set to cut out the center and glue the center onto a green top folding card.


  • Color with Derwent Inktense pencils and use the second-largest Oval Nested Small Stitched Die from the set to cut out the center and glue the center onto a green top folding card.


  • Glue acetate to the back of the oval frame, I use transparencies from an office supply store like Office Depot, make sure they're smooth.
  • Now here's a little secret, to help prevent the shaker bits from clinging to the acetate, wipe acetate with a new dryer sheet!!!


  • Stamp "You're the Best" on the oval panel with black ink.
  • Apply strips of foam tape around the oval panel taking care to make sure all of the strips butt up against each other, you don't want the shaker bits falling out.


  • Remove the paper liner from the foam tape and place the acetate panel over this.


  • Die-cut Smile three times from black cardstock and layer the pieces using Nuvo Glue, it dries clear so if some oozes out you won't see it.


  • Apply two blue sequins in the top right corner.


Follow Me- Stamp This, on-
Twitter

Affiliate and Product Disclosure
I am on various Design Teams and get free goodies for blogging about craft products but only because I love their products and genuinely use them. Ultimately my opinions are my own. A list of companies is in my sidebar.
Being part of various affiliate programs – when you click on an affiliate link and then go on to make a purchase, at no cost to you, I receive a small commission.  The affiliates I use include Rubbernecker Stamps.


Friday, July 10, 2020

Lucky Stars


Hi my crafty friends, today is the Mini Release day for Soul Sisters from Whimsy Stamps.  Covid quarantine have you missing your girl time?  Show your friends that you care with this sweet new release.

To make my card I stamped the images on watercolor paper with Onyx Black VersaFine Ink and then colored with Inktense Pencils.  The matching dies make is quick and easy to cut out the images.  Peekaboo Window 3 Die was used for the background along with the pretty 6" x 6" Paper Pack- Calico, I just love the decorative paper!


Be sure to stop by the Whimsy Stamps site to see what other new products they've released today.

**NEW Soul Sisters Clear Stamps - Whimsy Stamps  **NEW Soul Sisters Outline Die Set - Whimsy Stamps  Peekaboo Window 3 Die - Whimsy Stamps  **NEW 6x6 Paper Pack - Calico - Whimsy Stamps

Have a creative day and follow me on 

Instagram

Affiliate and Product Disclosure
I am on various Design Teams and get free goodies for blogging about craft products but only because I love their products and genuinely use them. Ultimately my opinions are my own. A list of companies is in my sidebar.
Being part of various affiliate programs – when you click on an affiliate link and then go on to make a purchase, at no cost to you, I receive a small commission.  The affiliates I use include Whimsy Stamps.


Monday, July 6, 2020

Slimline Flowers


Hi everyone, today I have a slimline card using one of the brand new slimline dies from Rubbernecker Stamps called Slimline Solid Bubble Scallop Die, aren't those edges pretty?! There are more slimline dies available with different edges that I'll be sharing soon so be sure to come back to check them out!

Now here's how my card was made-
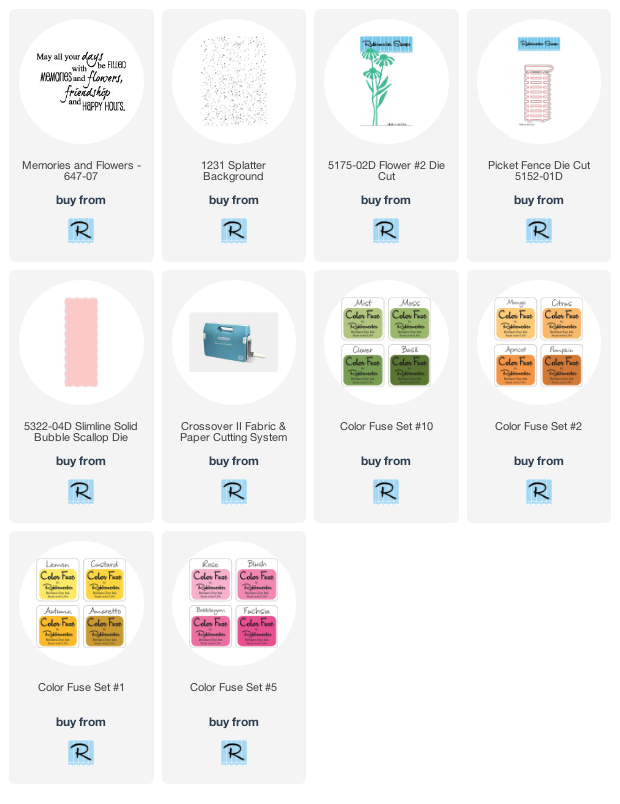
  • Die-cut white cardstock using the slimline Solid Bubble Scallop Die and the Flower #2 Die Cut and also cut this from black cardstock.

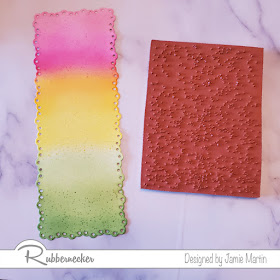
  • Use blending brushes to blend Color Fuse Inks ink Autumn, Lemon, Moss, Clover, Bubblegum, and Blush.


  • Ink the Splatter Background stamp with the same colors and stamp over the blended panel.

  • Use the Picket Fence Die Cut to cut out of white cardstock.
  • Stamp the sentiment on a white cardstock square with black ink and glue to a black panel.


  • Glue the die-cut flowers to the ink blended panel and pop up the fence over the stems using foam tape.
  • Pop up the sentiment at the top of the panel.
  • Glue the panel to slightly larger black cardstock and glue to a white slimline card.
  • Randomly glue sequins to add a bit of shimmer.


Follow Me- Stamp This, on-
Twitter

Affiliate and Product Disclosure
I am on various Design Teams and get free goodies for blogging about craft products but only because I love their products and genuinely use them. Ultimately my opinions are my own. A list of companies is in my sidebar.
Being part of various affiliate programs – when you click on an affiliate link and then go on to make a purchase, at no cost to you, I receive a small commission.  The affiliates I use include Rubbernecker Stamps.


Saturday, July 4, 2020

NapBeepoo Time


Hi there!  I have a shaker card today made with a slimline die, stamps, and paper from Whimsy Stamps.  I used the slimline die for my card but instead of having a tall card like I did on Thursday, I folded it in half to make a small card.  This is a great way to get a lot of use and different looks from your slimline dies!  You can click HERE to see Thursdays card.

If you were not able to order the Bizzy Bees Paper Door Kit but would like to have the opportunity to still purchase the items individually, Whimsy Stamps is offering you a special coupon code valid during release week (July 1 to July 7). This special discount will save 25% on the 5 items in this kit (Bizzy Bees Stamps, Bizzy Bees Outline Dies, Bizzy Bees Paper Pack, Honeycomb Drips Stencil and Slimline Card Builder Die Set).
This code must be entered at checkout and is valid ONLY on those items listed above. Code expires at 11:59pm ET on July 7th 2020, offer valid while supplies last.
Use code: BizzyBee25


Click on the product to go to the Whimsy Store site.

*NEW Bizzy Bees Clear Stamps - Whimsy Stamps        *NEW Slimline Card Builder Die - Whimsy Stamps  *NEW 6x6 Paper Pack - Bizzy Bees - Whimsy Stamps

Have a creative day and follow me on 

Instagram

Affiliate and Product Disclosure
I am on various Design Teams and get free goodies for blogging about craft products but only because I love their products and genuinely use them. Ultimately my opinions are my own. A list of companies is in my sidebar.
Being part of various affiliate programs – when you click on an affiliate link and then go on to make a purchase, at no cost to you, I receive a small commission.  The affiliates I use include Whimsy Stamps.